

Before We Start
This post will describe the step-by-step approach to secure your API Gateway resources with Okta’s FGA model.
Before we start with the solution and integration steps, we will summarize:
- Summary of services and features we will cover in the blog post.
- Relationship-Based Access Control
- Authorization for APIs
- Solution prerequisite
Okta FGA: enables organizations to enforce authorization based on user context, ensuring that only suitable access is granted to the right resources. It allows developers to implement complex authorization policies that adapt to changing needs without compromising security or performance. Find more about Okta FGA here.
AWS API Gateway manages services to enable developers to create, publish, and manage APIs at scale. It acts as an entry point for backend services and supports features like traffic management, authorization, and monitoring to streamline API development and deployment. Find more about AWS API Gateway here.
AWS API Gateway Authorizer: controls access to your APIs to authenticate and authorize API requests. It offers flexible custom authorization logic based on tokens, roles, or user-defined criteria. Find more about AWS API Gateway Authorizer here.
AWS Lambda: serverless compute service that allows you to run code without provisioning or managing servers, automatically scaling based on the number of requests. It supports various programming languages and integrates seamlessly with other AWS services, making it ideal for building microservices, automating tasks, and processing real-time data. Find more about AWS Lambda here
Relationship-Based Access Control
One of the most commonly used approaches to authorization is Role-Based Access Control (RBAC), where a role contains a set of permissions and is assigned to a user. This is a simple way of determining what permissions a user has and what actions they should be able to perform within our application. Complex applications often require a flexible approach to authorization, where access can be granted on a user and resource context instead of a simple assignment.
Instead of checking a fixed set of permissions assigned to a user via roles, we're going to look at the relationship between a consumer (or group of consumers) and a resource (or group of resources) to determine if they should be able to access a specific resource(s) or perform an action on them.
Because we're looking at the bigger picture and determining relationships between two entities, these relationships often don't need to be explicitly defined.
For example, if a user belongs to a group, it is enough to grant that group access, and all its members will automatically be given access. The same is true for a group of resources. If a user has access to, for example, a folder, they should automatically get access to all files within that folder without explicitly defining these relationships. These are called indirect relationships as opposed to direct ones.
Authorization for APIs
Authorization has become more complex over the years. Users require more collaboration features and privacy controls about what data is shared with others. Security and compliance teams demand that users' permissions be limited to just the ones they need, as well as visibility over authorization policies and access control logs. Managing authorization in an ad-hoc way in application code isn’t cutting it. It’s no wonder that broken access control is the No.1 most common web application security risk.
Authorization for apps and APIs is primarily done DIY. It is expensive to do at scale and requires significant investment. Authorization requires lower latency and will run closer to the Workload. Developers spend development cycles on DIY solutions that are often less secure and hard to scale and maintain.
Amazon API Gateway helps developers create, publish, and maintain APIs in the AWS ecosystem. API gateway uses AWS Lambda authorizers to implement an authorization scheme for REST APIs. We will review how to integrate Okta FGA with the API Gateway authorizer and help customers build authorization logic without disrupting feature-specific code.
With Okta FGA and AWS, development teams can spend less time building and maintaining authorization and more time building and shipping new products and features. FGA enables developers to manage authorization in a way that best fits their business and use cases, helping increase security and efficiency and giving developers greater visibility and control than traditional authorization methods.
Prerequisite:
Before starting, you need an Okta FGA and AWS Account.
Creating an Okta FGA Account: If you already have an Auth0 account, you can use the same credentials to log in to the Okta FGA dashboard at https://dashboard.fga.dev. If you don't have an Auth0 account, hop over to https://dashboard.fga.dev and create a free account.
Creating an AWS Account: If you already have an AWS account, you can use the same credentials to log in to the AWS Console; if you don't have an AWS account, you can create one here.
The Use Case
To demonstrate the integration pattern between Okta FGA and API Gateway, we will consider a hypothetical e-commerce application use case. In the application, users have levels of subscription tiers (Gold, Silver, and Platinum). The user will be able to redeem the coupon based on the subscription level and coupon ID. The application has a “Coupon redemption function.” The module is designed to process the coupon redemption action after evaluating a user’s request and the product it’s being redeemed for.
The coupon redemption API is behind the API gateway and AWS Lambda. I am a developer interested in building a feature and writing code for redemption actions. I want to offload my authorization decisions to the API Gateway authorizer layer. Okta FGA and API Gateway Authrizer integration approach will help me distribute AuthZ decisions, create a modular architecture, and enable faster development cycles.
Architecture Diagram:

API Gateway and Okta FGA authorization flow
- A user logs into the e-Commerce application.
- A user browses the e-commerce application and clicks on the ‘Redeem A Coupon’ action from the app UI
- The app UI makes a backend call to the API Gateway endpoint, which is published and configured with the e-commerce app. The Request includes user, coupon, and product.
- The request is received and interpreted by the API Gateway Authorizer against the authorization model in Okta FGA. The API Gateway authorizer evaluates the request and passes the result back to the API Gateway.
- Based on the authorizer results being true, API Gateway will pass on the control to the Lambda function.
The Authorization Model is central to making precise authorization decisions as part of the solution. Let's explore how to create this critical component.
Authorization Model
Okta FGA maintains an authorization model to handle all possible relationships between your application entities. First, navigate to the Model Explorer page from Okta in your dashboard.

FGA Dashboard
Add the following model to the model editor, and remember to hit the Save button.
model
 schema 1.1
type user

type tier
 relations
   define member: [user]
type coupon
 relations
   define can_redeem: member from tier
   define tier: [tier]
After saving the model, you will see its preview and authorization model.

FGA Authorization Model
Let’s dive into and understand the definition of the authorization model.

FGA Authorization Model Definition
Type represents an individual or entity that interacts with the system. In our e-commerce application
- user: represents a user accessing the e-commerce application.
- tier: represents membership tiers (e.g., Gold, Silver, Platinum)
- coupon: represents a coupon that users can redeem.
Relations define a possible relationship between an object and a user in the system.
- define member: [user]: describes that users can be associated with a specific tier (Gold, Silver, Platinum), allowing for different access or privileges based on their membership.
- define can_redeem: member from tier: specifies that a coupon can be redeemed by a user who is a member of a specific tier.
- define tier: which tier the coupon is associated with, setting the conditions under which it can be redeemed.
How does the Authorization Model work:
- A tier can include multiple users as members. For instance, a Gold tier might have userA
- Each coupon is linked to a specific tier. For example, a discount coupon:2 could be tied to the Gold tier.
- canredeem relation specifies that only users who are members of the associated tier are eligible to redeem the coupon. For example, if userA belongs to the Gold tier and a coupon:2 is associated with that tier, userA can redeem the coupon:2_.
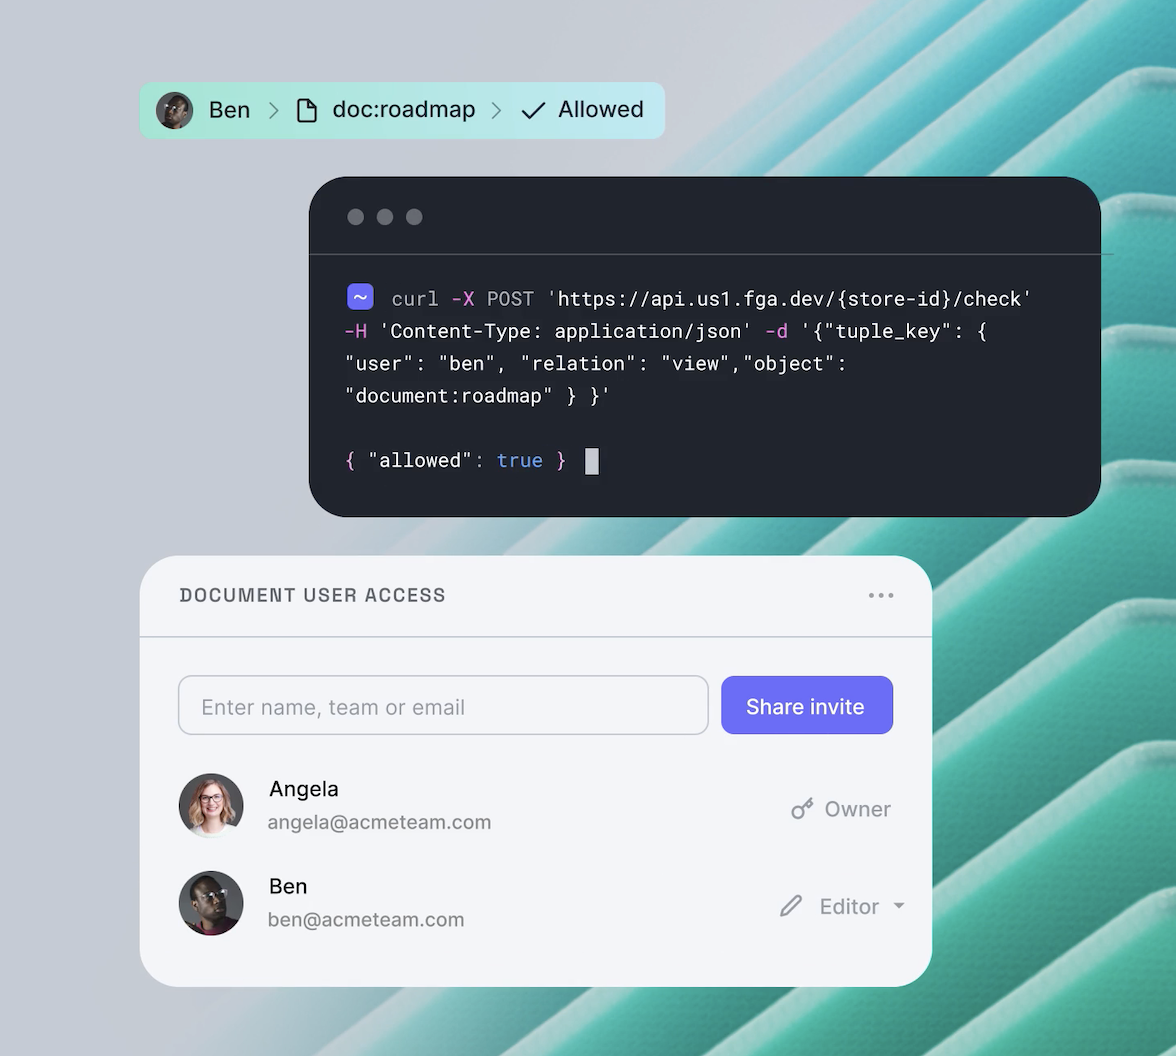
With your authorization model in place, we need to focus on the actual data relationships in your eCommerce system, such as which user belongs to which tier or which coupon is associated with which tier. In Okta FGA, you can manage actual relationships between application entities using a relationship tuple.
A relationship tuple is a base tuple/triplet consisting of a user, relation, and object. Relationship tuples are written and stored in Okta FGA.
Tuple Management
The Tuple management dashboard can be accessed from the dashboard.

Tuple Management Dashboard
Click on the Add Tuple button to add relationship data, adding two tuples to demonstrate.
- User Tom is a Platinum tier member
- Coupon 3 can be redeemed by platinum-tier members only

Adding Tuples
Here is a summary of all relationship tuples in the Authorization Model:

So far, we have the Okta FGA Authorization Model and all the relationships ready.
Configuring the FGA authorization model
In this section, we will walk through how to prepare the Authorization model to connect to connect to our application.
In your FGA Dashboard:
- Select the authorization store at the top left corner.
- Click on “settings.” Note the StoreId and ModelID from your org. We will use these values in the Lambda Authorizer code.
- Click on the Create Client.

FGA Authorization Model Settings -1
Select the suitable set of permissions your application needs and click Create.

FGA Authorization Model Settings -2
This step creates the credentials required for your app. Make sure to save these values before clicking on the continue button.

FGA Authorization Model Settings -3
At this point, we have Okta FGA configured, and we are ready to configure AWS components.
AWS Setup
We won’t be covering how to configure API Gateway and AWS Lambda functions as part of the setup. You can find more information on how to do it here.

API Gateway and AWS Lambda Integration
After finishing setting up the API Gateway and AWS Lambda, you should be able to see the lambda integrated into your API Gateway routes.
Using AWS Lambda as API Gateway Authorizer
Let’s configure the Authorization for API Gateway using Authorizer.
In our example, the authorizer is a Lambda function that controls access to an underlying API. It processes incoming requests from the app user, performs authorization, and returns an allow or deny access. This function includes logic to integrate with the Okta FGA Authorization model.
We will use the following code for Lambda Authorizer:
import asyncio  # Import asyncio for running asynchronous functions
from openfga_sdk.client import OpenFgaClient, ClientConfiguration  # Import OpenFGA client and configuration classes
from openfga_sdk.client.models import ClientCheckRequest  # Import the request model for checking access
from openfga_sdk.credentials import Credentials, CredentialConfiguration  # Import credentials management classes
async def main(user_obj):
   """Asynchronously check user access using OpenFGA."""
   # Set up credentials for API authentication using the client credentials method
   credentials = Credentials(
       method='client_credentials',
       configuration=CredentialConfiguration(
           api_issuer="auth.fga.dev",  # FGA issuer domain for the API
           api_audience="https://api.us1.fga.dev/",  # Audience for the API
           client_id="zz4NVP2O5pftyyyyyyy",  # Client ID from FGA authorization model
           client_secret="i-N0fFR8XgtIQJL8g96EUUIv1auFyyyyyyyyyyyyyyyyyyy"  # Client secret from FGA authorization model
       )
   )


   # Configure the OpenFgaClient with API details and credentials
   configuration = ClientConfiguration(
       api_scheme="https",  # Scheme for secure HTTP (HTTPS)
       api_host="api.us1.fga.dev",  # Host URL of the OpenFGA API
       store_id="01J2YEGYTZ1T2X3xxxxxxxxxxxxx",  # Store ID for identifying the authorization store
       authorization_model_id='01J3DDQXRRBxxxxxxxxxxxxxx',  # Optional: Model ID for targeting specific authorization models
       credentials=credentials,  # Credentials for authenticating the client
   )


   # Use the OpenFgaClient as a context manager to manage the session
   async with OpenFgaClient(configuration) as fga_client:
       # Options for the access check, specifying the authorization model ID
       options = {
           "authorization_model_id": "01J3DDQXRRBZDS2Kxxxxxxxxxxx"
       }


       # Create a request body for the access check using the user, relation, and object from the input
       body = ClientCheckRequest(
           user=f"user:{user_obj['user']}",  # Specify the user for the access check
           relation=user_obj['relation'],  # Specify the relation to check
           object=user_obj['object'],  # Specify the object to check access against
       )
       # Perform the access check and return the response
       response = await fga_client.check(body, options)
       return response


def lambda_handler(event, context):
   """AWS Lambda handler for checking user access."""
   # Extract user information from the event headers
   user_obj = {
       'relation': event['headers']['relation'],
       'user': event['headers']['user'],
       'object': event['headers']['object'],
   }


   # Run the main asynchronous function to perform the access check
   result = asyncio.run(main(user_obj))


   # Prepare and return the response indicating whether the access is allowed
   response = {
       "isAuthorized": result.allowed,  # 'allowed' field from the response indicates if access is granted
   }


   return response
Create a Lambda function in your AWS account and paste the above code.
Connect Authorizer with API Gateway
From the Authorizer section of the API Gateway, select the Lambda function you just created in the above step.

Configure API Gateway Authorizer
Next, Select the Create and Attach an Authorizer Option and Select the Lambda function. Select the Lambda function ARN created in the previous step.

Choose the Lambda Function in Authorizer settings
At this stage, you will have API Gateway, AWS Lambda function, and API Gateway authorizer configured within your AWS account.

Now, the API endpoint is ready to accept the request, evaluate it against the FGA Authorization model, and process it based on the authorizer's response.
How Do We Validate It?
In this section, we will test the end-to-end flow and the output based on the Relationship tuples created as part of the setup. As shown in the figure Adding Tuples, User Tom has a platinum-level subscription and can redeem coupon ID 3.
As part of the validation, we will be using Postman to invoke the API Gateway URL
Let us create some test case scenarios:
Test Case 1: Can Tom redeem a coupon ID 3? Expected Result: TRUE, Coupon can be redeemed

Test Case 2: Can Tom redeem coupon ID 2? Expected Result: FALSE, Forbidden

Conclusion
In summary, integrating Okta FGA with AWS API Gateway offers a powerful way to enhance your API security with fine-grained access control. By leveraging Okta FGA's robust authorization capabilities, you can ensure:
- APIs are protected by maintaining strict security without sacrificing flexibility or performance.
- Only authorized users can interact with your APIs
- Strengthen security posture and give you greater control over your API resources.
- Enforcement of fine-grained access policies directly at the gateway
Bringing Okta FGA into your AWS API Gateway results in a more secure, efficient, and manageable API environment that supports your organization's growth and innovation while safeguarding sensitive data and resources.


