TL;DR: Serving web-app users a good offline experience can be tricky if they become disconnected from the internet. Providing offline functionality is important for UX, and some recent technologies make it easier for developers to accomplish it. In this article, we focus on the service worker API and find out how to use it with a library called UpUp to make our apps offline-first.
Application users are no longer restricted to devices that are always connected to the internet, so it's more important than ever that applications can handle poor or no network connection. Ideally, apps should still work when the network connection is lost, with a mechanism for local data storage synced with a remote database. This kind of functionality is familiar in many ways; native applications provide mechanisms to accomplish it easily. We can achieve the same effects in mobile hybrid apps, as well as web apps in general, with some relatively new technologies.
In this article, we'll explore the current state of offline-first applications and see what kind of approach to take to ensure a smooth user experience in our own apps, even when disconnected. We'll talk about service workers and how to use them either directly, or with a helper library called UpUp.
Service Workers for Offline-First Apps
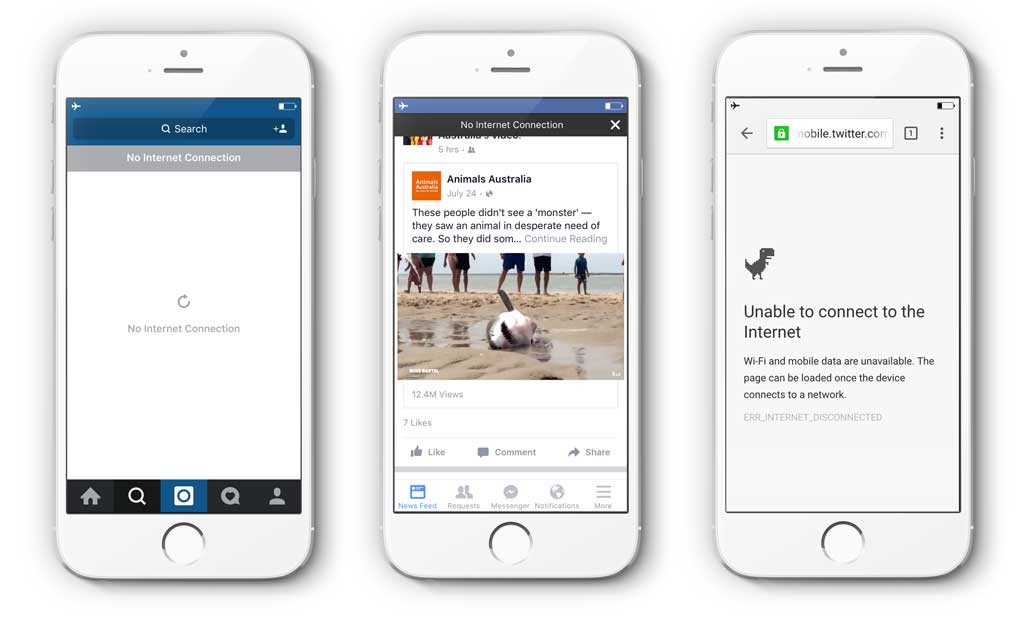
We're all familiar with what happens when we become disconnected while using the web--we try to move forward on the page or in the app, and we're greeted with a message that tells us we can't. Most native mobile apps will still offer some functionality while offline, but a lot of web apps don't.
What we need, then, is a way for our app to detect when we don't have an internet connection, and then respond in a different and particular way. This is where the service worker API comes in. In fact, this technology’s main focus is making it easier for developers to provide users with good offline experiences.
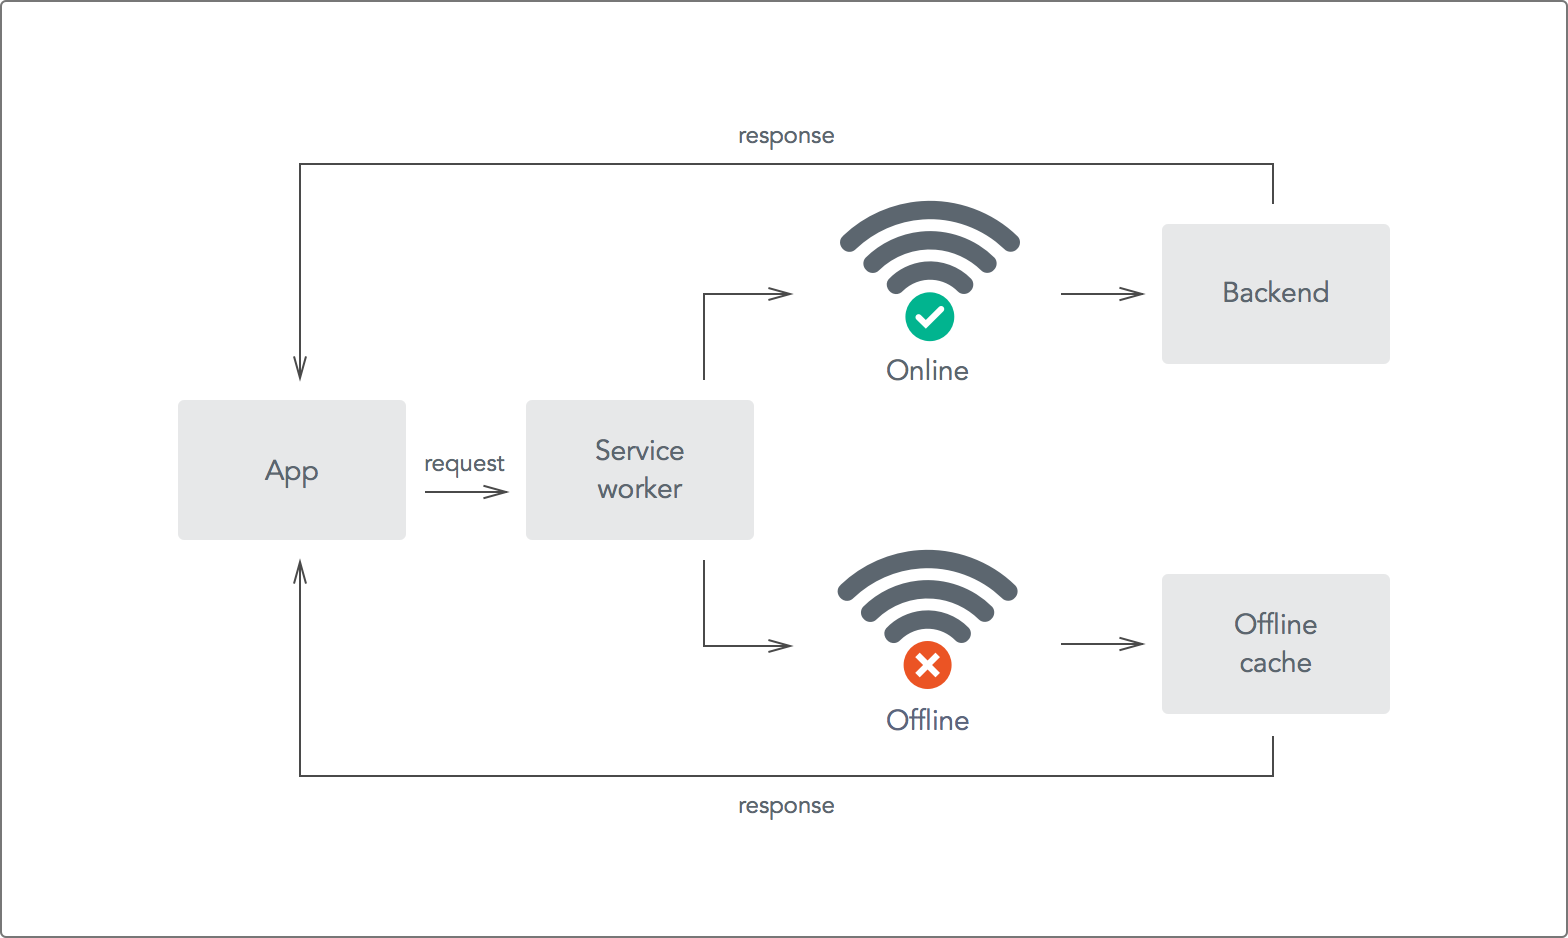
A service worker is a bit like a proxy server between the application and the browser, and it has quite a bit of power. With a service worker, we can completely take over the response from an HTTP request and alter it however we like. This is a key feature for serving an offline experience. Since we can detect when the user is disconnected, and we can respond to HTTP requests differently, we have a way of serving the user files and resources that have been saved locally when they are offline.
"With a service worker, we can completely take over the response from an HTTP request and alter it."
Tweet This
Service Workers > AppCache
The service worker API is an attempt to replace the HTML5 Application Cache. Nothing is perfect, but AppCache has a host of issues that frustrate developers trying to create offline experiences. One of the biggest issues is that apps won't work at all unless AppCache is set up just right, which means debugging is very tricky. With AppCache, only same-origin resources can be cached, and when it comes to updating resources, it's all or nothing—we can't update cached items individually.
Service workers really shine when stacked up against AppCache. They give us a lot of fine-grained control, so we're able to customize the process of serving an offline experience. Some of this ability is because service workers use promises, which allow us to respond to both success and error conditions.
Registering a Service Worker
So how do we make use of service workers? We can access them through the navigator API and hook up new service workers with the register method.
if('serviceWorker' in navigator) {
  navigator.serviceWorker
    .register('sw.js', { scope: './'})
    .then(function(registration) {
      console.log('Service worker registered!');
    })
    .catch(function(error) {
      console.log('There was an error!');
    });
}
Service workers are tied to a particular scope, and the location of the service worker script in the project directory is important. If we want the above service worker to apply to any route in our application, we would need the sw.js script to be accessible at http://example.com/sw.js.
With the service worker registered, we need to define what happens when certain events, such as fetch, occur. Instead of rolling out a full example on our own, let's make use of a small library called UpUp. This library provides a service worker abstraction that makes it easier to simply define which resources we want available when the user is offline.
Offline-First Apps with UpUp
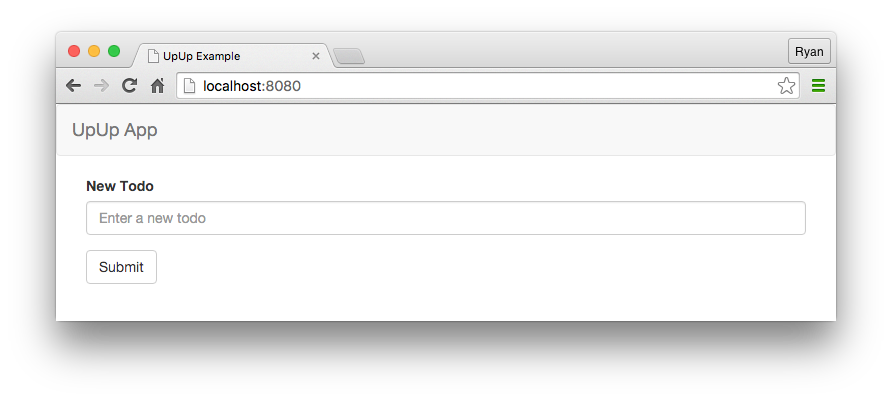
The first step is to create our app just as we would normally.
  <!-- index.html -->

  ...

  <nav class="navbar navbar-default">
    <div class="container-fluid">
      <a class="navbar-brand">UpUp App</a>
    </div>
  </nav>

  <div class="container">
    <form>
      <div class="form-group">
        <label>New Todo</label>
        <input type="text" class="form-control" placeholder="Enter a new todo">
      </div>
      <button type="submit" class="btn btn-default">Submit</button>
    </form>
  </div>

  ...
UpUp lets us define what we want to serve the user when they are disconnected. We do this with the start method and we can pass in the content-url and an array of assets that should be used.
  <!-- index.html -->

  ...

  <script src="upup.min.js"></script>
  <script>
    UpUp.start({
      'content-url': 'templates/offline.html',
      'assets': [
        'css/bootstrap.min.css'
        // Other assets like images, JS libraries etc
      ]
    });
  </script>

  ...
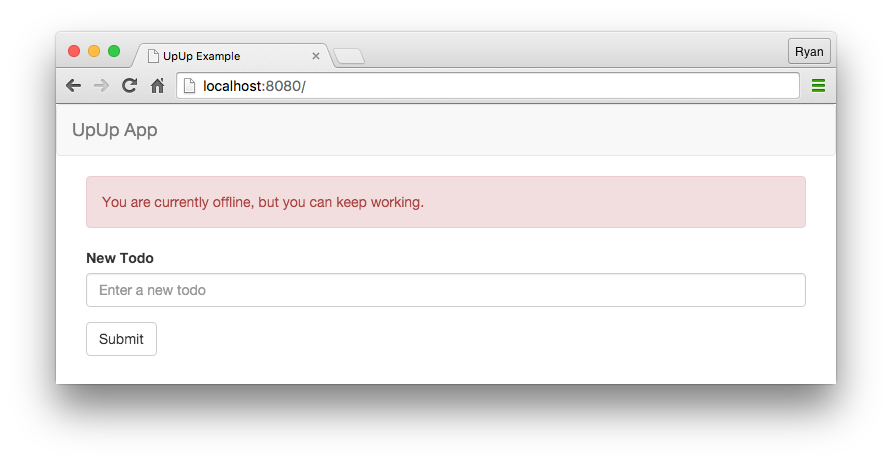
We can tell UpUp which specific template to use when the user is offline. The content we serve when when offline can be the same as when online, or we can customize it to let the user know they are disconnected.
  <!-- templates/offline.html -->

  ...

  <div class="alert alert-danger">
    You are currently offline, but you can keep working.
  </div>

  ...
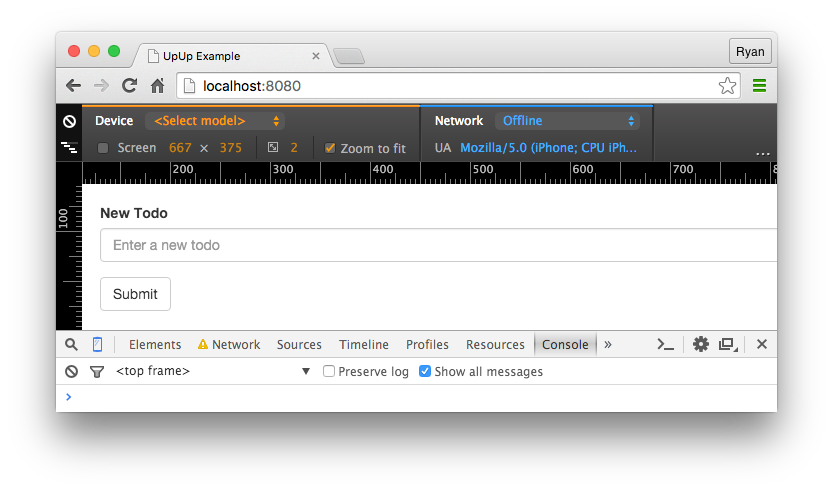
TIP: You don't need to unplug your modem to simulate being offline. Simply use the "Toggle Device Mode" with Chrome dev tools and select Network: Offline.
If we need a framework for our app, we can bring in the necessary JavaScript within the assets array so that it is retrieved when offline.
So that works, but what exactly is UpUp doing to achieve this? Looking at the UpUp service worker will give us an idea.
// src/upup.sw.js

self.addEventListener('fetch', function(event) {
  event.respondWith(
    // try to return untouched request from network first
    fetch(event.request.url, { mode: 'no-cors' }).catch(function() {
      // if it fails, try to return request from the cache
      return caches.match(event.request).then(function(response) {
        if (response) {
          return response;
        }
        // if not found in cache, return default offline content
        if (event.request.headers.get('accept').includes('text/html')) {
          return caches.match('sw-offline-content');
        }
      })
    })
  );
});
UpUp is listening for fetch events and first tries to return a request from the network. If that fails, it looks to the cache to resolve the request; if that fails too, it serves the offline content we registered.
The service worker itself is wired up with the start method we saw earlier.
// upup.js

start: function(settings) {
  this.addSettings(settings);

  // register the service worker
  _serviceWorker.register(_settings.script, {scope: './'}).then(function(registration) {
    // Registration was successful
    if (_debugState) {
      console.log('ServiceWorker registration successful with scope: %c'+registration.scope, _debugStyle);
    }

...
What About Data?
Native apps naturally provide ways for collecting data while the user is offline. This data can be synced with a remote database once a connection is re-established. When it comes to the web, however, data synchronization isn't as easy.
We might be inclined to roll our own solutions, but dealing with timestamps, revisions, conflict resolution, and consistency can be a lot of work. Fortunately, there are some great solutions for collecting data locally for syncing later.
PouchDB
PouchDB is an open source local data storage library that can be set up with CouchDB to automatically sync data. PouchDB emulates CouchDB very closely, so the API between the two looks and feels quite similar.
PouchDB makes it trivial to set up a local and remote database and to have them automatically sync with one another. Local databases use the browser's IndexedDB to store data.
// Local databases are created by just providing a name
var local = new PouchDB('todos');

// Remote databases are created by providing a path to CouchDB
var remote = new PouchDB('http://localhost:5984/todos');
PouchDB uses a simple promise-based API for storing and retrieving documents.
// Store a document
var todo = {
  "_id": "todo1",
  "name": "Go to the store"
}

local.put(todo);

// Retrieve a document
local.get('todo1').then(function(data) {
  console.log(data);
}).catch(function(error) {
  console.log('There was an error');
});
When it comes to syncing, we can have one-way or two-way sync, and we can choose to have the databases replicate continuously or just at a time we specify. In many cases, we'll set up live replication that accounts for a user dropping in and out of network coverage. To do this, we just need to tell PouchDB that we want it to retry syncing.
local.sync(remote, {
  live: true,
  retry: true
});
Aside: Auth0 Authentication with JavaScript
At Auth0, we make heavy use of full-stack JavaScript to help our customers to manage user identities, including password resets, creating, provisioning, blocking, and deleting users. Therefore, it must come as no surprise that using our identity management platform on JavaScript web apps is a piece of cake.
Auth0 offers a free tier to get started with modern authentication. Check it out, or sign up for a free Auth0 account here!
Then, go to the Applications section of the Auth0 Dashboard and click on "Create Application". On the dialog shown, set the name of your application and select Single Page Web Applications as the application type:
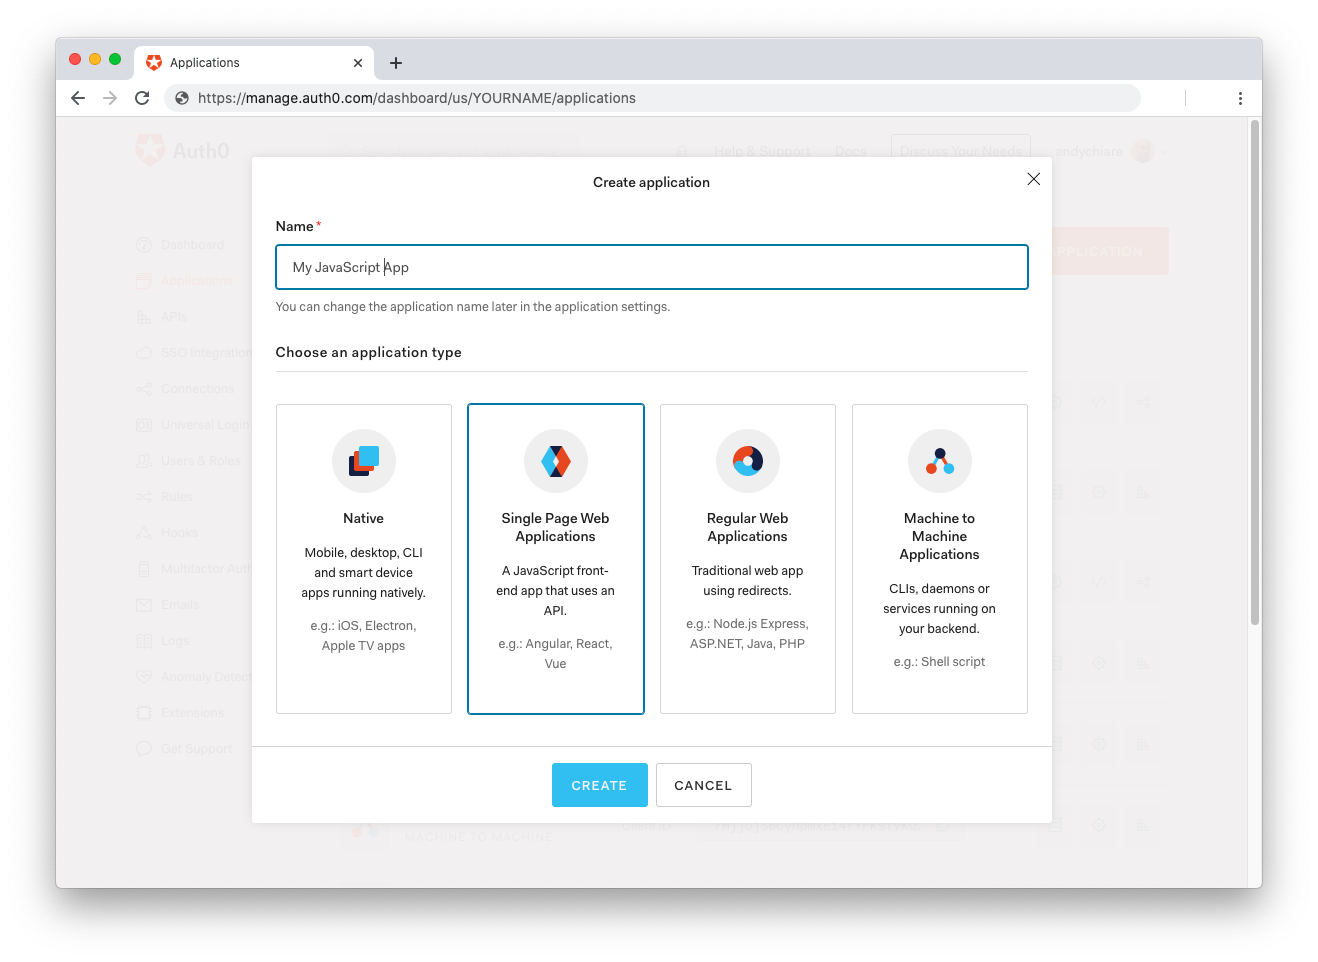
After the application has been created, click on "Settings" and take note of the domain and client id assigned to your application. In addition, set the Allowed Callback URLs and Allowed Logout URLs fields to the URL of the page that will handle login and logout responses from Auth0. In the current example, the URL of the page that will contain the code you are going to write (e.g. http://localhost:8080).
Now, in your JavaScript project, install the auth0-spa-js library like so:
npm install @auth0/auth0-spa-jsThen, implement the following in your JavaScript app:
import createAuth0Client from '@auth0/auth0-spa-js';

let auth0Client;

async function createClient() {
  return await createAuth0Client({
    domain: 'YOUR_DOMAIN',
    client_id: 'YOUR_CLIENT_ID',
  });
}

async function login() {
  await auth0Client.loginWithRedirect();
}

function logout() {
  auth0Client.logout();
}

async function handleRedirectCallback() {
  const isAuthenticated = await auth0Client.isAuthenticated();

  if (!isAuthenticated) {
    const query = window.location.search;
    if (query.includes('code=') && query.includes('state=')) {
      await auth0Client.handleRedirectCallback();
      window.history.replaceState({}, document.title, '/');
    }
  }

  await updateUI();
}

async function updateUI() {
  const isAuthenticated = await auth0Client.isAuthenticated();

  const btnLogin = document.getElementById('btn-login');
  const btnLogout = document.getElementById('btn-logout');

  btnLogin.addEventListener('click', login);
  btnLogout.addEventListener('click', logout);

  btnLogin.style.display = isAuthenticated ? 'none' : 'block';
  btnLogout.style.display = isAuthenticated ? 'block' : 'none';

  if (isAuthenticated) {
    const username = document.getElementById('username');
    const user = await auth0Client.getUser();

    username.innerText = user.name;
  }
}

window.addEventListener('load', async () => {
  auth0Client = await createClient();

  await handleRedirectCallback();
});
Replace the
YOUR_DOMAINandYOUR_CLIENT_IDplaceholders with the actual values for the domain and client id you found in your Auth0 Dashboard.
Then, create your UI with the following markup:
<p>Welcome <span id="username"></span></p>
<button type="submit" id="btn-login">Sign In</button>
<button type="submit" id="btn-logout" style="display:none;">Sign Out</button>
Your application is ready to authenticate with Auth0!
Check out the Auth0 SPA SDK documentation to learn more about authentication and authorization with JavaScript and Auth0.
Important API Security Note: If you want to use Auth0 authentication to authorize API requests, note that you'll need to use a different flow depending on your use case. Auth0 idToken should only be used on the client-side. Access tokens should be used to authorize APIs. You can read more about making API calls with Auth0 here.
In the case of an offline-first app, authenticating the user against a remote database won't be possible when network connectivity is lost. However, with service workers and a library like UpUp, you have full control over which pages and scripts are loaded when the user is offline. This means you can configure your offline.html file to display a useful message stating the user needs to regain connectivity to login again instead of displaying the Lock login screen.
Wrapping Up
With so many app users relying on mobile, and with spotty networks in many places, it's becoming more and more essential to give our users a decent offline experience. The service worker API helps greatly, and really outdoes AppCache, because we have much more control over what happens. While the service worker API is relatively straightforward to use, setting up an offline app is even easier with abstractions such as the one provided by UpUp.
Focusing on the offline experience is not always feasible, perhaps because other features take priority. However, providing usability while offline is valuable and can even be a key differentiator between your app and others.


