TL;DR: In the emerging world of "all things JavaScript", it is no longer a mind-blowing fact that developers can now write desktop applications with JavaScript. Since the initial release of Electron about 5 years ago, web developers have been empowered to use web technologies to develop applications that run as native desktop apps. One of the many beautiful things about Electron is that you can use any JavaScript framework you prefer to build the interface of your desktop application. In this article, you will learn how easy it is to use Vue.js to build interfaces for Electron apps. If needed, you can use this GitHub repository as a reference.
"Ever wondered how to use Vue.js along with Electron to build desktop apps? Check this article."
Tweet This
Prerequisites
To be able to follow the instructions in this article, you are expected to have:
- basic knowledge of Vue;
- basic knowledge of Electron;
- and both Node.js and NPM installed on your system.
Besides that, you will need Vue CLI 3. To install it, you can open a terminal and issue the following command:
npm install -g @vue/cliWhat You Will Build
To learn about how to use Electron and Vue.js together to create modern desktop apps, you will be building a classic to-do list application. This app will manage to-do activities and will allow users to sign in so the whole process becomes more secure. Just like you would do in any real-world scenario.
Cloning and Running the API
This Electron and Vue.js app will need an API to function. As the goal of this article is to focus on these technologies, you won't invest time building the API. Instead, you will clone one from GitHub. To do so, back in your terminal, issue the following commands:
# clone the API
git clone https://github.com/auth0-blog/electron-vue-api.git

# move into it
cd electron-vue-api

# install the API dependencies
npm install

# run the API
npm start
You can leave this API up and running for now (i.e., don't close the terminal). By the way, if you want to learn more about how to create APIs with Node.js and Express, you can check this tutorial that goes through the whole process from scratch.
Scaffolding Desktop Apps with Vue.js and Electron
Now that you have the prerequisites correctly configured, you are ready to start working on the client app. To scaffold your desktop application, you will use an excellent open-source project that makes it super simple to work with Vue.js and Electron: electron-vue. This project comes bundled with other useful Vue.js libraries like Vue Router and Vuex.
To scaffold your application, you don't even need to install this project. All you need is to tell Vue CLI that you want to use it as the foundation for your new app. To do so, open a new terminal (you have to leave the API up and running since you will make the desktop app interact with it) and issue the following command:
vue init simulatedgreg/electron-vue to-do-desktopRunning this command will take you through an interactive installation process that asks you a set of questions. Below, you can find the questions and the corresponding answers you should provide for this :
- Application Name (
to-do-desktop) - Application Id (Hit Enter key to accept the default)
- Application Version (Hit Enter key to accept the default)
- Project description (Hit Enter key to accept the default)
- Use Sass / Scss? (
n) - Select which Vue plugins to install (All are selected by default, hit Enter to agree to this)
- Use linting with ESLint? (
Y: Yes, we will be using ESLint to ensure code quality. Hit enter to also accept the Standard version) - Set up unit testing with Karma + Mocha? (
n) - Set up end-to-end testing with Spectron + Mocha? (
n) - What build tool would you like to use? (
electron-builder) - author: (Hit Enter key to accept the default)
After responding to all the questions in the installation process, a new electron-vue project is scaffolded for you.
Next, you can move the terminal into your new project and update the Electron version that the app will use:
# move into the new project
cd to-do-desktop

# remove the old version of Electron
npm rm electron

# install the new version
npm i -D electron
Besides replacing the Electron version on your new project, the last two commands will also install all other dependencies in your development environment. Therefore, after running them, you can issue npm run dev and NPM will use Electron to open your new application.
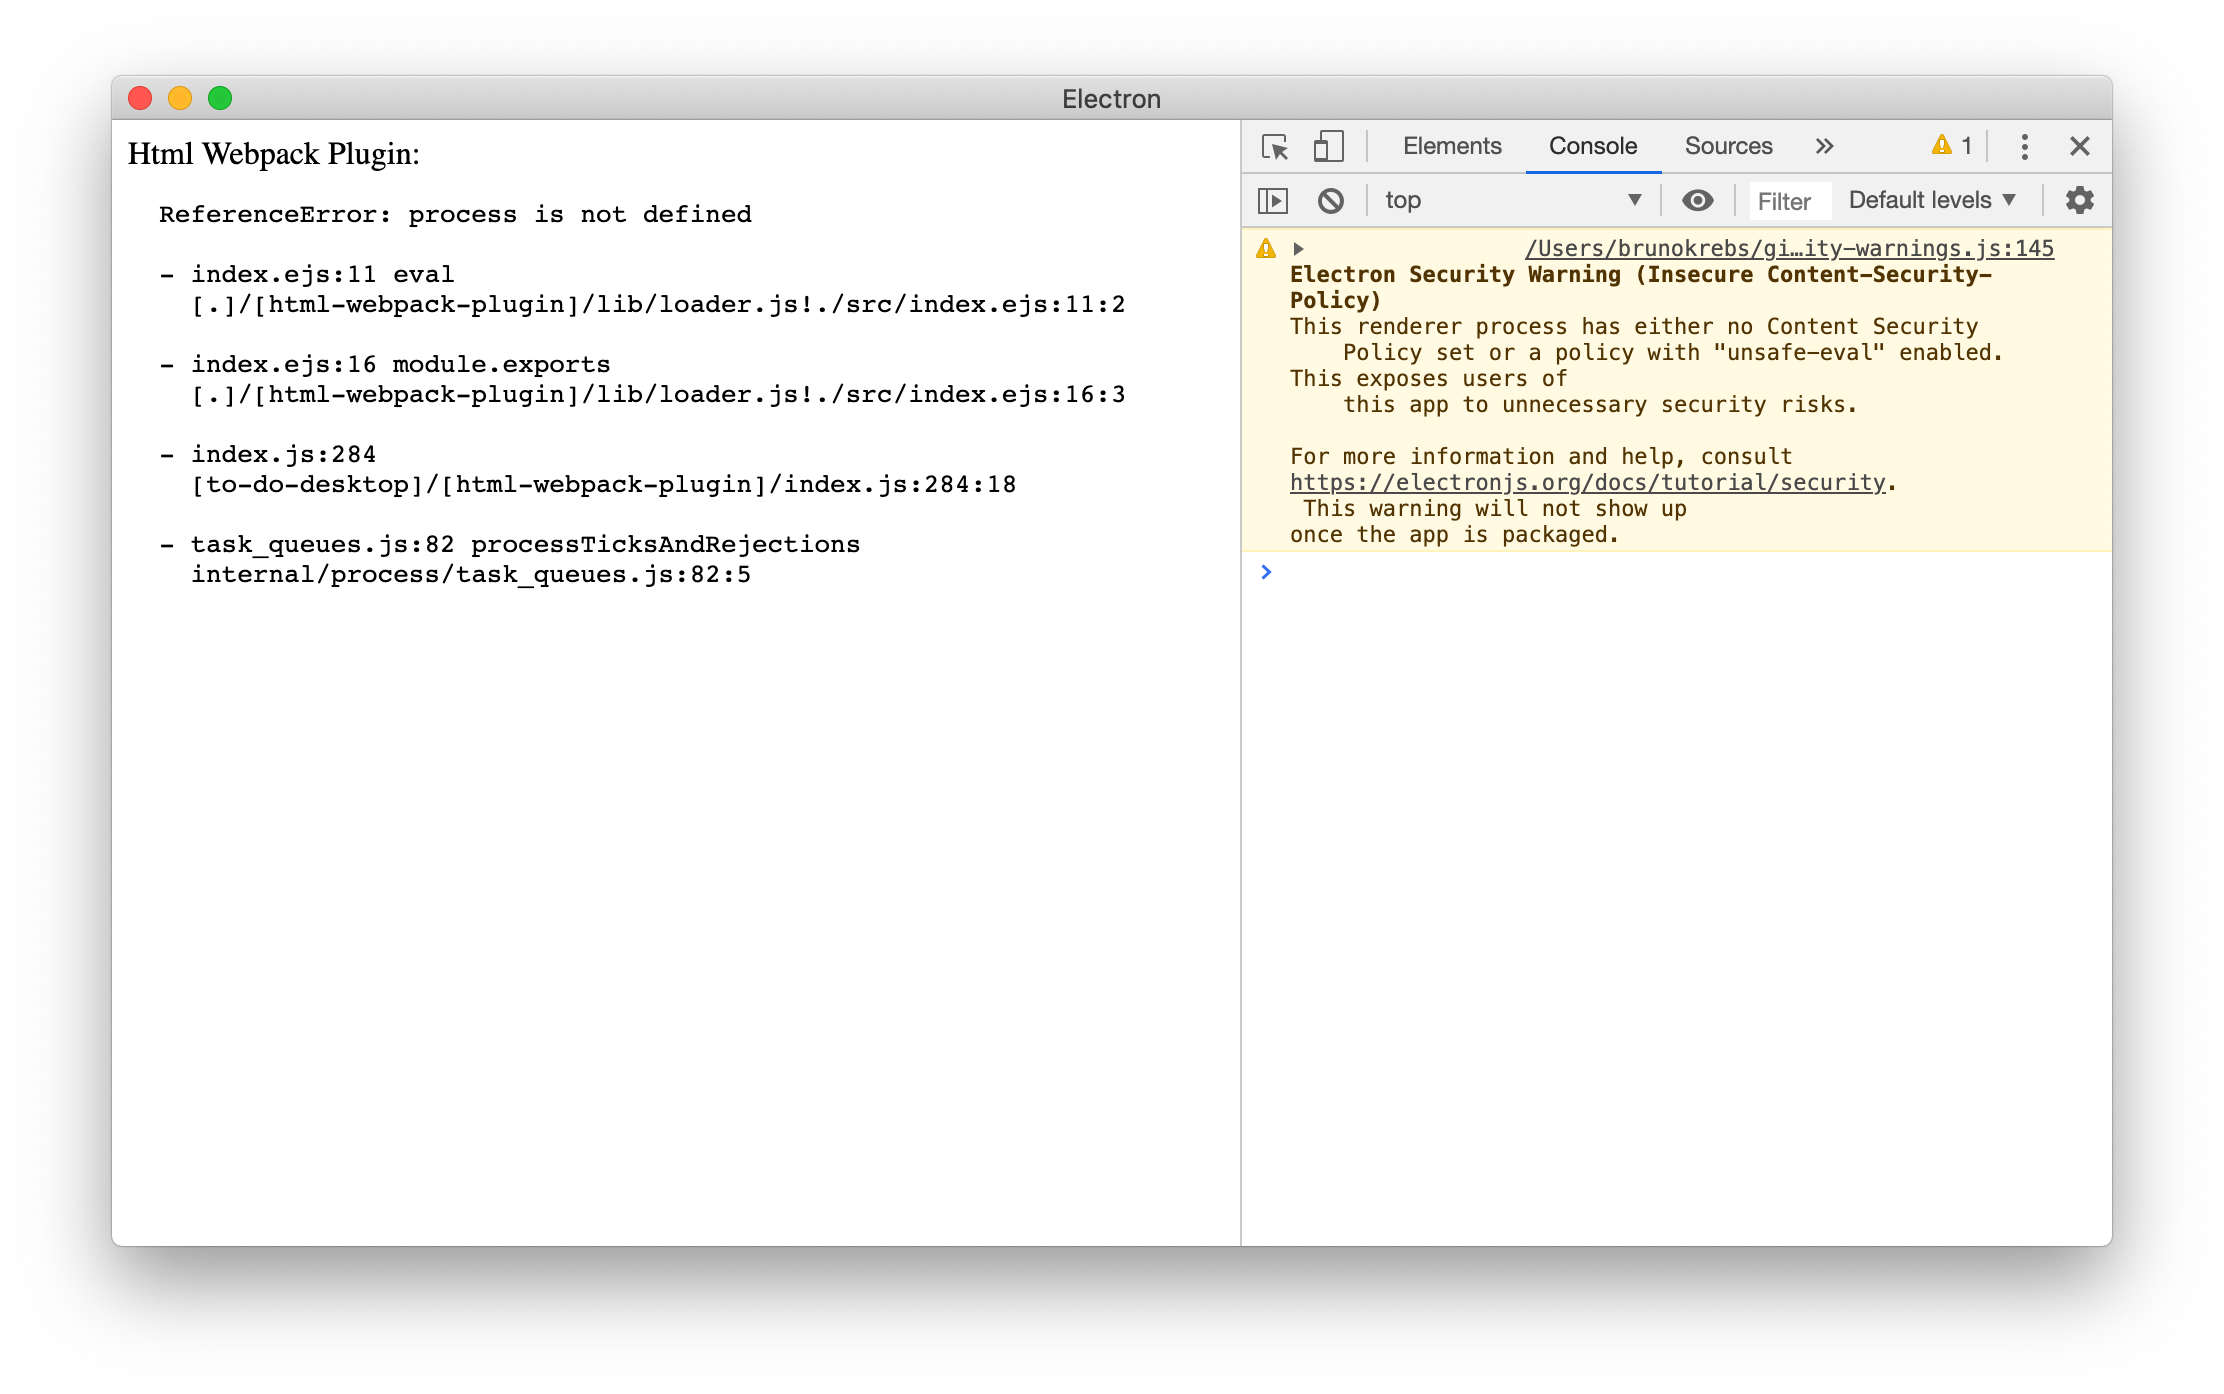
As you can see, something is not right. The problem here is that the Vue.js template you used to scaffold your application is not ready for Electron 6. What you will need to do to fix this issue is to open the .electron-vue/webpack.renderer.config.js and update it as follows:
// find the rendererConfig variable
let rendererConfig = {
  // then, find the plugins property
  plugins: [
    // then, replace the call to the HtmlWebpackPlugin constructor
    new HtmlWebpackPlugin({
      filename: 'index.html',
      template: path.resolve(__dirname, '../src/index.ejs'),
      minify: {
        collapseWhitespace: true,
        removeAttributeQuotes: true,
        removeComments: true
      },
      isBrowser: false,
      isDevelopment: process.env.NODE_ENV !== 'production',
      nodeModules: process.env.NODE_ENV !== 'production'
        ? path.resolve(__dirname, '../node_modules')
        : false
    }),
  ]
}
As you can see in the comments above, you won't change much in this file. All you will do is to hard code the isBrowser, setting it to false, and you will define that isDevelopment depends on the process.env.NODE_ENV value.
Note: Be extra careful while updating this file. You don't have to remove or change anything else besides adding these two properties to the object passed to
HtmlWebpackPlugin.
With that in place, you will have to open ./src/index.ejs file and replace the contents of the <body> element with this:
<div id="app"></div>
<!-- Set `__static` path to static files in production -->
<% if (!htmlWebpackPlugin.options.isBrowser && !htmlWebpackPlugin.options.isDevelopment) { %>
  <script>
    window.__static = require('path').join(__dirname, '/static').replace(/\\/g, '\\\\')
  </script>
<% } %>
The changes to this file are quite succinct as well. The only difference is that, now, you are not calling the global process variable anymore because Electron 6 is not exposing it by default and because the Vue.js template you used is not asking for it explicitly.
However, there are other places that you will need to use the global process variable. As such, to wrap up the scaffolding part of this tutorial, you will open the ./src/main/index.js file and will update it as follows:
// find the createWindow function definition
function createWindow () {
  // add the webPreferences property passed to BrowserWindow
  mainWindow = new BrowserWindow({
    height: 563,
    useContentSize: true,
    width: 1000,
    webPreferences: {
      nodeIntegration: true,
      nodeIntegrationInWorker: true
    }
  })
}
In this case, you are updating this file to make sure the rest of the application (the source code that you are going to write) will have access to some Node.js features.
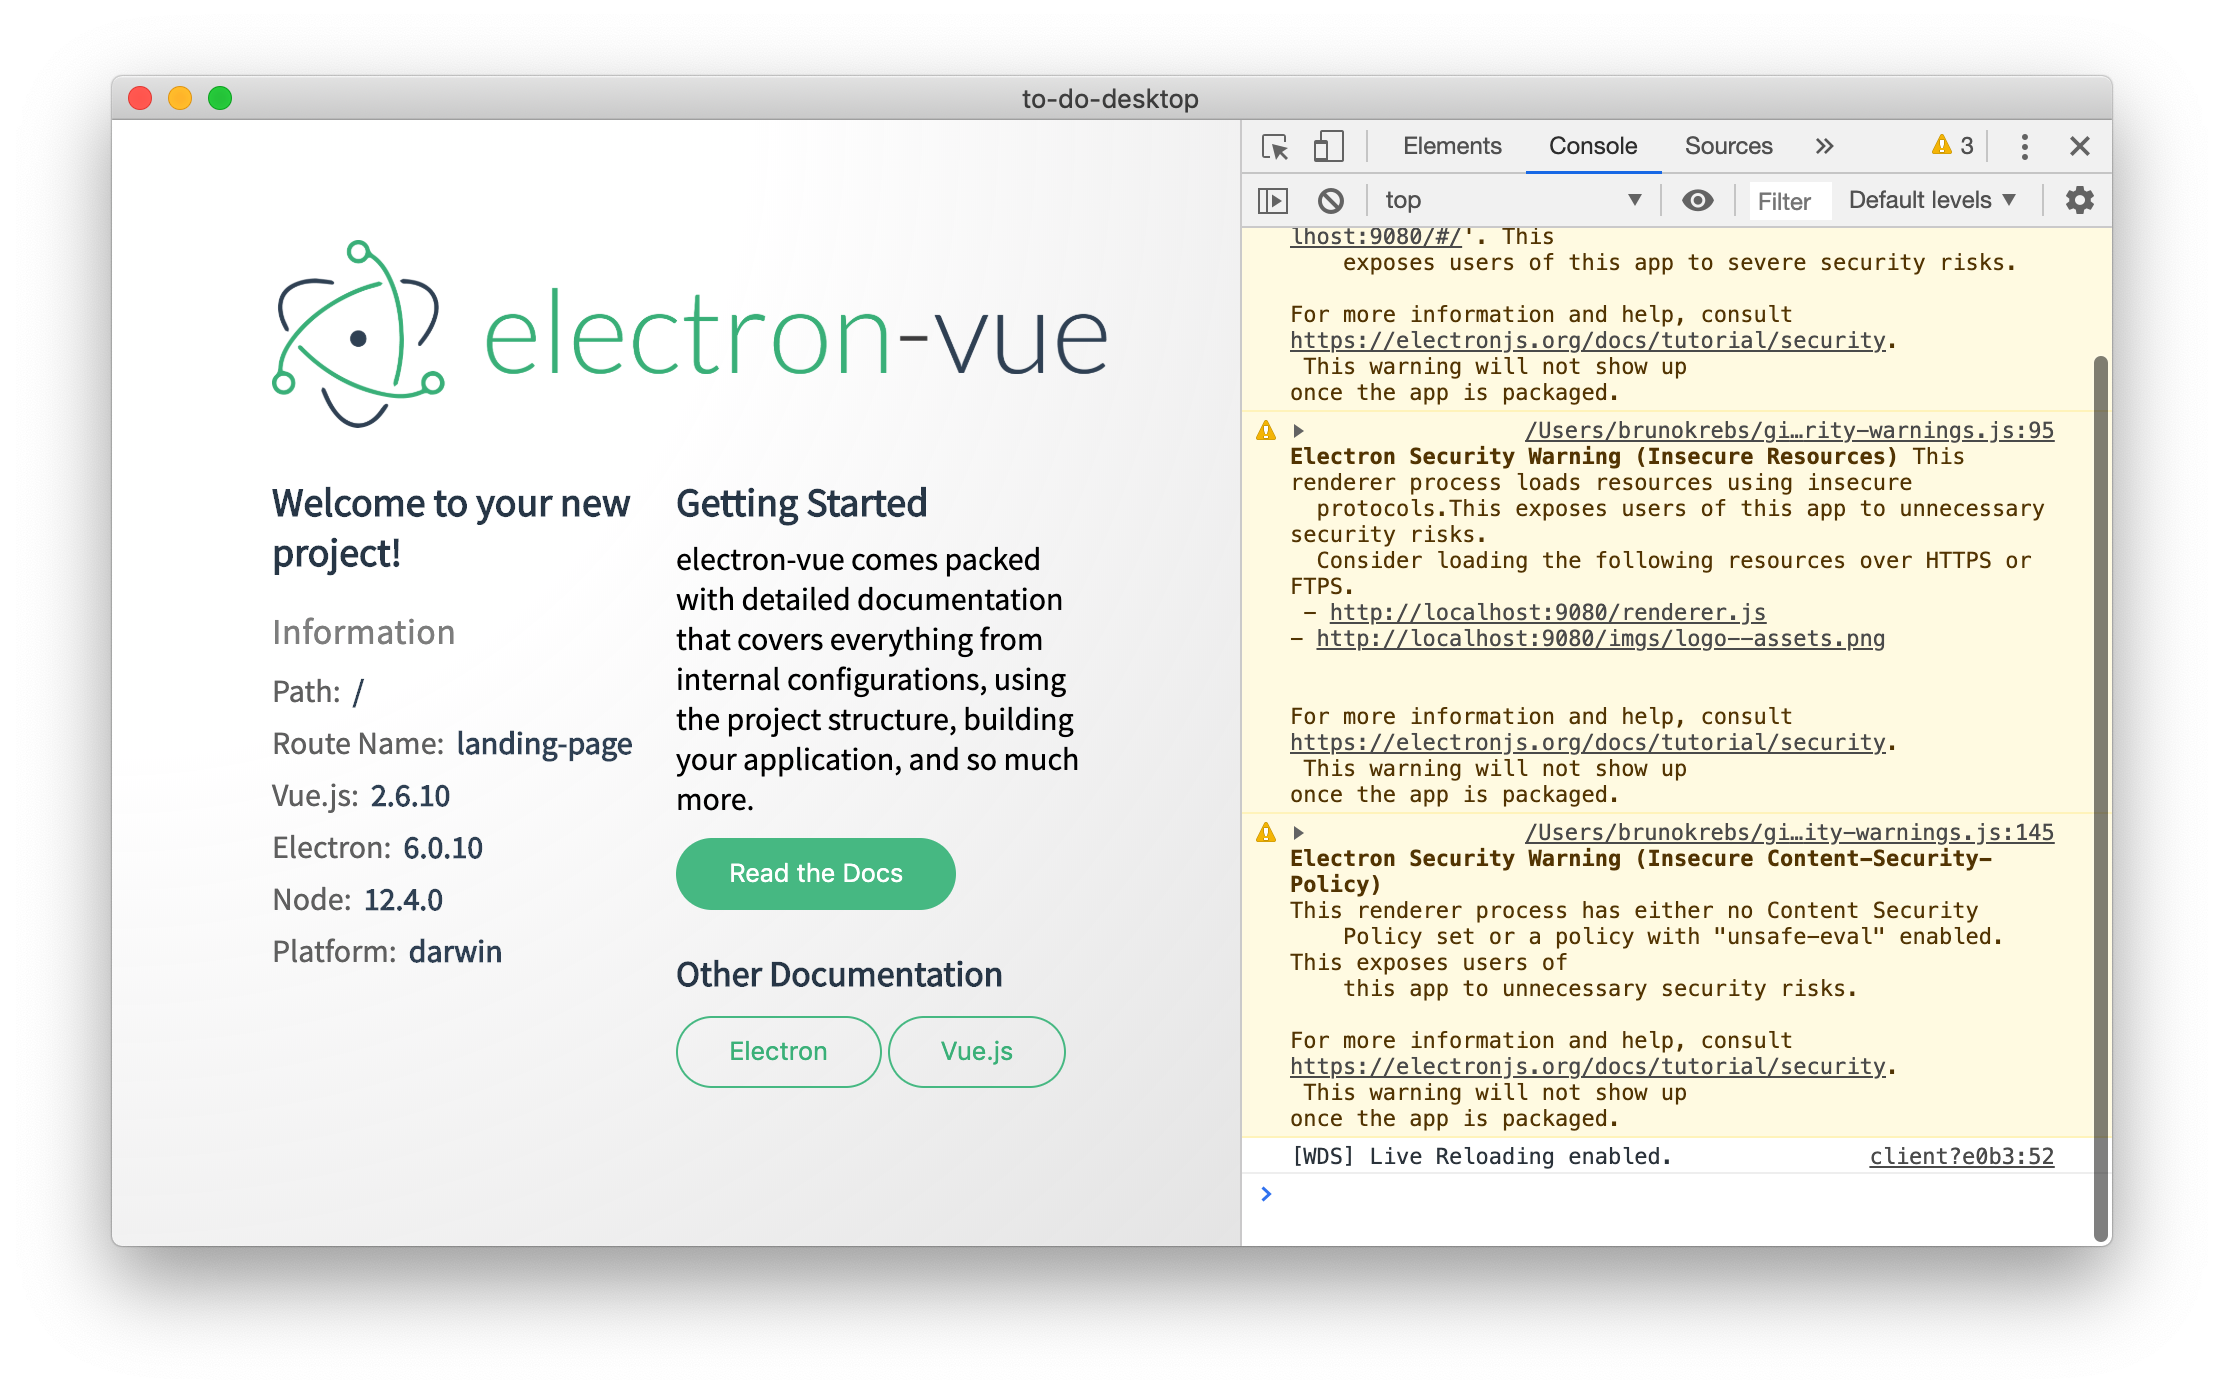
After updating this file, you can stop the previous instance of Electron (e.g., you can hit Ctrl + C in the terminal you used to run it) and you can issue npm run dev again. If everything works as expected, you will see the electron-vue getting started page.
If you don't see this page, you can double check the steps above by comparing what you did with the changes on this commit.
Implementing the First Route with Vue.js and Electron
After scaffolding your new application, the first thing you will do is to create a page for the to-do list. Preferably, you will want to make this page the first thing users see in your application.
Routes, in electron-vue, are defined in the ./src/renderer/router/index.js file. Components, on the other hand, are located in the ./src/renderer/components directory. So, open the ./src/renderer/router/index.js file and replace the contents in it with this:
import Vue from 'vue'
import Router from 'vue-router'

Vue.use(Router)

export default new Router({
  routes: [
    {
      path: '/',
      name: 'todos-page',
      component: require('@/components/ToDos').default
    },
    {
      path: '*',
      redirect: '/'
    }
  ]
})
With this change, the landing page is now pointing to a component called ToDos, which you will create next. To create this component, go into the ./src/renderer/components folder and delete everything inside it. Then, create a new file called ToDos.vue and paste the following content into it:
<template>
  <div>
    <h2>Welcome to the To-Dos Page</h2>
  </div>
</template>
Now, when you view your application, you should see a blank screen with the "Welcome to the To-Dos Page" title.
Consuming APIs with Vue.js and Electron
After creating the first route in your Vue.js and Electron application, it's time to make it consume the API you bootstrapped. To do so, you can replace the code inside the ToDos.vue file with this:
<template>
    <div>
        <div>
            <div>
                <button @click="fetchTodos()" class="btn btn-primary">Fetch Todos</button>
            </div>
        </div>
        <div>
            <div>
                <ul>
                    <li v-for="todo in todos" :key="todo.id">{{todo.title}}</li>
                </ul>
            </div>
        </div>
    </div>
</template>
<script>
  const axios = require('axios')
  export default {
    name: 'ToDos',
    data: () => {
      return {
        todos: []
      }
    },
    methods: {
      async fetchTodos () {
        axios
          .get('http://localhost:3001/')
          .then(response => {
            this.todos = response.data
          })
          .catch(error => {
            if (error) throw new Error(error)
          })
      }
    }
  }
</script>
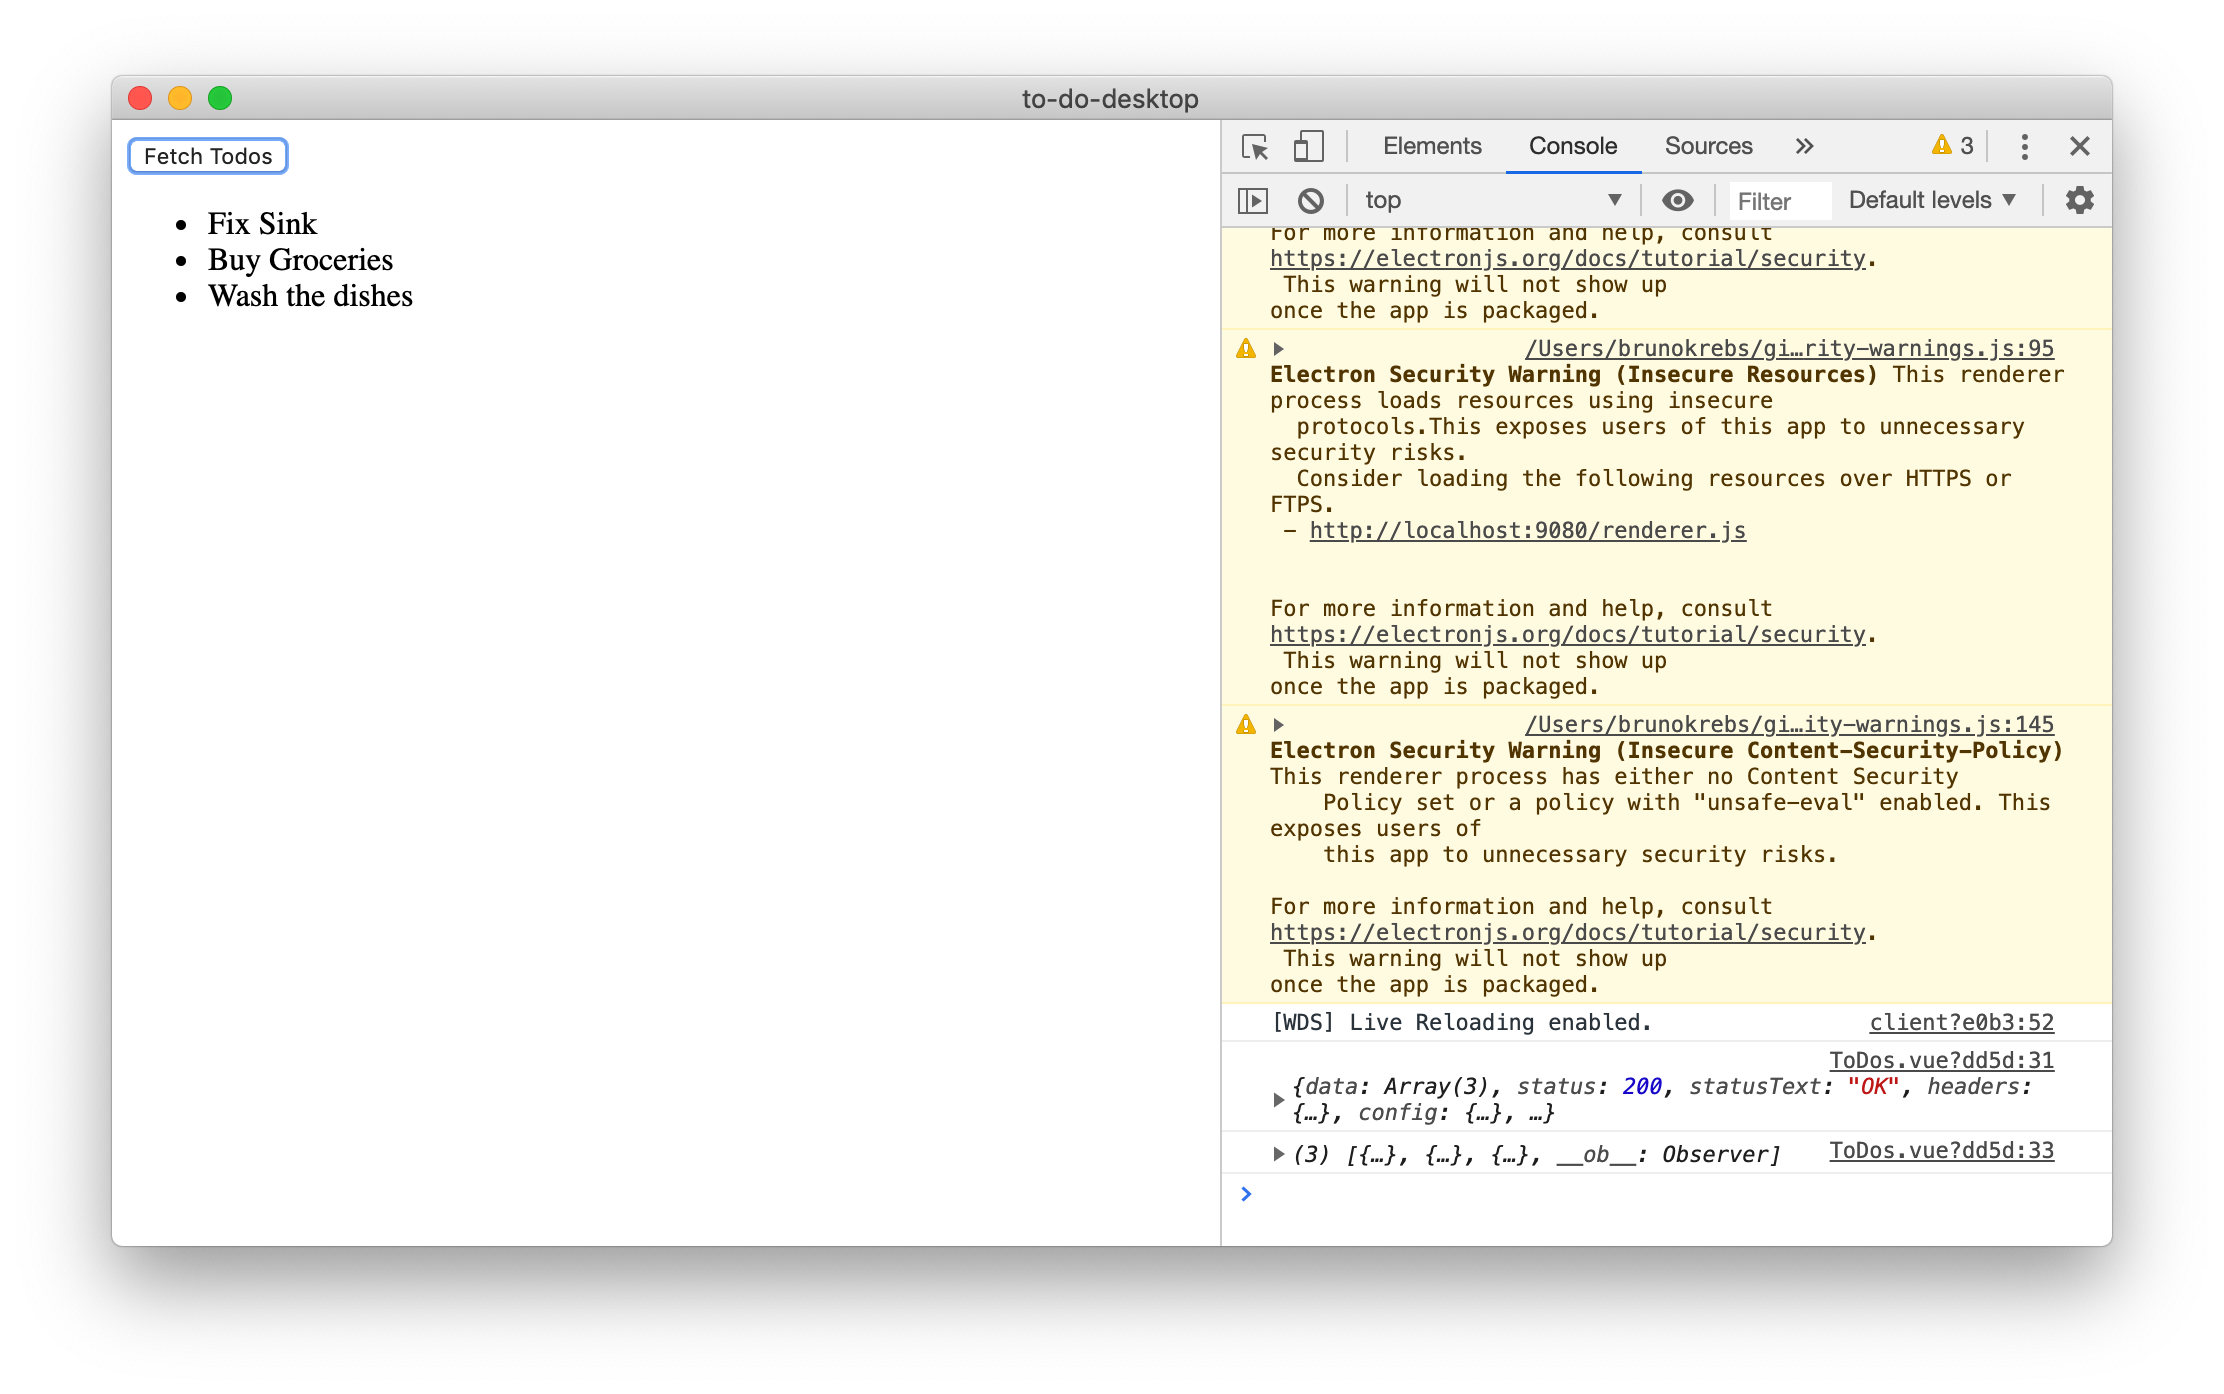
In the code above, you are creating a data property called todos to hold the collection of to-dos items. Then, you are creating a method called fetchTodos to call the API endpoint to load this collection.
In the template, you are creating a button that, when clicked, calls the fetchTodos method and that renders the data on the page. After making this change, you will see the page with the new button on your desktop app.
Securing Vue.js and Electron Desktop Apps
Now that you have finished creating the first route of your desktop app and that you integrated it with the API, it is time to start thinking about how to handle end-user authentication in your app. For this task, you could, for example, create your own solution. However, this approach does come with a good number of disadvantages. Among them, there are two that stand out:
- You would have to work for dozens (if not hundreds) of hours just to have a minimum solution that would allow your users to sign up, sign in, change their lost password, etc.
- You would not use the best security measures and technologies because you are (probably) not an expert in identity management.
For these two main reasons (among many others), you will be better off relying on a production-ready solution like Auth0.
Note: If you want to learn more about how Auth0 can help you keep your app and your users safe, check out this article.
For the instruction that follow, you will need an Auth0 account. If you don't have one yet, you can use this link to create a free one. If you already have an account, you can reuse it.
Configuring your Auth0 Account
After sign in to your Auth0 dashboard, the first thing you will have to do is to create an Auth0 API to represent that Node.js and API express that you bootstrapped before. To do this, head to the APIs section and click on "Create API". When you do so, Auth0 will show a form that you can fill as follows:
- Name: To-Do API
- Identifier:
https://to-do-api - Signing Algorithm: RS256
After that, you can click on the "Create" button to complete the process. When Auth0 finishes creating the API, click on the "Settings" tab, search for the Allow Offline Access option, enable it, and hit save at the bottom of the page.
Now, head to the Applications section of your Auth0 dashboard and click on "Create Application". Then, you can fill the form that Auth0 presents as follows:
- Name: To-Do App
- Application Type: Native
Then, you can click on the "Create" button. When you do so, Auth0 will redirect you to the "Quick Start" section of your new app. From there, you can head to the "Settings" section and change the following property of your app:
- Allowed Callback URLs:
file:///callback
This field will tell Auth0 that it is fine to call file:///callback after an authentication process. After changing this field, scroll to the bottom of the page and click on "Save Changes".
Securing the API
Now, open the terminal that is running the API and hit Ctrl + C. Then, issue the following commands:
git checkout secured-api

npm i

touch .env
The first command will checkout a branch called secured-api. This branch contains the code necessary to identify authenticated end-users and will deny requests issues by unknown users. The second command will install all the dependencies of this branch. The third command will create a file called .env that you will use to configure the secured API with your Auth0 values.
After issuing these commands, open the .env file and update it as follows:
AUTH0_DOMAIN=
AUTH0_API_IDENTIFIER=
For the first variable, you will have to use the domain of your Auth0 tenant (e.g., brunokrebs.auth0.com). If you don't know your Auth0 domain, check this documentation. For the second variable, you will have to use the identifier of the API you create earlier (probably, https://to-do-api).
Then, you can issue npm start to restart the API.
Securing Electron and Vue.js Apps with Auth0
Now, back to the Electron desktop application, you need to integrate it with Auth0 to let users authenticate. To do this, you will need some extra packages. So, shutdown the Electron app (you can hit Ctrl + C to stop it) and issue the following command:
npm install jwt-decode request keytar bootstrapThis command will install four new packages:
jwt-decode: Since Auth0 uses JWTs to transmit user data, you need this package to decode this information.request: You will needrequestto be able to issue requests from the Node.js environment to Auth0.keytar: This package will help you keep user tokens in a safer way on the user environment.bootstrap: This one will allow your desktop app to use Bootstrap to make the user interface prettier.
Next, you can create a file called env.json where you will put your Auth0 Application properties. So, create this file inside the project root and add the following JSON object to it:
{
  "apiIdentifier": "YOUR_AUTH0_API_IDENTIFIER",
  "auth0Domain": "YOUR_APP_DOMAIN",
  "clientId": "YOUR_CLIENT_ID"
}
Similarly to what you have done on the .env file of the API, you will have to set the API identifier you used to create the API on your Auth0 account (e.g., https://to-do-api) and you will have to set the Auth0 domain as well (e.g., brunokrebs.auth0.com). Besides that, you will have to use the Auth0 Application client ID on the file above. To find this information, open the Auth0 Application in your Auth0 dashboard and you will see a field with this name.
Then, you will create 3 modules to help you with the integration with Auth0:
auth-service.js: A module to hold all the methods and properties to handle the authentication flow.auth-process.js: A module that controls the authentication flow process.app-process.js: A module that loads the application homepage.
You don't have to worry that much about how these modules work, but if you are curious, check the Securing Electron Applications with OpenID Connect and OAuth 2.0 article in our blog.
You will add all these files inside a new directory called services that you will create inside the ./src/main/ directory. To help you with the task, you can issue the following commands on your terminal:
mkdir src/main/services/

touch src/main/services/auth-service.js
touch src/main/services/auth-process.js
touch src/main/services/app-process.js
Then, you can add the following code inside the src/main/services/auth-service.js file:
const jwtDecode = require('jwt-decode')
const request = require('request')
const url = require('url')
const envVariables = require('../../../env')
const keytar = require('keytar')
const os = require('os')

const { apiIdentifier, auth0Domain, clientId } = envVariables

const redirectUri = `file:///callback`

const keytarService = 'my-todo-app'
const keytarAccount = os.userInfo().username

let accessToken = null
let profile = null
let refreshToken = null

function getAccessToken () {
  return accessToken
}

function getProfile () {
  return profile
}

function getAuthenticationURL () {
  return (
    'https://' +
    auth0Domain +
    '/authorize?' +
    'audience=' +
    apiIdentifier +
    '&' +
    'scope=openid profile offline_access&' +
    'response_type=code&' +
    'client_id=' +
    clientId +
    '&' +
    'redirect_uri=' +
    redirectUri
  )
}

function refreshTokens () {
  return new Promise(async (resolve, reject) => {
    const refreshToken = await keytar.getPassword(keytarService, keytarAccount)

    if (!refreshToken) return reject(new Error('no refresh token available'))

    const refreshOptions = {
      method: 'POST',
      url: `https://${auth0Domain}/oauth/token`,
      headers: { 'content-type': 'application/json' },
      body: {
        grant_type: 'refresh_token',
        client_id: clientId,
        refresh_token: refreshToken
      },
      json: true
    }

    request(refreshOptions, function (error, response, body) {
      if (error) {
        logout()
        return reject(new Error(error))
      }

      accessToken = body.access_token
      profile = jwtDecode(body.id_token)

      global.accessToken = accessToken

      resolve()
    })
  })
}

function loadTokens (callbackURL) {
  return new Promise((resolve, reject) => {
    const urlParts = url.parse(callbackURL, true)
    const query = urlParts.query

    const exchangeOptions = {
      grant_type: 'authorization_code',
      client_id: clientId,
      code: query.code,
      redirect_uri: redirectUri
    }

    const options = {
      method: 'POST',
      url: `https://${auth0Domain}/oauth/token`,
      headers: {
        'content-type': 'application/json'
      },
      body: JSON.stringify(exchangeOptions)
    }

    request(options, (error, resp, body) => {
      if (error) {
        logout()
        return reject(error)
      }

      const responseBody = JSON.parse(body)
      accessToken = responseBody.access_token
      global.accessToken = accessToken
      profile = jwtDecode(responseBody.id_token)
      refreshToken = responseBody.refresh_token

      keytar.setPassword(keytarService, keytarAccount, refreshToken)

      resolve()
    })
  })
}

async function logout () {
  await keytar.deletePassword(keytarService, keytarAccount)
  accessToken = null
  profile = null
  refreshToken = null
}

export default {
  getAccessToken,
  getAuthenticationURL,
  getProfile,
  loadTokens,
  logout,
  refreshTokens
}
Then, inside the src/main/services/app-process.js file, you will have to add this code:
import { BrowserWindow } from 'electron'

let mainWindow
const winURL =
  process.env.NODE_ENV === 'development'
    ? `http://localhost:9080`
    : `file://${__dirname}/index.html`

function createAppWindow () {
  /**
   * Initial window options
   */
  mainWindow = new BrowserWindow({
    height: 563,
    useContentSize: true,
    width: 1000,
    webPreferences: {
      nodeIntegration: true,
      nodeIntegrationInWorker: true
    }
  })

  mainWindow.loadURL(winURL)

  mainWindow.on('closed', () => {
    mainWindow = null
  })
}

export default createAppWindow
Lastly, you will have to add the following code inside the src/main/services/auth-process.js file:
import { BrowserWindow } from 'electron'
import authService from './auth-service'
import createAppWindow from './app-process'

let win = null

function createAuthWindow () {
  destroyAuthWin()

  // Create the browser window.
  win = new BrowserWindow({
    width: 1000,
    height: 600,
    webPreferences: {
      nodeIntegration: false
    }
  })

  win.loadURL(authService.getAuthenticationURL())

  const {
    session: { webRequest }
  } = win.webContents

  const filter = {
    urls: ['file:///callback*']
  }

  webRequest.onBeforeRequest(filter, async ({ url }) => {
    await authService.loadTokens(url)
    createAppWindow()
    return destroyAuthWin()
  })

  win.on('authenticated', () => {
    destroyAuthWin()
  })

  win.on('closed', () => {
    win = null
  })
}

function destroyAuthWin () {
  if (!win) return
  win.close()
  win = null
}

export default createAuthWindow
After creating these files, open the src/main/index.js file and use the following code to replace the current one:
'use strict'

import { app } from 'electron'
import createAuthWindow from './services/auth-process'
import createAppWindow from './services/app-process'
import authService from './services/auth-service'

if (process.env.NODE_ENV !== 'development') {
  global.__static = require('path').join(__dirname, '/static').replace(/\\/g, '\\\\')
}

let mainWindow

async function createWindow () {
  try {
    await authService.refreshTokens()
    mainWindow = createAppWindow()
  } catch (err) {
    createAuthWindow()
  }
}

app.on('ready', createWindow)

app.on('window-all-closed', () => {
  if (process.platform !== 'darwin') {
    app.quit()
  }
})

app.on('activate', () => {
  if (mainWindow === null) {
    createWindow()
  }
})
The new version of this file is first checking if there is a previous-authenticated user. If there is an authenticated user, the app shows the main window. Otherwise, the app shows a window with the Auth0 login page to let users sign in.
With that in place, you can restart the app by issuing npm run dev. If things work as expected, you will see a screen where you will be able to sign in, or to create a new account if you don't have one yet.
Note: When you run
npm run dev, Electron might show a dialog saying thatkeytardid not register itself. If you get this error, installelectron-rebuildby issuingnpm i -D electron-rebuild, then run./node_modules/.bin/electron-rebuild.
Consuming Secured APIs
Now to the final piece of the application. You will refactor your frontend to make authenticated calls to the backend API (the to dos API) which is currently protected (i.e., unavailable to unauthenticated users). You will also be adding some little styling with Bootstrap.
To do this, open the src/renderer/components/ToDos.vue file and replace its code with this:
<template>
    <div>
        <div class="row">
            <header class="col-md-12">
                <nav class="navbar navbar-light bg-light">
                    <a class="navbar-brand">Vue TODO List</a>
                    <button class="btn btn-danger my-2 my-sm-0" @click="logout()" type="button">Logout</button>
                </nav>
            </header>
        </div>
        <div class="row" id="fetch-button-row">
            <div class="col-md-12">
                <button @click="fetchTodos()" class="btn btn-primary">Fetch Todos</button>
            </div>
        </div>
        <div class="row" id="todos-row">
            <div class="col-md-12">
                <ul class="list-group">
                    <li class="list-group-item" v-for="todo in todos" :key="todo.id">{{todo.title}}</li>
                </ul>
            </div>
        </div>
    </div>
</template>
<script>
  import authService from '../../main/services/auth-service'
  const { remote } = window.require('electron')
  const axios = require('axios')
  export default {
    name: 'HelloWorld',
    data: () => {
      return {
        todos: []
      }
    },
    methods: {
      async logout () {
        await authService.logout()
        remote.getCurrentWindow().close()
      },
      fetchTodos () {
        let accessToken = remote.getGlobal('accessToken')
        axios
          .get('http://localhost:3001/', {
            headers: {
              Authorization: 'Bearer ' + accessToken
            }
          })
          .then(response => {
            this.todos = response.data
          })
          .catch(error => {
            if (error) throw new Error(error)
          })
      }
    }
  }
</script>
<style scoped>
    @import "~bootstrap/dist/css/bootstrap.min.css";
    #fetch-button-row,
    #todos-row {
        margin: 10px;
    }
</style>
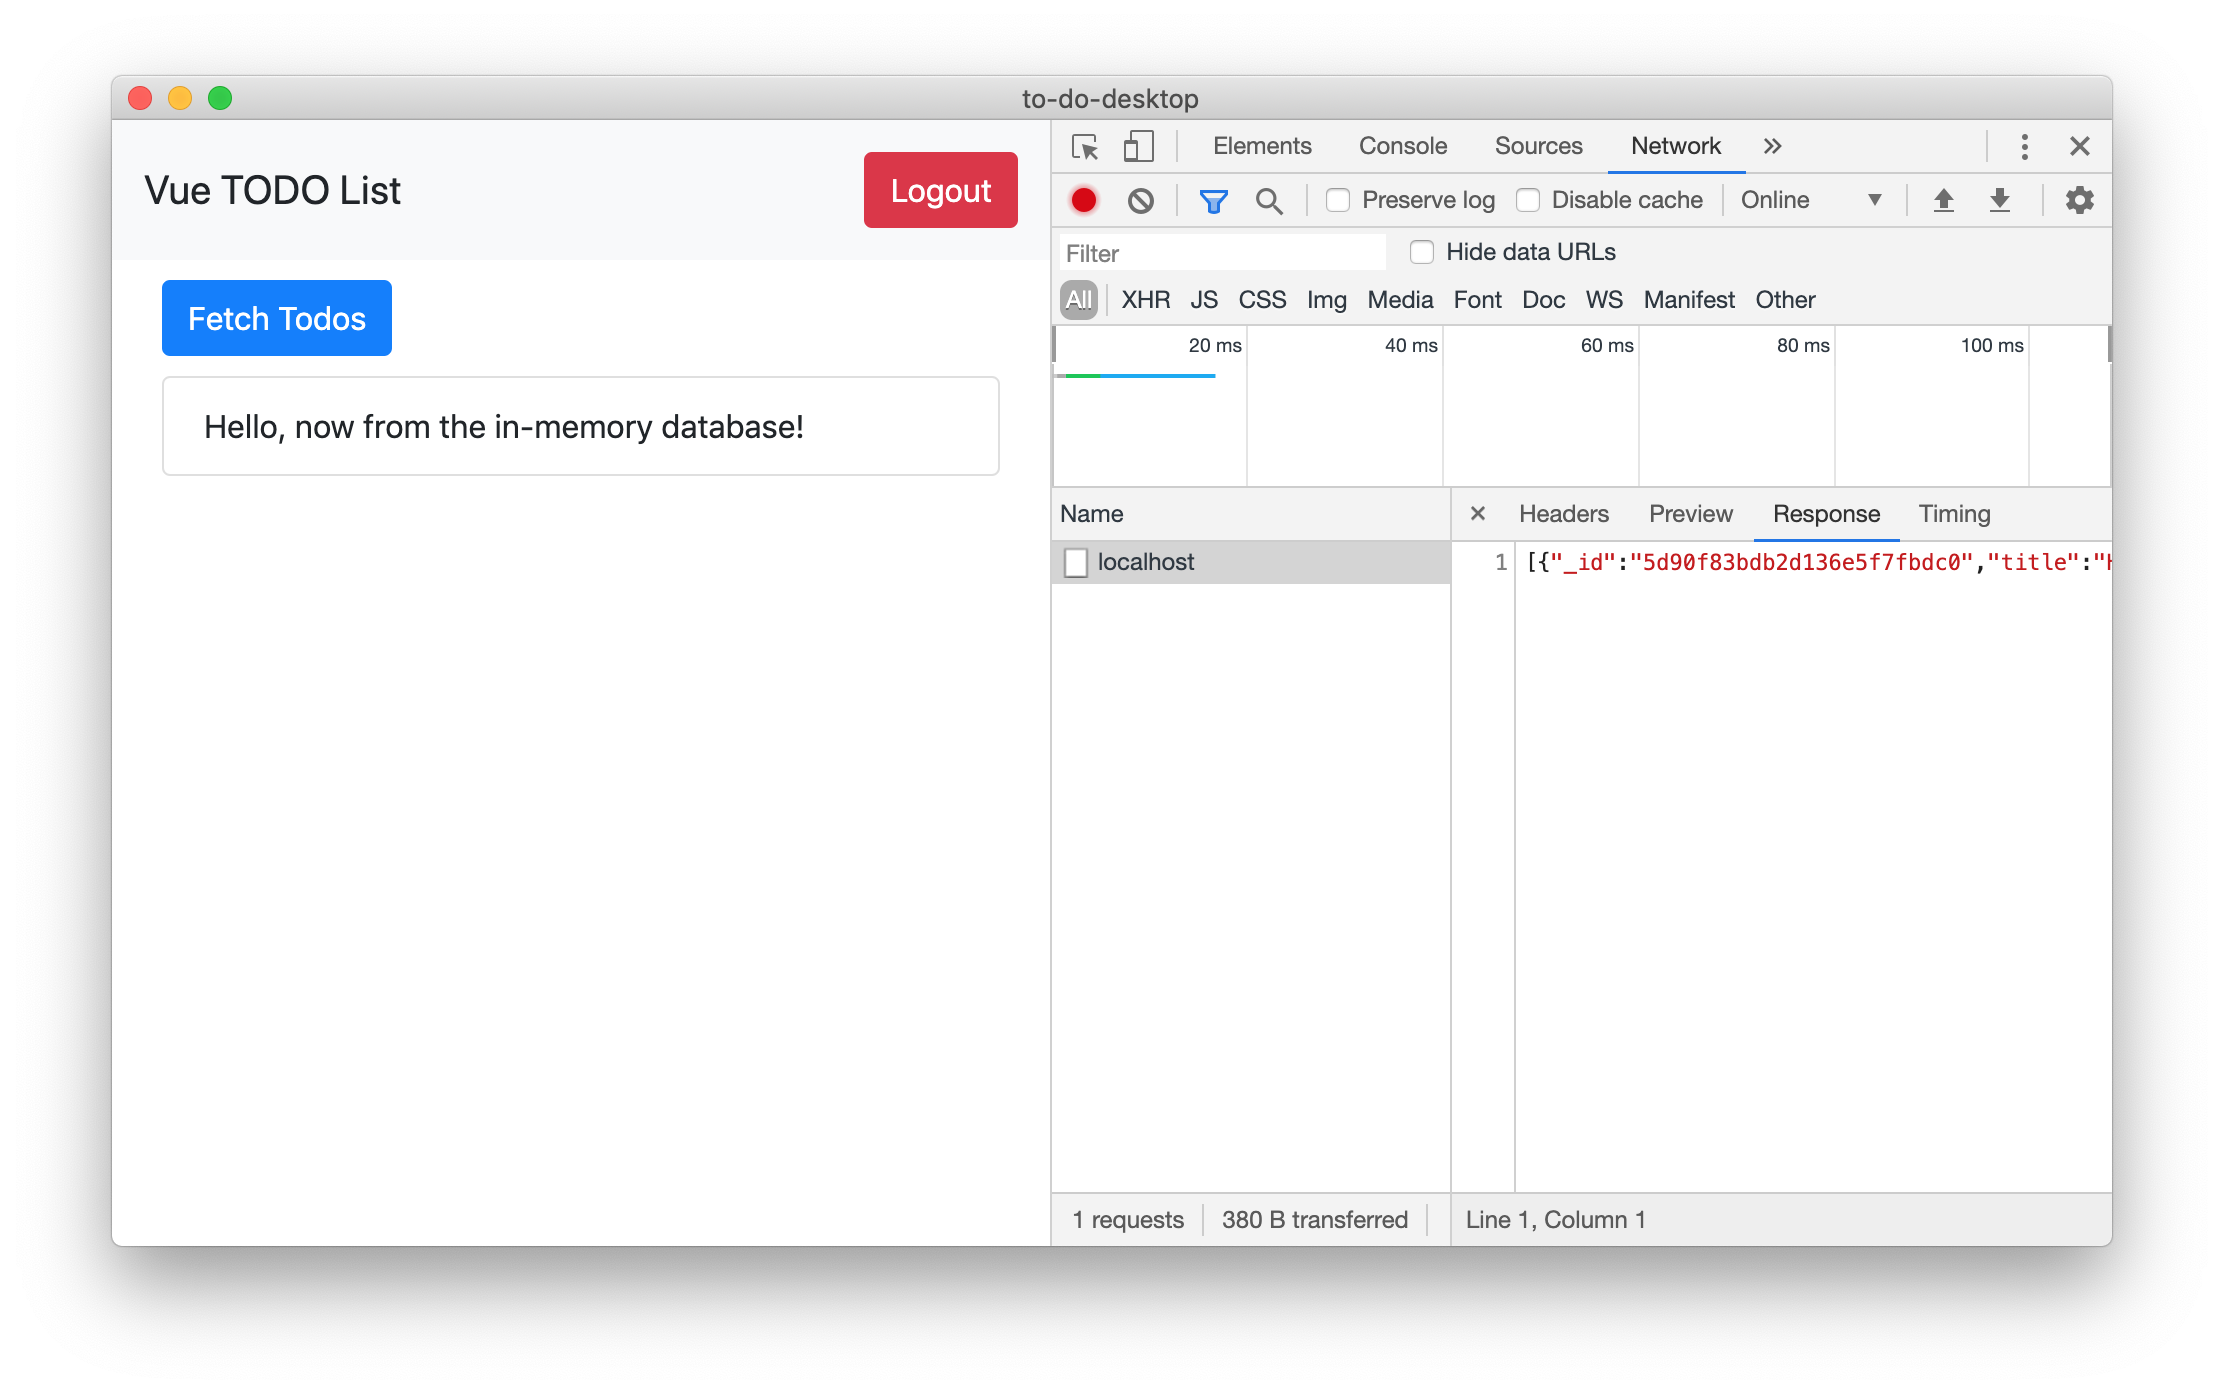
In the new version of this file, you are making the fetchTodos consume the global accessToken variable. With this variable, the ToDos component issues a request to the secured API and fetches the list of to-do items. Like before, the app uses this list to render the item to the user.
So, if you check your application again, you will see a screen that looks a little bit better than before and that allows you to fetch to-do items again.
"Building modern and secure desktop apps with Electron and Vue.js is easy. Learn how!"
Tweet This
Conclusion
As seen in this article, creating native desktop experiences with web technologies is a breeze when you use the right tools, and the electron-vue package enables developers to get the best of both worlds of Vue, a fast-rising developer friendly frontend framework, and ElectronJS.

