In this article, you'll learn what SAML is, how it works, and how you can configure a SAML identity provider using Auth0.
What is SAML
Before jumping into the technical jargon, let's look at an example that demonstrates what SAML is and why it's beneficial.
You just started working at a new company, Wizova. They've given you a work email address and access to a dashboard. Once you sign in to this dashboard, you're presented with the icons of all of the external services the company uses: Salesforce, Expensify, Jira, AWS, and more.
You click on the Salesforce icon, some magic happens in the background, and before you know it, you're signed into Salesforce without ever entering any credentials.
As you might have guessed, the "magic" was actually SAML in action. So what's going on here?
SAML stands for Security Assertion Markup Language. It is an XML-based open-standard for transferring identity data between two parties: an identity provider (IdP) and a service provider (SP).
Identity Provider — Performs authentication and passes the user's identity and authorization level to the service provider.
Service Provider — Trusts the identity provider and authorizes the given user to access the requested resource.
In the scenario above, the identity provider would be the IdP that Wizova uses, Auth0. The service provider would be Salesforce. The Wizova employee signs into the Wizova dashboard with Auth0. They click on the Salesforce icon, and Salesforce recognizes that the user wants to log in via SAML. Salesforce sends the employee back to Auth0 with a SAML Request that asks Auth0 to authenticate the user. Since the employee has already authenticated with Auth0, Auth0 verifies the session and sends the user back to Salesforce with a SAML Response. Salesforce checks this response, and if it looks good, the employee is granted access.
Benefits of SAML Authentication
Improved User Experience — Users only need to sign in one time to access multiple service providers. This allows for a faster authentication process and less expectation of the user to remember multiple login credentials for every application. In the example above, that user could have clicked on any of the other icons in their dashboard and been promptly logged in without ever having to enter more credentials.
Increased Security — SAML provides a single point of authentication, which happens at a secure identity provider. Then, SAML transfers the identity information to the service providers. This form of authentication ensures that credentials are only sent to the IdP directly.
Loose Coupling of Directories — SAML doesn't require user information to be maintained and synchronized between directories.
Ability to Alter, Audit, or Revoke Access Centrally — Because SAML doesn’t require synchronization between directories for each application, it isn’t necessary to notify each service provider to revoke or change access levels, meaning that access can be revoked quickly if necessary for a single service or across an enterprise. Similarly, auditing who has access to which services is easy with SAML because authentication logs are centralized.
Fewer Password Reset Requests — Users only need to remember one set of credentials, so IT can focus on supporting your workforce without having to respond to numerous password reset requests.
Scalability — Adding new users, applications, or services is straightforward, minimizing the overhead necessary for your organization to grow.
Reduced Costs for Service Providers — With SAML, you don't have to maintain account information across multiple services. The identity provider bears this burden.
How Does SAML Authentication Work?
Now that you've seen the high-level overview of how SAML authentication works, let's look at some of the technical details to see how everything is accomplished.
SAML single sign-on authentication typically involves a service provider and an identity provider. The process flow usually involves the trust establishment and authentication flow stages.
Consider this example:
- Our identity provider is Auth0
- Our service provider is a fictional service, Zagadat
Note: The identity provider could be any identity management platform.
Now, a user is trying to gain access to Zagadat using SAML authentication.
Let's break down how the different components of the diagram interact with each other to make authentication with SAML possible. The following diagram gives you a high-level overview of how SAML works:
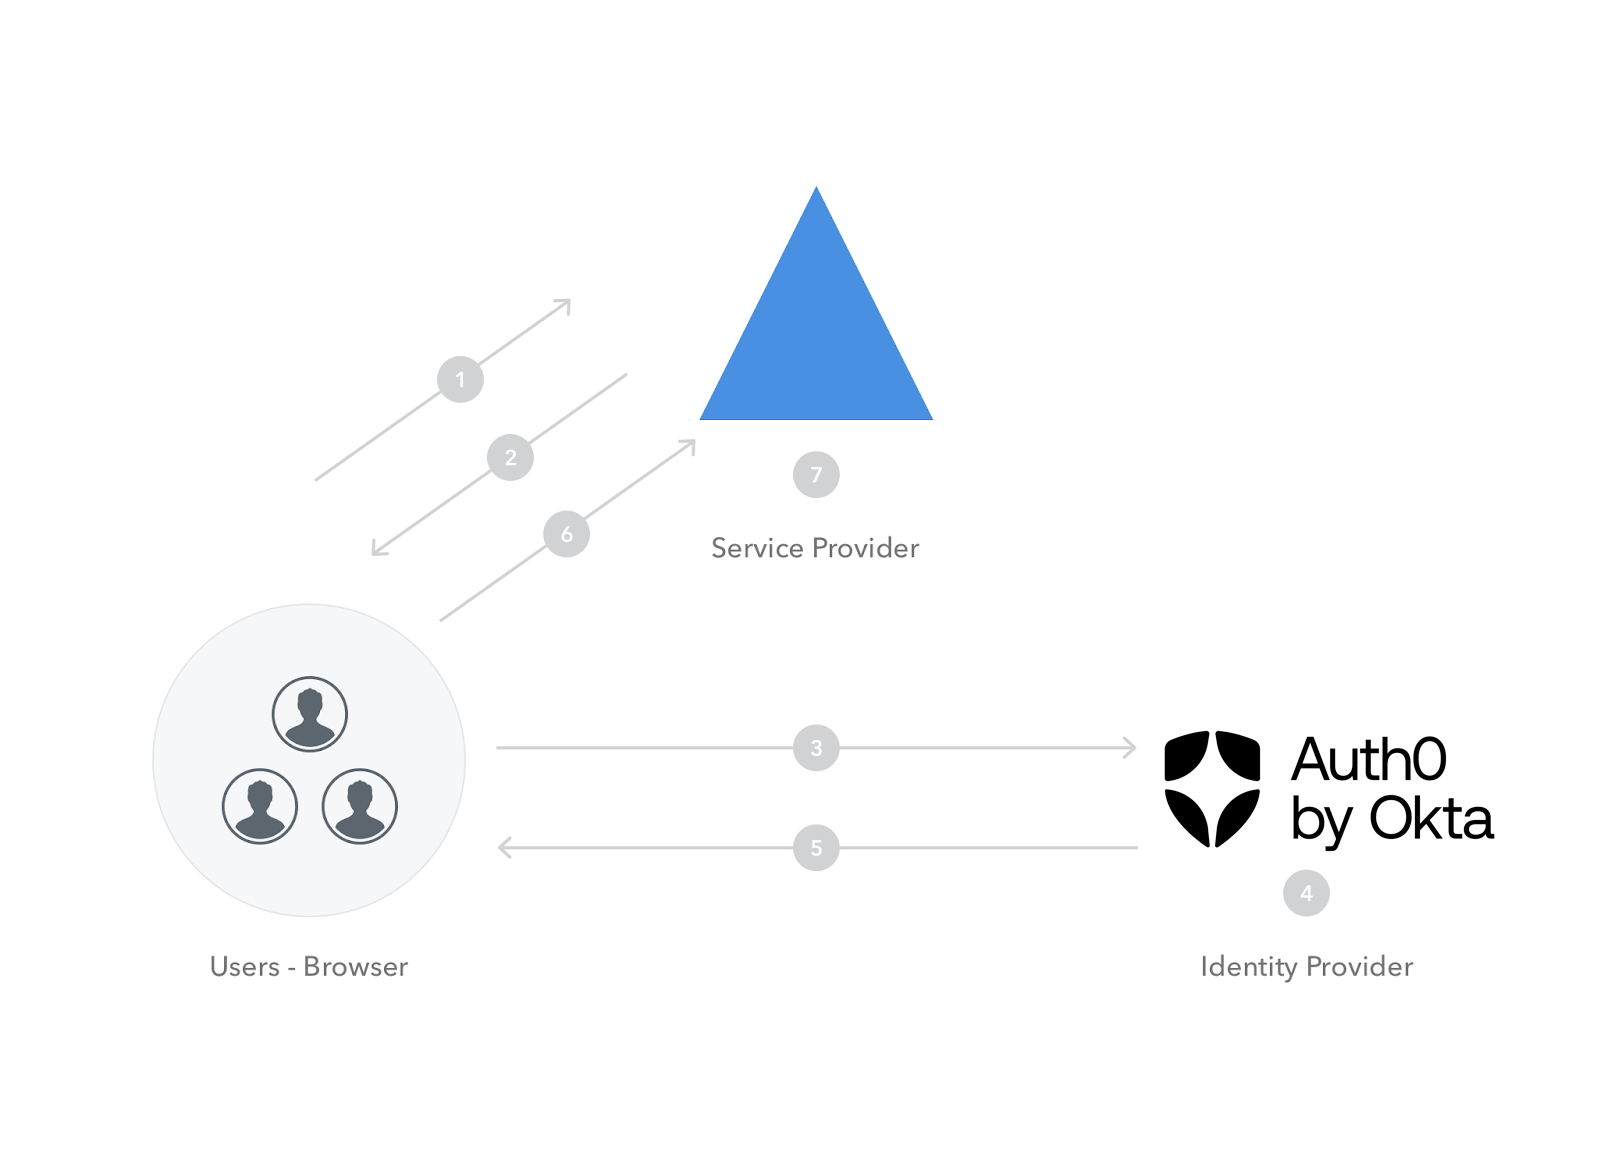
Here is a description of each numbered step in the diagram:
- The user tries to log in to Zagadat from a browser.
- Zagadat responds by generating a SAML request.
- The browser redirects the user to a Single Sign-On (SSO) URL, Auth0.
- Auth0 parses the SAML request and authenticates the user. This could be with username and password or even social login. If the user is already authenticated on Auth0, this step will be skipped. Once the user is authenticated, Auth0 generates a SAML response.
- Auth0 returns the encoded SAML response to the browser.
- The browser sends the SAML response to Zagadat for verification.
- If the verification is successful, the user will be logged in to Zagadat and granted access to the resources that they are authorized to view/modify.
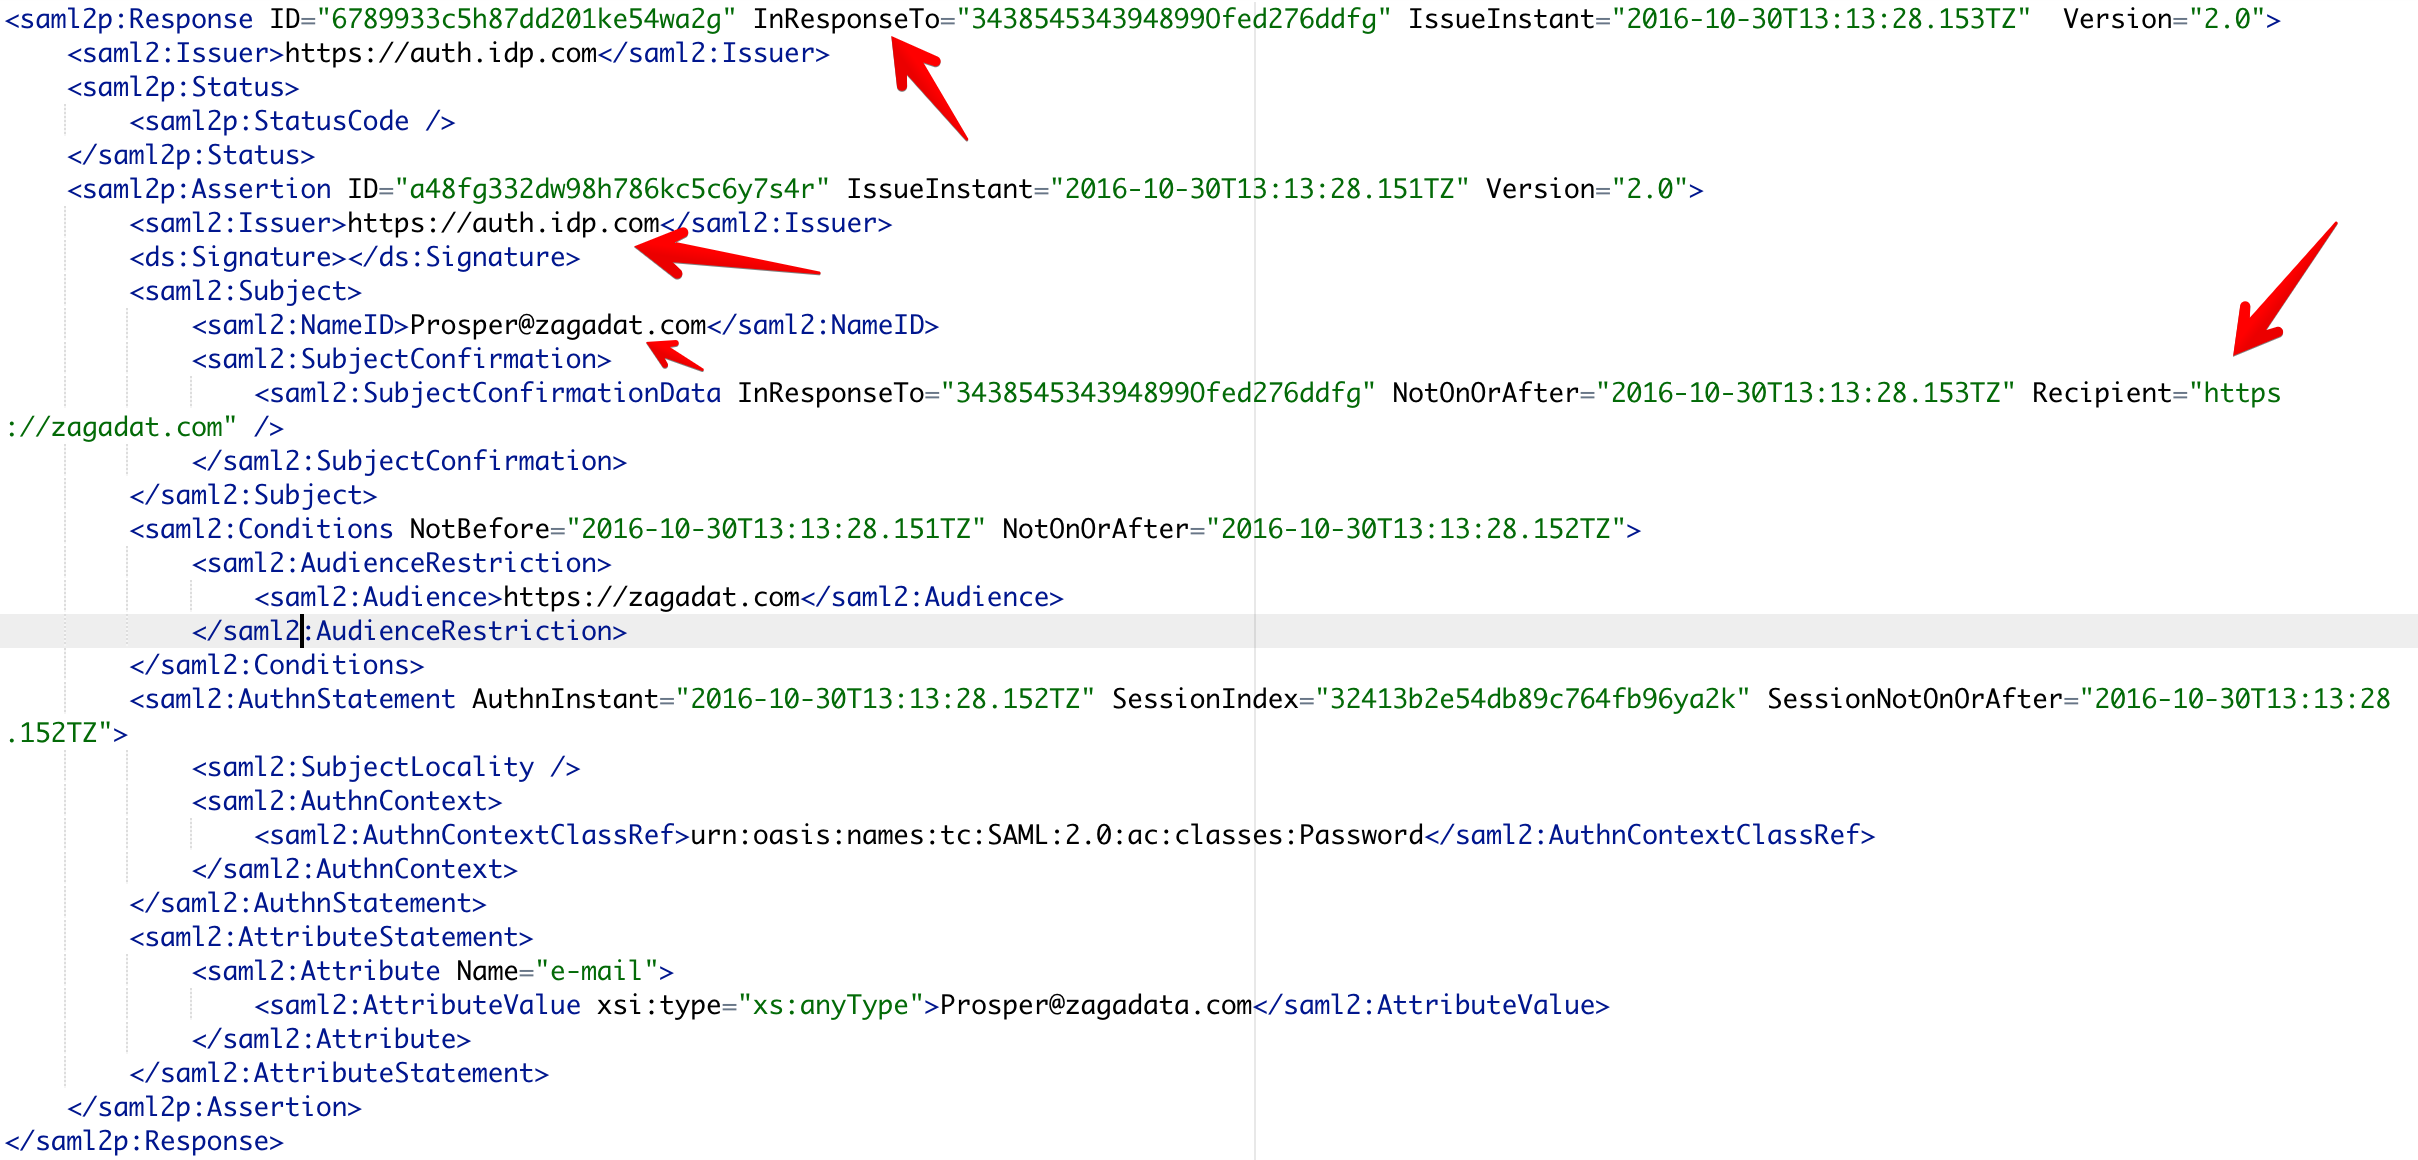
Note the attributes that are highlighted in the SAML request and response. Here's a glossary of these parameters:
- ID: Newly generated number for identification
- IssueInstant: Timestamp to indicate the time it was generated
- AssertionConsumerServiceURL: The SAML URL interface of the service provider, where the Identity provider sends the authentication token.
- Issuer: The EntityID (unique identifier) of the service provider
- InResponseTo: The ID of the SAML request that this response belongs to
- Recipient: The EntityID (unique identifier) of the service provider
SAML Authentication with Auth0
When it comes to implementing SAML, Auth0 is extremely extensible and able to handle several scenarios:
- Auth0 as the identity provider
- Auth0 as the service provider
- Auth0 as the identity and service provider
For this example, you'll learn how to implement SAML authentication using Auth0 as the identity provider.
"When implementing SAML, Auth0 can serve as the identity provider, service provider, or both!"
Tweet This
Prerequisites
An Auth0 account — If you don't already have one, you can sign up for a free account here.
An account with a service provider that supports SAML — Generally, most service providers require you to have a business account or some paid plan to configure SAML.
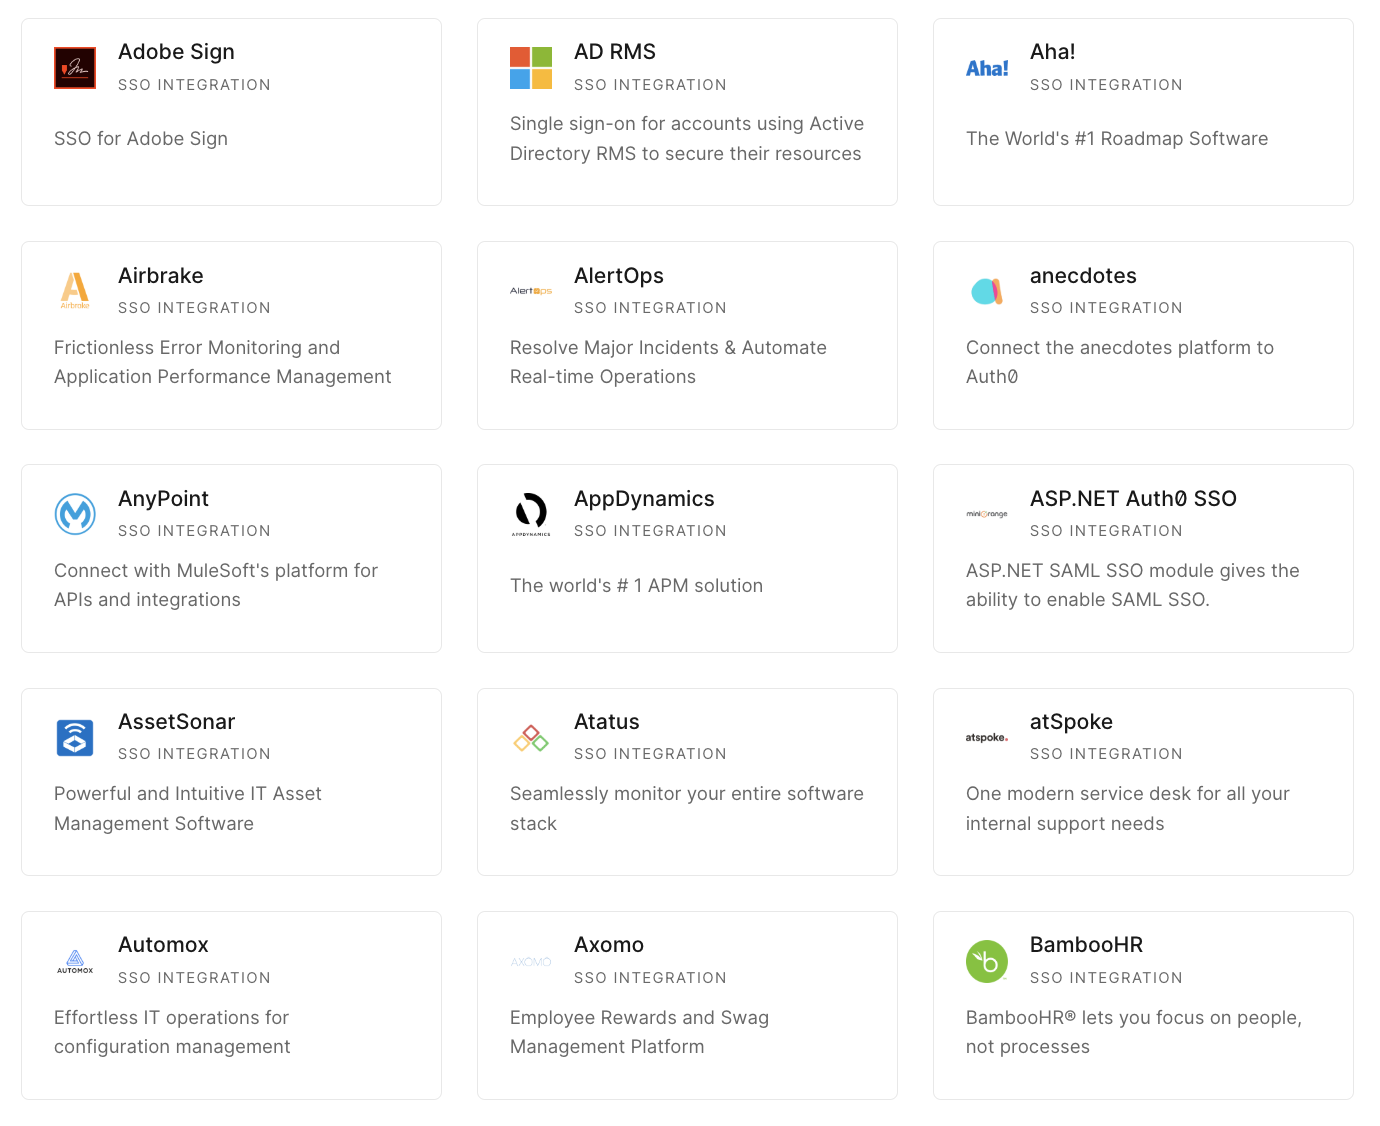
The following image shows a list of the service providers Auth0 supports out-of-the-box, but you also have the option of configuring a custom service provider in the dashboard.
Configure the service provider
This tutorial will use Zendesk as the service provider, but you can follow along with any SP of your choice.
To configure your chosen service provider, run through the following steps in your Auth0 dashboard:
- Click on SSO Integrations in the sidebar under account > security
- Click on the blue button in the top right corner, Create SSO Integration
- Select SAML
- Enter the name and/or any identifying information required and press Save
- Follow the instructions under Tutorial for your specific service provider
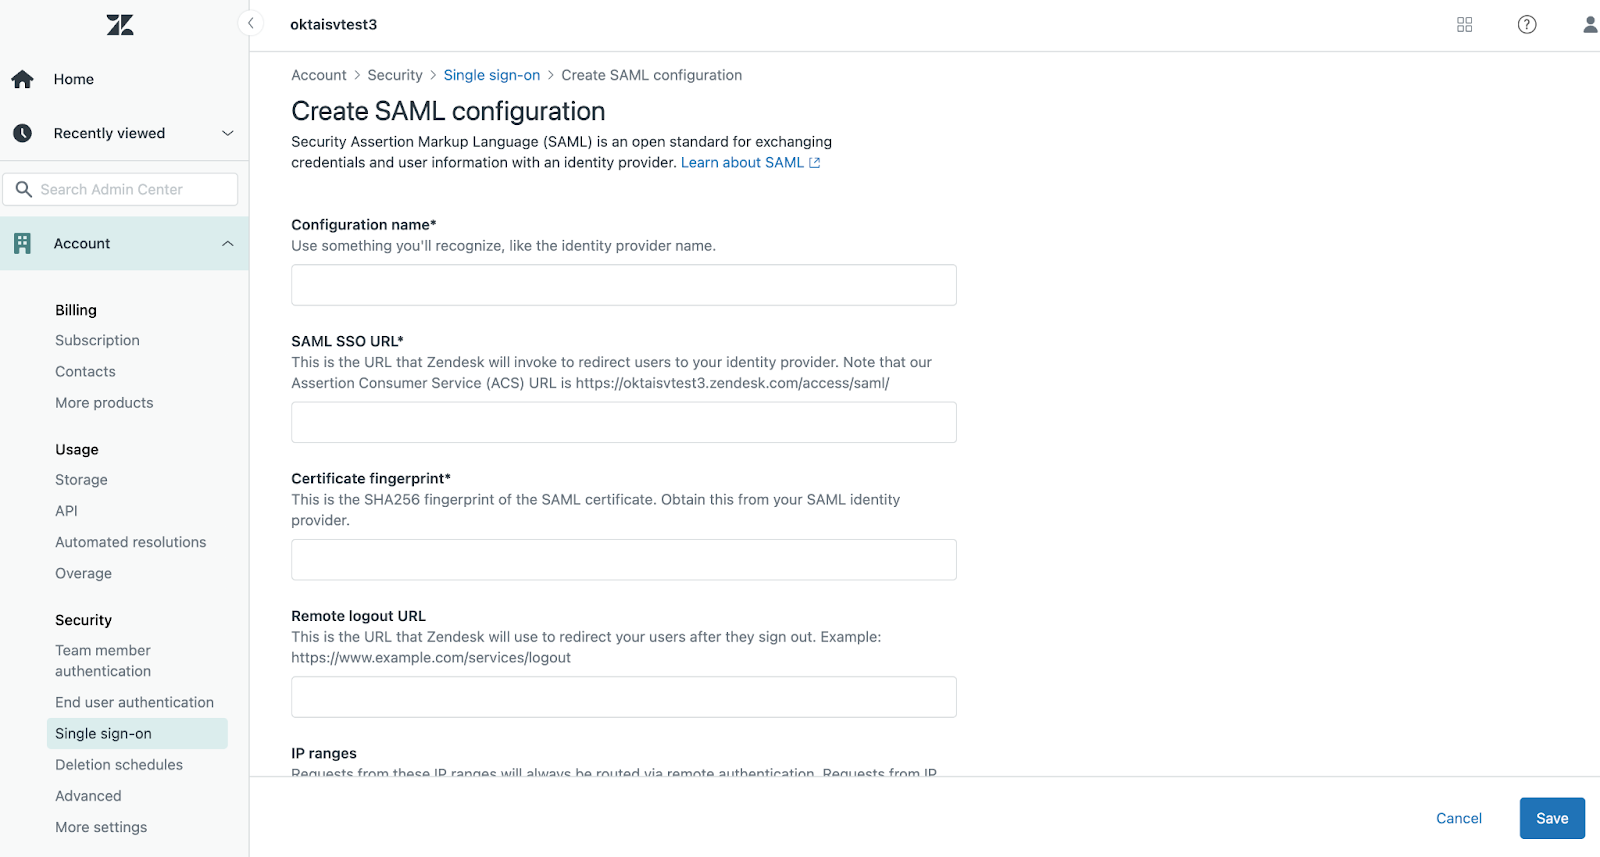
Note: This step will require you to input some values on the service provider's side.
Here's what that looks like for Zendesk.
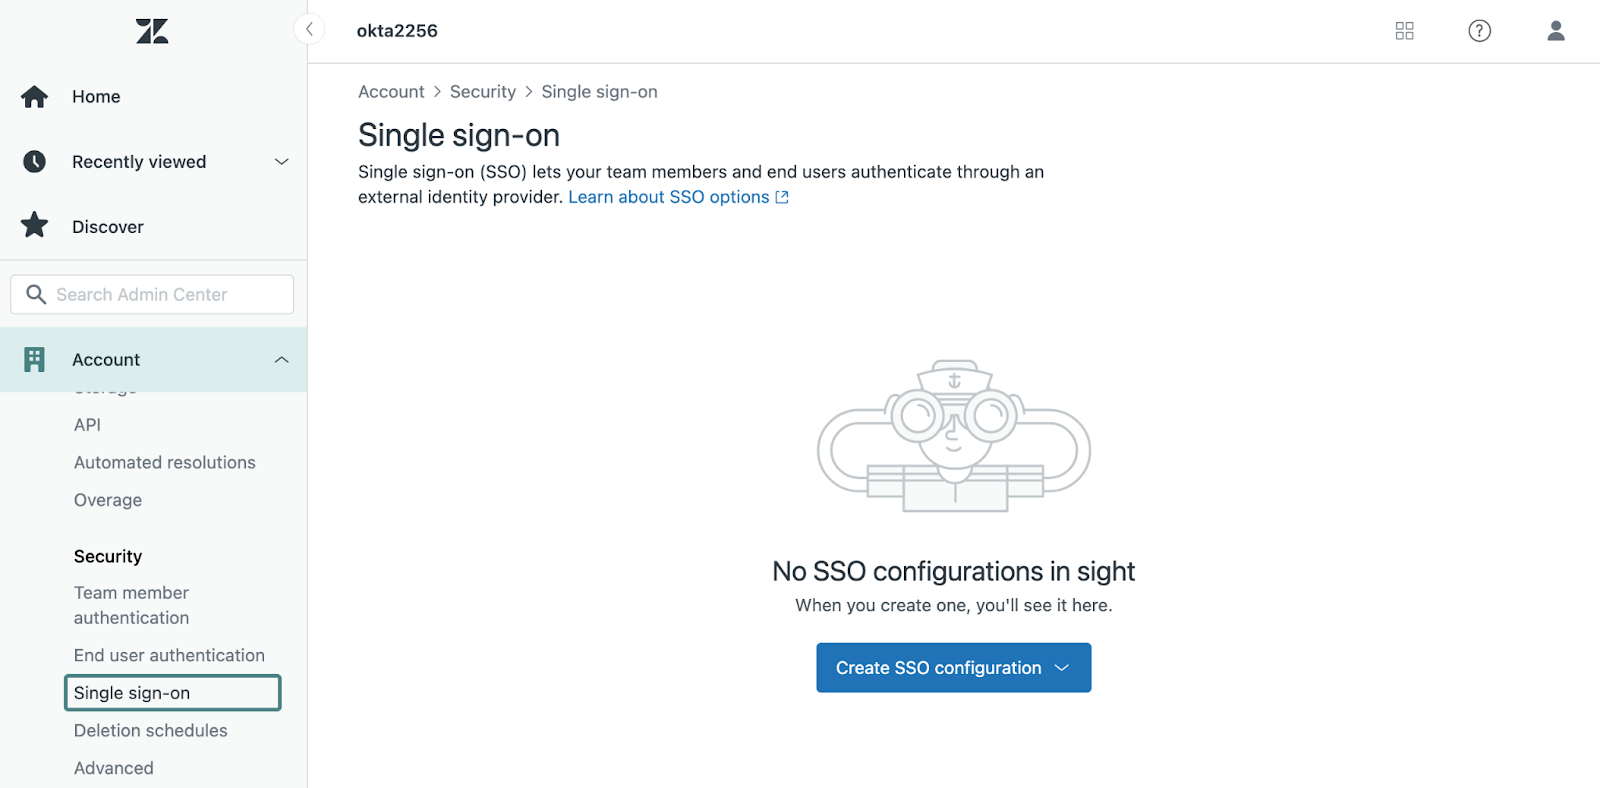
First, go into the Admin Center in the Zendesk dashboard and click on Security. Next, click on SSO, and you'll find the SAML configuration settings. This is where you'll paste in those values from the Auth0 dashboard.
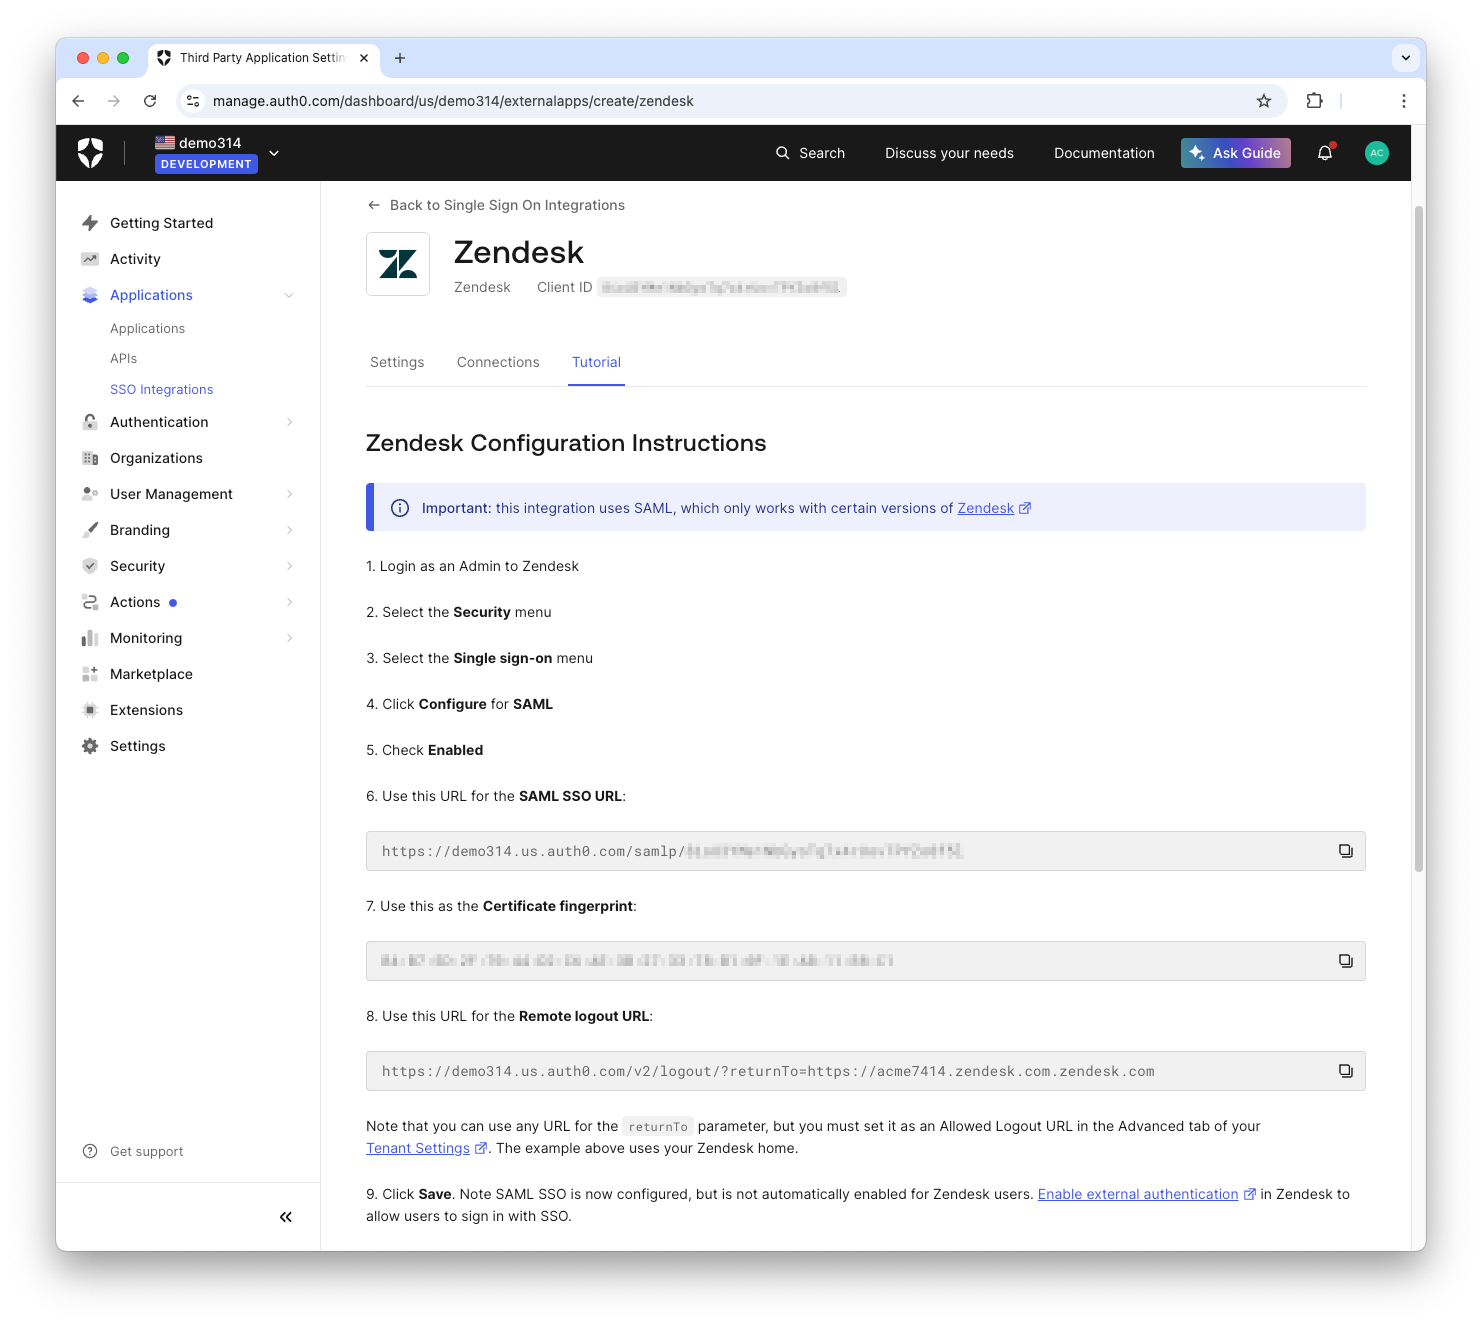
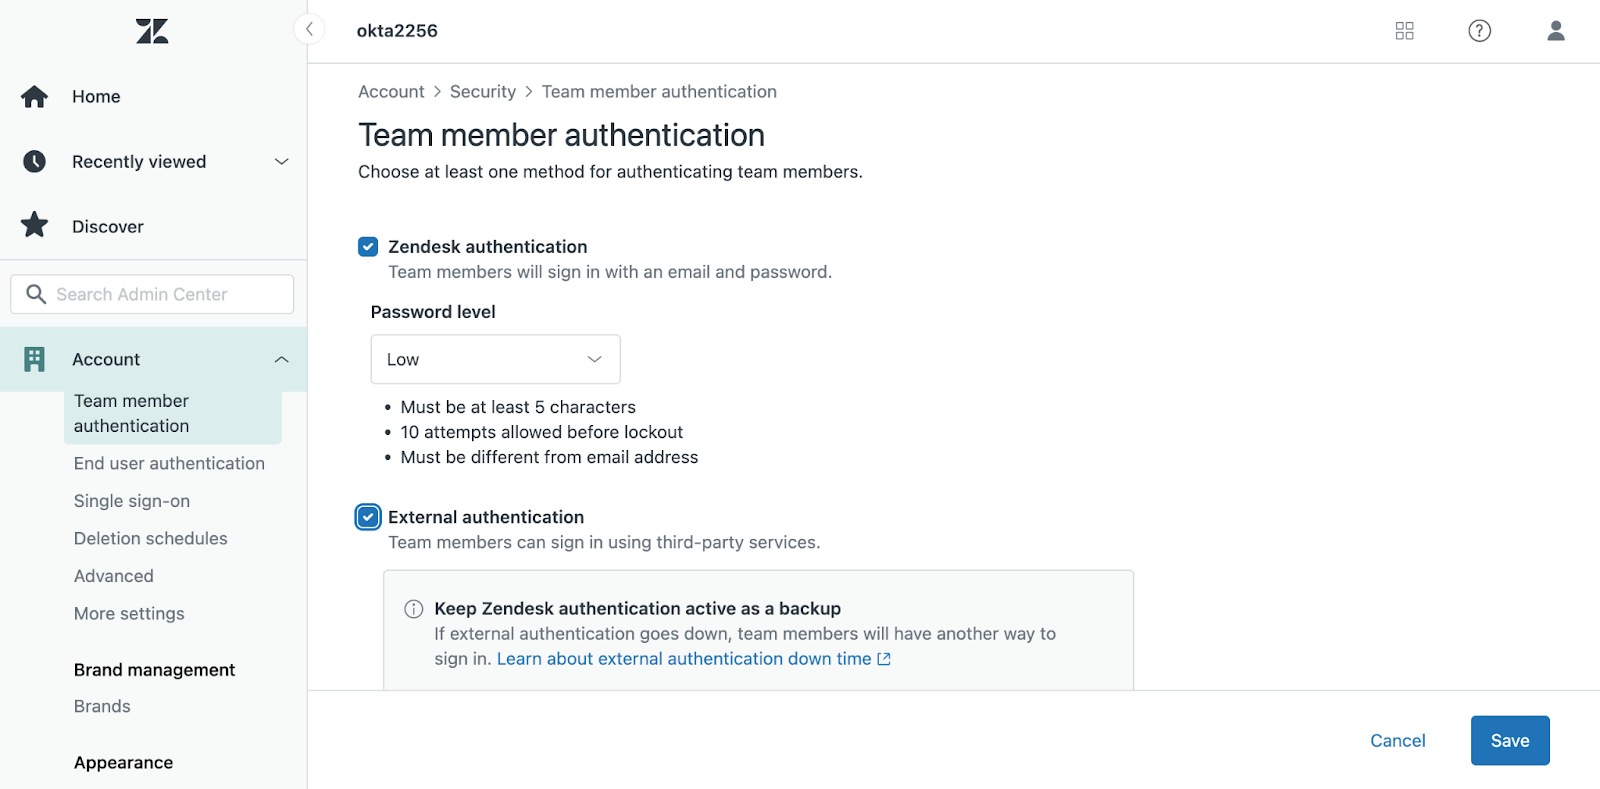
Once these values are copied over, the last step is to enable external authentication for the users that should be able to login with SAML. Zendesk allows you to enable this for end-users, staff users, or both.
Test it out
Now that everything is set up on both ends, it's time to test it out! See the video below for a demonstration of what the final flow should look like.
As you can see, once you go to your Zendesk URL, you're redirected back to Auth0, the identity provider, to sign in. Once authenticated, Auth0 sends this information back to Zendesk. Zendesk verifies the response, determines it valid, and grants you access to your Zendesk dashboard.
Note: You may have noticed that in the video, the user signed in with Google SSO. This can be enabled in the Auth0 dashboard. You'll see how to implement this in the next section.
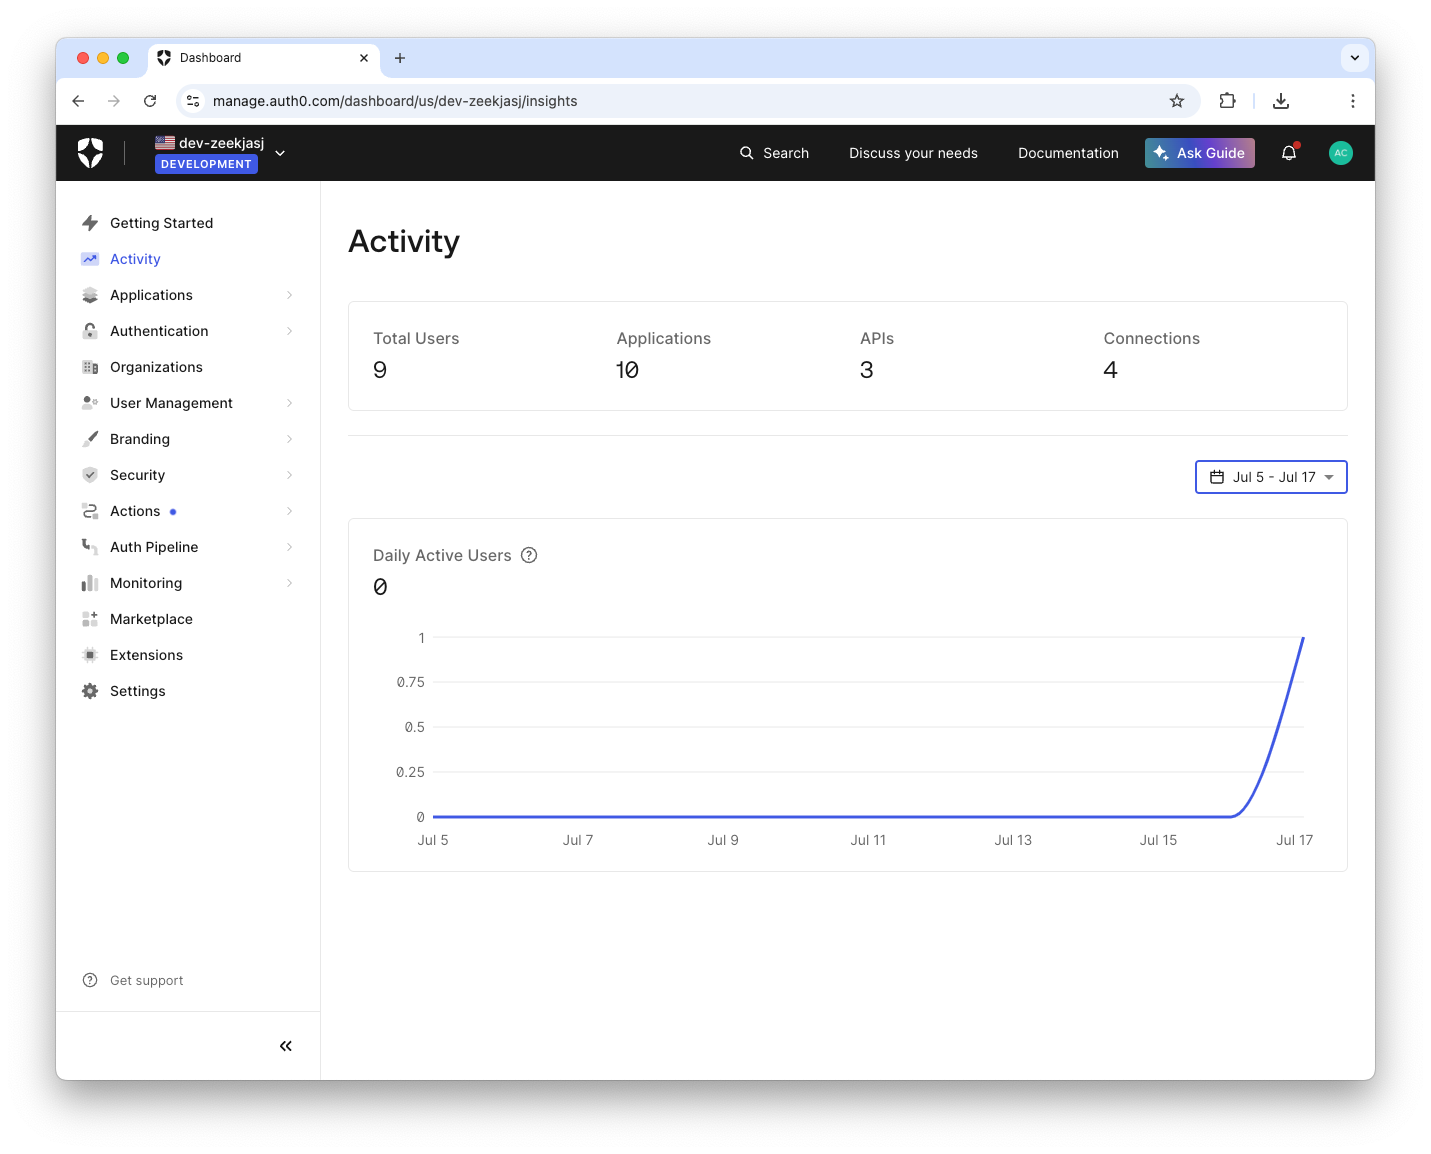
If you go back to your Auth0 dashboard, you'll now see a record of the user that just signed in.
Note: If you'd like to debug a SAML response, check out https://samltool.io. This tool can decode a SAML response and serves as a useful debugging resource.
Enable SSO (optional)
Now that your service provider is set up with Auth0, your users can sign in using an email and password by default. A common use case, especially with SAML authentication, is to have users sign in using single sign-on (SSO) with a social provider.
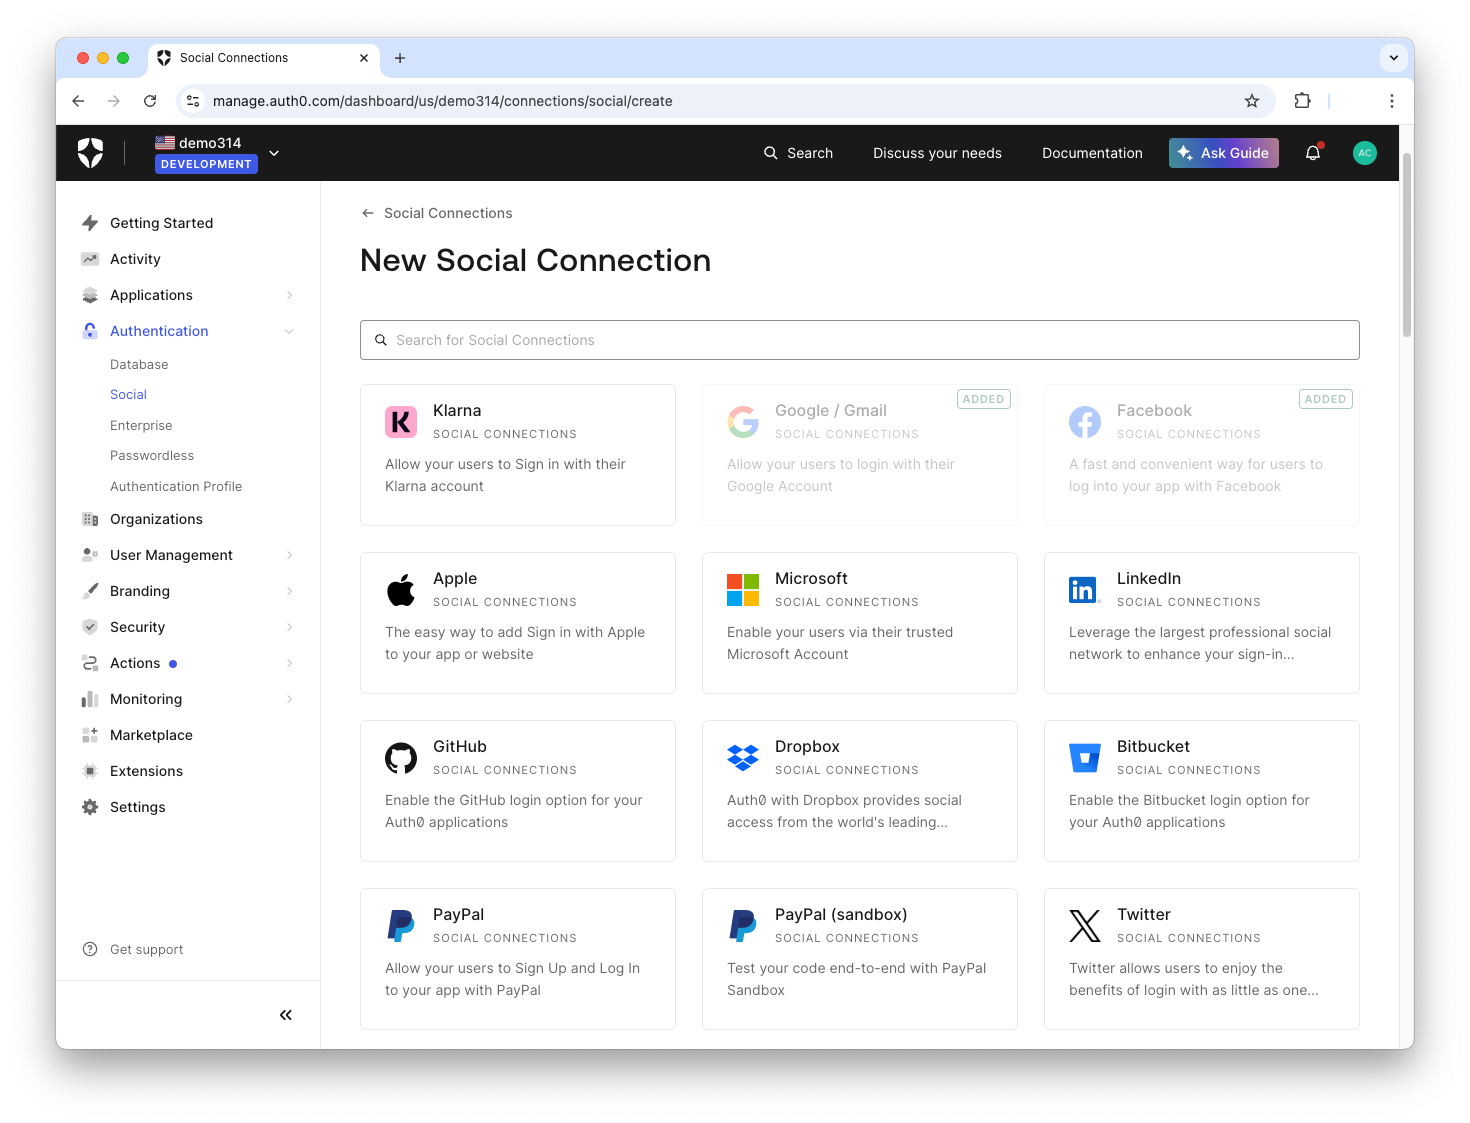
Auth0 supports several social identity providers that you can enable with the click of a button.
In your dashboard, click on Connections > Social in the sidebar. Select the provider you'd like to use and fill in the details required for that provider.
Note: Make sure you use your own keys for the selected provider. You may use the default Auth0 developer keys for testing, but they should not be used in production.
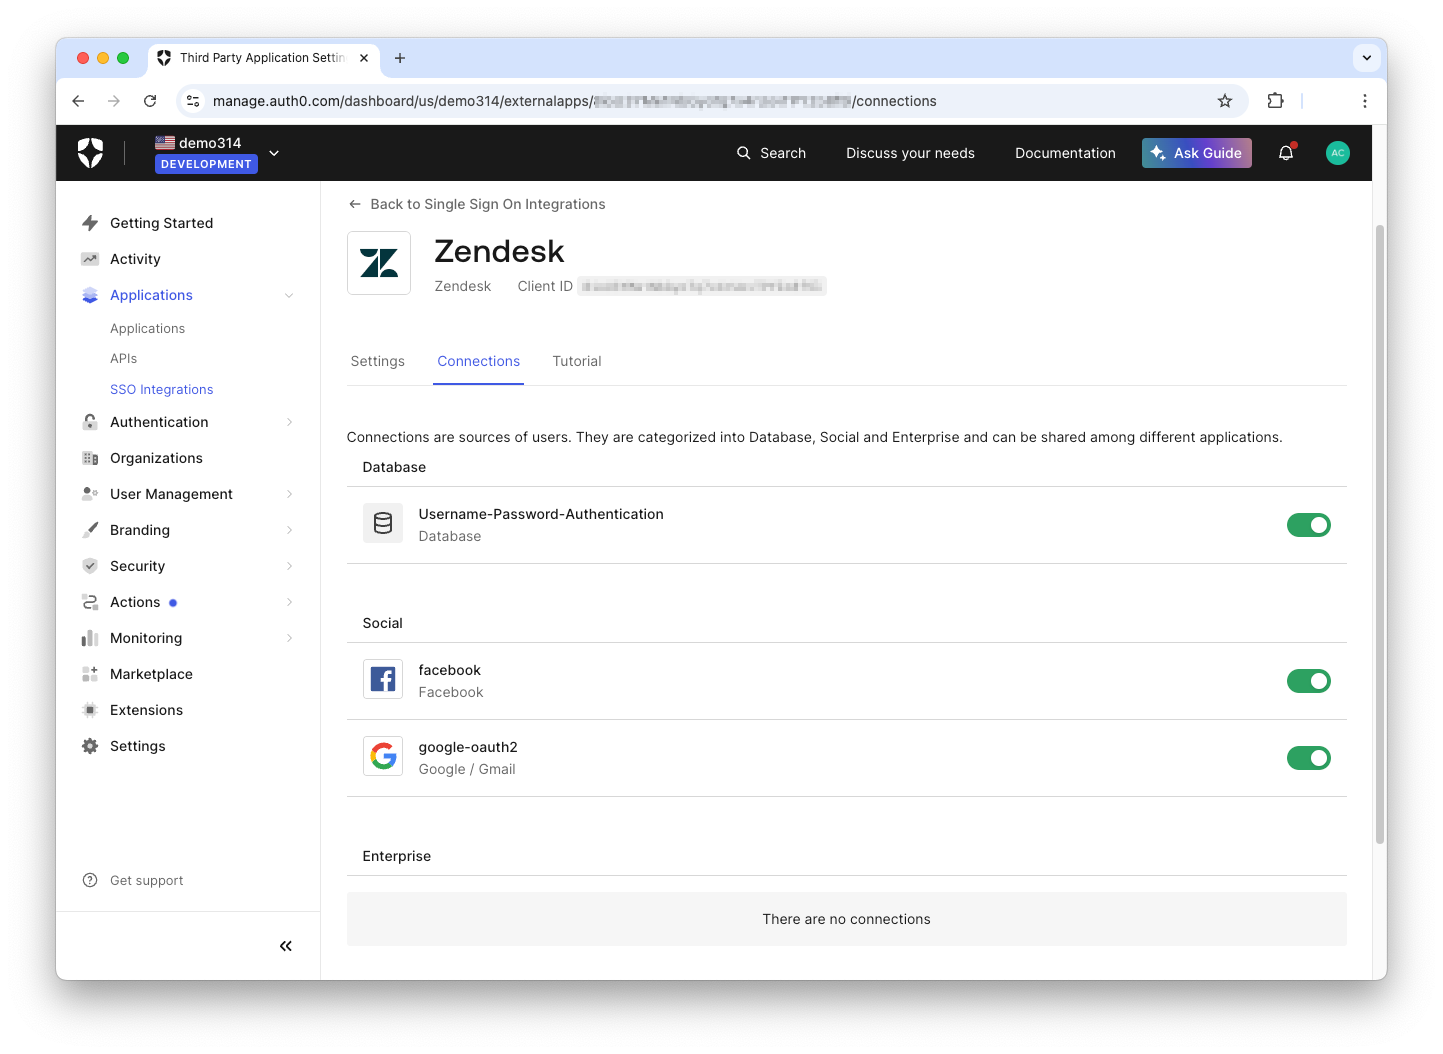
Once you've selected the social connections you want to use, go back to the SP you configured under SSO Integrations. Select the SP, and under Connections, you should see the social connection you just created. Click on the switch to enable it, and now your users are ready to sign in with any of the connections listed.
Note: Some SSO integrations are very easy, and simply require the user to enable them as described above; however, a few of the SSO options require additional steps that are specific to the social network. For example, Facebook requires the user to create an app on the Facebook Developers site, and requires some additional fields and steps like supplying an App ID. Some applications may require a review process. While a comprehensive guide to all of these processes is out of scope for this tutorial, each network typically publishes their own guide for configuring SSO. Facebook’s guide can be found here: Enable single sign-on for your organization’s managed Meta accounts in Admin Center.
More Auth0 SAML Configurations
Auth0 is adaptable when it comes to SAML configuration. Here are some of the other ways you can configure Auth0:
- Configure Auth0 as a Service Provider in a SAML federation
- SAML Configurations for SSO Integrations such as Google Apps, Hosted Graphite, Litmos, Cisco Webex, Sprout Video, FreshDesk, Tableau Server, Datadog, and more
- Configure Auth0 to use other identity Providers such as Okta, OneLogin, PingFederate 7, SalesForce, SiteMinder, and SSOCircle
- Configure Auth0 as both the service provider and identity provider
Conclusion
You have covered how SAML authentication works, the benefits SAML provides, and how to implement SAML with Auth0 as the identity provider. If you have any questions, feel free to reach out below.


