Project templates are a handy way to scaffold an application in minutes, if not seconds. .NET developers are used to templates since Microsoft provides several built-in project templates for .NET through the .NET SDK or Visual Studio.
Now you have .NET templates with Auth0 embedded, including the right Auth0 SDK and best practices for a given type of application! You can build your .NET projects integrated with Auth0 in seconds using the .NET CLI or the IDE you prefer: Visual Studio or Visual Studio Code.
What Is Auth0 Templates for .NET?
Auth0 Templates for .NET is a project that provides you with a set of project templates to help you scaffold your application with Auth0 support for authentication and authorization. Currently, the project offers templates for the following application types:
- ASP.NET Core MVC
- ASP.NET Core Web API
- Blazor Server
- Blazor WebAssembly (ASP.NET Core hosted)
More templates will be added in the near future. The templates target .NET 7 and allow you to create your applications by using the typical approach you are accustomed to using the built-in templates.
Install the Package
The Auth0 Templates for .NET project uses the modern template approach, which guarantees high compatibility across different development environments and operating systems. This means that you can use the templates with your preferred development environment: .NET CLI, Visual Studio for Windows and Mac, or Visual Studio Code.
Even JetBrains Rider is supported, but at the time of writing, there is still an issue with parameter support that prevents the full power of the templates from being used.
To install the Auth0 Templates for .NET NuGet package, run the following command in a terminal window:
dotnet new install Auth0.Templates::2.0.1Once the package is installed, use your preferred IDE to create your application.
Create Your .NET Project
Let's see how you can use the templates to create a new .NET application. First, there are some preliminary steps to take. The templates assume that you have already registered your application with Auth0 and have all the necessary configuration settings at hand.
To integrate your application with Auth0, you need an Auth0 account. You can sign up for a free one now. Then you need to register your application or your API in the Auth0 dashboard. The registration step will return some data that you will use to set up your app through the templates. Basically, this data is a subset of the following:
- the Auth0 domain,
- the client ID,
- the client secret,
- the API identifier or audience.
Once you have this data from the Auth0 dashboard, you are ready to use the Auth0 templates for building your app.
Use the templates in .NET CLI
You can leverage the dotnet new command to list the available templates. For example, you can run the following command to get the list of available Auth0 templates:
dotnet new list auth0As a result of this command, you should see the following list:
Template Name                 Short Name         Language  Tags
----------------------------  -----------------  --------  ----------------------------
Auth0 ASP.NET Core Web API    auth0webapi        [C#]      Web/WebAPI/Auth0
Auth0 ASP.NET Core Web App    auth0webapp        [C#]      Web/MVC/Razor Pages/Auth0
Auth0 Blazor Server App       auth0blazorserver  [C#]      Web/Blazor/Auth0
Auth0 Blazor WebAssembly App  auth0blazorwasm    [C#]      Web/Blazor/WebAssembly/Auth0
Suppose you want to learn the CLI syntax for using the Blazor Server template. You run the following command in your terminal:
dotnet new auth0blazorserver --helpThis command will show you all the options you can provide to build an already configured Blazor Server application.
To create a new Blazor Server app through the Auth0 template, use the following command:
dotnet new auth0blazorserver \
    --domain <YOUR_AUTH0_DOMAIN> \
    --client-id <YOUR_CLIENT_ID> \
    -o MyBrandNewApp
The line continuation character (
\) shown above is just for presentation purposes. Use the appropriate character for your command line shell if you want to use it in your operating system.
Replace the placeholders <YOUR_AUTH0_DOMAIN> and <YOUR_CLIENT_ID> with the actual values you got when registering your app in the Auth0 dashboard. This command will create your Blazor Server application in the MyBrandNewApp folder.
After creating the app, you can run it and test authentication support in a minute!
Read this document to learn how to use the available Auth0 templates.
Use the templates in Visual Studio
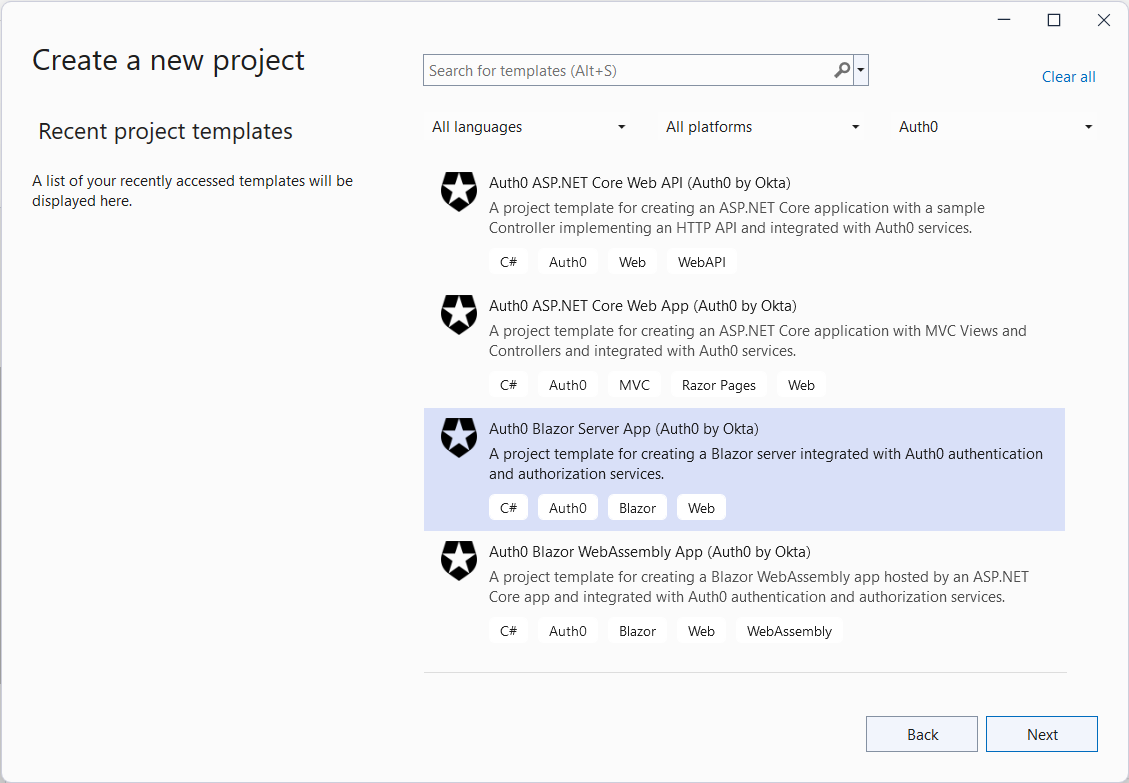
The templates installed with the above command are also available in Visual Studio. Select the Auth0 template for the app you want to create, as shown in the following picture for Visual Studio for Windows:

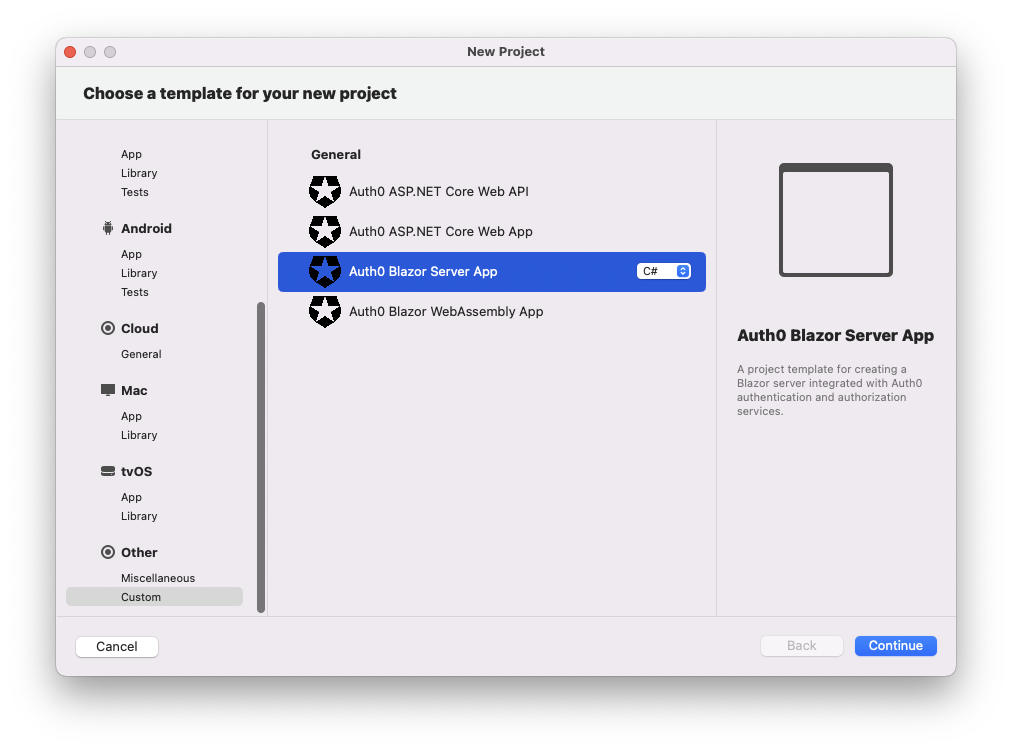
The following picture comes from Visual Studio for Mac:

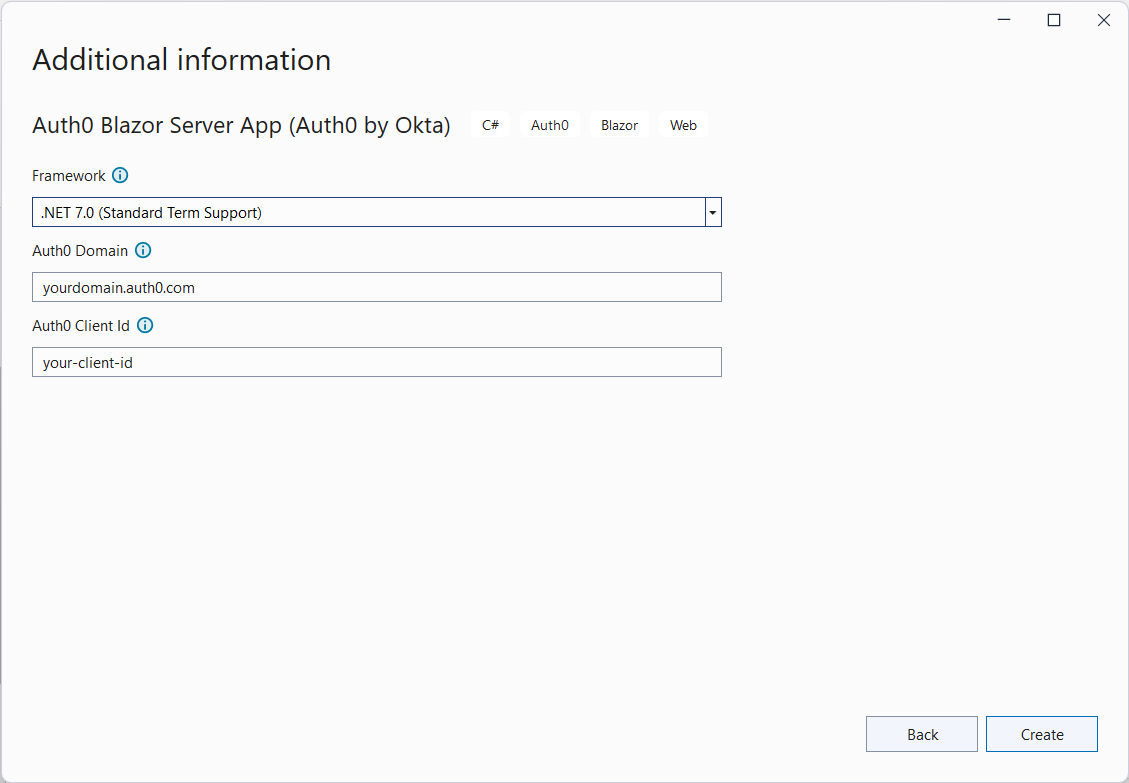
You will then be prompted for the registration information, as shown in the following picture (Visual Studio for Windows):

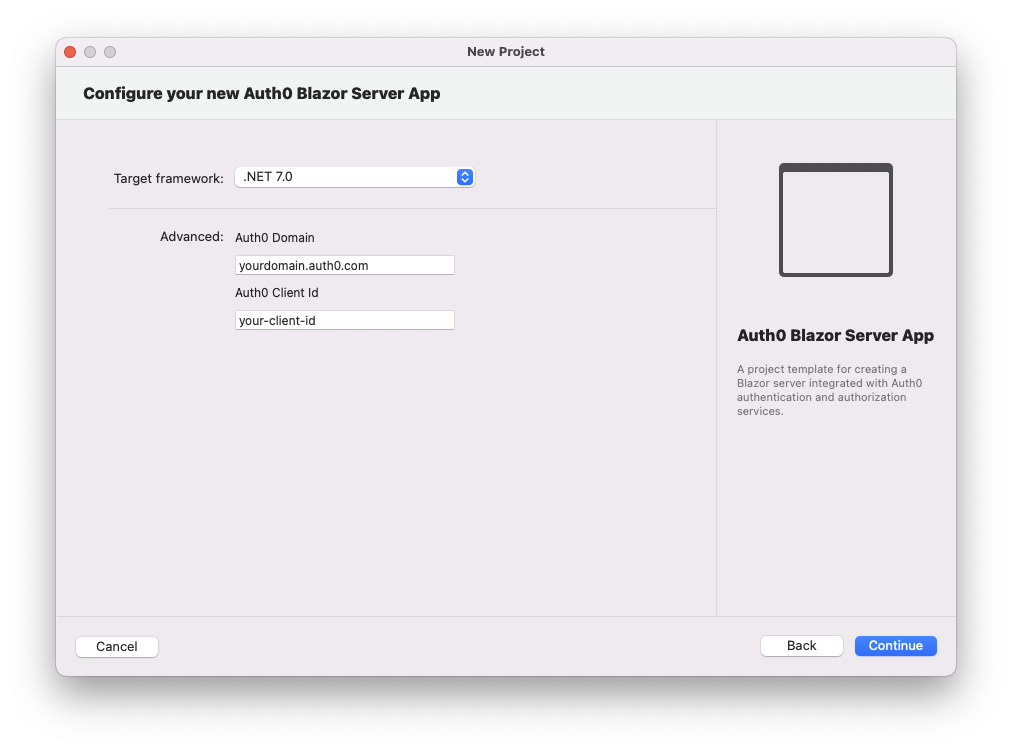
This is the corresponding screen on Visual Studio for Mac:

Next, you specify the project's name and where you want to save it, as you would with standard templates. That's it! Once the application is created, you can run it and test authentication.
Read this document to learn how to use the available Auth0 templates.
Leverage Auth0's authentication and authorization services in your .NET applications.
DOWNLOAD THE FREE EBOOK
Looking Forward
This is the first release of the Auth0 Templates for .NET package, but we want to add new templates and improve the developer experience as well. Your feedback is highly appreciated, so please leave your comments below and let us know what you think about this project.
The Auth0 Templates for .NET project is open source, so your contribution is also welcome! If you think you can help with this project, check out our contribution policy and get involved.


