TL;DR: Many AngularJS 1.x developers are interested in Angular 2+, but the major differences between versions 1 and 2+ are daunting when we have so many AngularJS 1 apps already in production or maintenance. Learn how to migrate a real-world AngularJS app to a fresh Angular 2+ build: what's the same, what's similar, and what's completely different. After this tutorial, you should be prepared to tackle your own migrations as well as new Angular 2+ projects. The final code for our Angular 2+ app can be cloned from the ng2-dinos GitHub repo.
AngularJS 1 and Angular 2+
AngularJS 1.x has been a frontrunner among JavaScript frameworks over the past few years. There are thousands of production sites and apps built with Google's "superheroic MVW framework" and many more still in development. In mid-September 2016, Angular 2 was released after a lengthy period of betas and release candidates. Angular developers knew this was coming and that Angular 2 was a full rewrite and platform implementation, not an incremental update.
While Angular developers were and are eager to try Angular 2+, adoption can be challenging. Many of us have Angular 1 apps in development or maintenance and aren't in a position to migrate them to Angular 2 due to tight deadlines, budget constraints, client or management reluctance, etc. Angular 1 is still being maintained under the "AngularJS" moniker and Angular 1 apps are not about to go away.
Note: Angular 2+ uses SemVer (Semantic Versioning). This means that unlike Angular 1, there will no longer be breaking changes in point releases. There will not be an Angular 3; instead, Angular 4 will be the next major release in order to correlate to version 4 of the Angular router.
Migrate vs. Upgrade
Angular 2 is a powerful and attractive platform. Many developers will have their first opportunity to dig in when they tackle migrating an existing Angular 1 app to Angular 2. At this time, upgrading the original codebase is extremely difficult: Angular 2 is not an iteration of Angular 1. Moving between them is more straightforward when migrating to a fresh build that translates the same features on the new platform.
We'll walk through the process of migrating an Angular 1 app to Angular 2. Our Angular 1 project is relatively small but it represents a scalable, real-world Single Page Application. After following this tutorial, you should have a better understanding of how to get started with Angular 2 and how features from Angular 1 translate to Angular 2.
This tutorial assumes you are comfortable developing apps with AngularJS version 1.x. If you're looking to learn Angular 2+ without an Angular 1 comparison, check out resources like Angular 2 Authentication and Getting Started with Angular 2.
Angular 1 "ng1-dinos"
Our Angular 1 app is called ng1-dinos. The code is available at the ng1-dinos GitHub repo. It has the following features:
- Routing (dinosaurs listing with individual detail pages)
- Filtering (search for dinosaurs by name)
- Calls an external Node API to get dinosaur data
- SCSS and Bootstrap CSS
- Custom off-canvas navigation
- Metadata factory to provide dynamic
<title>s - Gulp build
- Guided by the Angular 1 Style Guide
- Scalability
Angular 1 Setup Before Migrating to Angular 2
Let's set up ng1-dinos and get it running locally.
Dependencies
Follow the instructions on the following sites to install these dependencies:
- NodeJS with npm
- Gulp (install globally with
npm install -g gulp)
We'll also need to clone sample-nodeserver-dinos. This local Node server will provide the external API for both our ng1-dinos and ng2-dinos apps. Follow the instructions in the sample-nodeserver-dinos README to get it installed and running on http://localhost:3001.
Install and Run "ng1-dinos"
- Clone ng1-dinos from GitHub to a local directory of your choosing.
- Run
npm installfrom the root directory. - Run
gulpto serve the application (runs locally on http://localhost:8000).
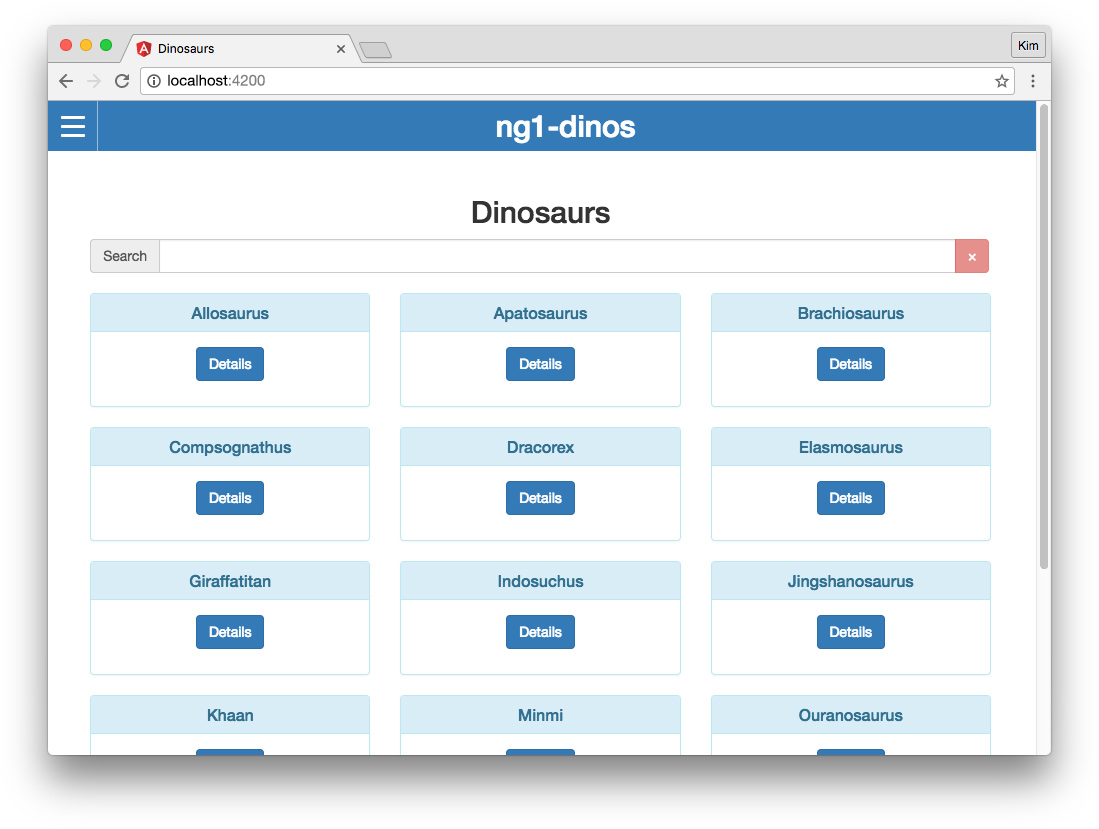
Once you have ng1-dinos and the Node API running, the app should look like this in the browser:
Important: Take some time to familiarize with the file structure, code, and features. We won't be making any changes to this application, but it's important to get comfortable with it because everything we do in our Angular 2 app will be a migration of ng1-dinos.
Introducing "ng2-dinos"
Our migrated Angular 2 application will be called ng2-dinos. The full source code for the completed app can be cloned from the ng2-dinos GitHub repo. This app will use the same Node API. From a user's perspective, we want ng2-dinos to be indistinguishable from ng1-dinos. Under the hood, we'll rewrite the app to take advantage of the powerful new features of Angular 2.
Angular 2 brings in several technologies that ng1-dinos does not take advantage of. Instead of a Gulp build, we'll use the Angular CLI to set up and serve ng2-dinos. We're going to write the app using TypeScript and ES6 which will be transpiled by the Angular CLI.
We'll follow the Angular 2 Style Guide for the most part, with a few minor exceptions regarding file structure. For this tutorial, we want to preserve as much of a correlation with ng1-dinos as we can. This will make it easier to follow the migration of features.
Angular 2 Setup for Migrating Angular 1
Let's get started with our ng2-dinos build!
Dependencies
You should have NodeJS with npm installed already.
Next, install the Angular CLI globally with the following command:
$ npm install -g @angular/cliInitialize ng2-dinos
The first thing we'll do is initialize our new Angular 2 app and get it running. We'll use the Angular CLI to generate a new project with SCSS support using the following command:
$ ng new ng2-dinos --style=scssNext we can serve the app by running the following command from the root directory of our new app:
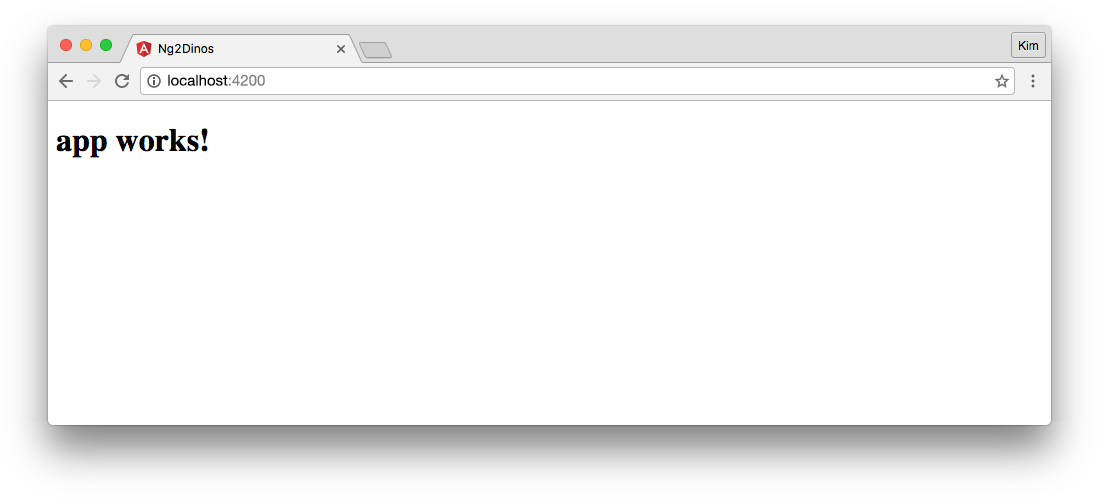
$ ng serveWe should be able to view the site in the browser at http://localhost:4200. The app should look like this:
Take a look at the file structure for your new ng2-dinos app. You may notice there are test files and configuration, but we won't cover testing in this tutorial. If you'd like to learn more about testing Angular, check out Testing in the Angular docs and articles like Angular 2 Testing In Depth: Services and Three Ways to Test Angular 2 Components.
Linting and Style Guide
The Angular CLI provides code linting with TSLint and Codelyzer. TSLint provides TypeScript linting and Codelyzer provides TSLint rules that adhere to the Angular 2 Style Guide. We can view all of these linting rules at ng2-dinos/tslint.json. We can lint our project using the following command:
$ ng lintThis tutorial follows the Style Guide and adheres to the default rules in the TSLint config file. It's good to lint your project periodically to make sure your code is clean and free of linter errors.
Note: The Angular CLI TSLint
"eofline": truerule requires files to end with a newline. This is standard convention. If you want to avoid lots of newline errors when linting, make sure that your files include this.
Customizing Our Angular Project for Migration
Now that we have a working starter project for our ng2-dinos app, we want to restructure it and add some libraries.
Bootstrap CSS
Let's start by adding the Bootstrap CSS CDN to the ng2-dinos/src/index.html file. We can also add a default <title> and some <meta> tags:
<!-- ng2-dinos/src/index.html -->
<!doctype html>
<html>
<head>
  <meta charset="utf-8">
  <title>ng2-dinos</title>
  <meta name="viewport" content="width=device-width, initial-scale=1">
  <meta name="author" content="Auth0">
  <meta name="description" content="Learn about some popular as well as obscure dinosaurs!">
  <base href="/">
  <!-- Bootstrap CDN stylesheet -->
  <link
    rel="stylesheet"
    href="https://maxcdn.bootstrapcdn.com/bootstrap/3.3.7/css/bootstrap.min.css"
    integrity="sha384-BVYiiSIFeK1dGmJRAkycuHAHRg32OmUcww7on3RYdg4Va+PmSTsz/K68vbdEjh4u"
    crossorigin="anonymous">
</head>
<body>
  <app-root>Loading...</app-root>
</body>
</html>
Note: The code for including the Bootstrap CSS can be found at Bootstrap CDN - Getting Started. We're using version 3.3.7 because it is latest stable at the time of writing. Please note that if you upgrade to version 4.x, there are major changes to be mindful of.
Third Party Libraries
The only third party JavaScript we want is a custom build of Modernizr. We'll be doing quite a bit of copying and pasting from ng1-dinos since we're doing a migration, so it's best to keep your local ng1-dinos project handy.
Our minified, custom Modernizr build can be found at ng1-dinos/src/assets/js/vendor/modernizr.min.js. Create the necessary folder structure in ng2-dinos:
ng2-dinos
  |-src/
    |-assets/
      |-js/
        |-vendor/
          |-modernizr.min.js
Angular CLI uses Webpack to bundle local dependencies, so we won't add Modernizr to our ng2-dinos index file. Instead, we'll add a reference to the .angular-cli.json app's scripts:
// ng2-dinos/.angular-cli.json

{...
  "apps": [
    {...
      "scripts": [
        "assets/js/vendor/modernizr.min.js"
      ],
      ...
Global SCSS
We initialized our project with the --styles=scss flag so SCSS is supported and a global styles.scss file has already been generated. However, it's currently located at the root of the ng2-dinos/src/ folder. To maintain a similar file structure with ng1-dinos, it needs to live in ng2-dinos/src/assets/scss/ instead.
Create a ng2-dinos/src/assets/scss/ folder and move the ng2-dinos/src/styles.scss file into it. Then update the .angular-cli.json app's styles reference:
// ng2-dinos/.angular-cli.json

{...
  "apps": [
    {...
      "styles": [
        "assets/scss/styles.scss"
      ],
      ...
Note: When moving or adding new files, you'll need to stop and restart the Angular CLI server (
Ctrl+C,ng serve) to avoid module build errors. Changes within files are watched and live reloaded, but reorganizing the file structure can break this.
Now let's add some global SCSS from ng1-dinos. We'll copy the files and subdirectories from ng1-dinos/src/assets/css/scss/core/ to ng2-dinos/src/assets/scss/.
Note: If you paid close attention, you'll notice we've left off a folder in ng2-dinos. Our Angular 1 ng1-dinos app had a
cssfolder withscssinside it. We don't need thecssfolder in ng2-dinos because of the Angular CLI Webpack bundling.
When we're done, our ng2-dinos global styles file structure should look like this:
ng2-dinos
  |-src/
    |-assets/
      |-scss/
        |-partials/
          |-_layout.vars.scss
          |-_responsive.partial.scss
        |-_base.scss
        |-_layout.scss
        |-_presentation.scss
        |-styles.scss
Now we'll @import these SCSS files in the ng2-dinos global styles.scss:
/* ng2-dinos/src/assets/scss/styles.scss */

// partials
@import 'partials/layout.vars';
@import 'partials/responsive.partial';

// global styles
@import 'base';
@import 'presentation';
@import 'layout';
Restart the Angular CLI server and our app's background color should change to grey. This is a visual indicator that our new global styles are working. If we inspect the page, we should see the global <body> styles applied.
Finally, we'll clean up the _base.scss file. Angular 2 doesn't utilize ng-cloak so we'll remove the ng-cloak ruleset. Afterwards, this is what remains:
/* ng2-dinos/src/assets/scss/_base.scss */

/*--------------------
       BASICS
--------------------*/

/*-- Cursor --*/

a,
input[type=button],
input[type=submit],
button {
  cursor: pointer;
}

/*-- Forms --*/

input[type="text"],
input[type="number"],
input[type="password"],
input[type="date"],
select option,
textarea {
  font-size: 16px;    /* for iOS to prevent autozoom */
}
Update App File Structure
The Angular CLI creates all app files (modules, components, services, pipes, etc.) relative to ng2-dinos/src/app/. Note that the ng2-dinos app has a component (app.component.ts|.html|.scss|.spec.ts) in the root of this folder. This is our app's root component, but we want to move it into a subfolder to keep ng2-dinos organized, scalable, and correlated with ng1-dinos.
Note: Recall that this tutorial won't cover testing. The
.spec.tsfiles have been largely removed from the sample ng2-dinos repo to make it simpler to view. The Angular CLI creates these files automatically when generating new architecture. Feel free to keep them in your project and write tests. For brevity, the rest of the tutorial will no longer mention.spec.tsfiles. If you're using them, just remember to include them whenever managing files.
Let's move the app.component[.html|.scss|.ts] files to a new folder: ng2-dinos/src/app/core/. The app folder's file structure should now look like this:
ng2-dinos
  |-src/
    |-app/
      |-core/
        |-app.component[.html|.scss|.ts]
      |-app.module.ts
This breaks our build. We can fix it by updating the ng2-dinos/src/app/app.module.ts file. If you have a TypeScript extension enabled in your code editor or IDE, you should see syntax highlighting where TypeScript detects problems. We need to update the path to app.component like so:
// ng2-dinos/src/app/app.module.ts

...
import { AppComponent } from './core/app.component';
...
Note: Always keep in mind that Angular 2 is very interconnected with regard to dependency imports. When we move files, we break references in other places. The CLI tells us where the problems are when we build. TypeScript code hinting in our editor can help too. To address the issue at its root, we can use additional
@NgModules to manage dependencies; you can learn more by reading Use @NgModule to Manage Dependencies in your Angular 2 Apps.
That's it for setup! We can officially start migrating ng1-dinos to ng2-dinos.
Angular 2 Root App Component
In the ng1-dinos Angular 1 app, ng-app was on the <html> element. This provided Angular control over the <head>, allowing us to dynamically update the <title> with a custom metadata factory. In Angular 2, our root app component is located inside the <body>. Angular 2 provides a service to manage page <title>s and we shouldn't use an <html>-level app root anymore.
As we saw above, the body of our Angular 2 ng2-dinos index.html file looks like this:
<!-- ng2-dinos/src/index.html -->
...
<body>
  <app-root>Loading...</app-root>
</body>
In comparison, the body of our Angular 1 ng1-dinos index.html file looks like this:
<!-- ng1-dinos/src/index.html -->
...
<body>
  <div class="layout-overflow">
    <div
      class="layout-canvas"
      nav-control
      ng-class="{'nav-open': nav.navOpen, 'nav-closed': !nav.navOpen}">
      <!-- HEADER -->
      <header
        id="header"
        class="header"
        ng-include="'app/header/header.tpl.html'"></header>
      <!-- CONTENT (Angular View) -->
      <div
        id="layout-view"
        class="layout-view"
        ng-view autoscroll="true"></div>
      <!-- FOOTER -->
      <footer
        id="footer"
        class="footer clearfix"
        ng-include="'app/footer/footer.tpl.html'"></footer>
    </div> <!-- /.layout-canvas -->
  </div> <!-- /.layout-overflow -->
  ...
</body>
The layout markup, header, content, and footer children will now move to the ng2-dinos root component app.component (<app-root>).
App Component Template
Let's stub out app.component.html:
<!-- ng2-dinos/src/app/core/app.component.html -->
<div class="layout-overflow">
  <div
    class="layout-canvas"
    [ngClass]="{'nav-open': navOpen, 'nav-closed': !navOpen}">
    <!-- HEADER -->
    <!-- CONTENT -->
    <div id="layout-view" class="layout-view">
        ...content goes here...
    </div>
    <!-- FOOTER -->
  </div> <!-- /.layout-canvas -->
</div> <!-- /.layout-overflow -->
App Component Styles
We already included global SCSS for the site layout and off-canvas nav functionality. Because the styles for the layout, header, and navigation interact with each other, we won't componetize the layout styles in this tutorial. We want to maintain a fairly direct migration path with ng1-dinos, but there will be room for refactoring after the app is migrated. We won't use the app.component.scss file so let's delete it.
App Component TypeScript
Now we'll add the navOpen boolean property we referenced for controlling the .nav-open/.nav-closed classes in the app.component.html above. We also need to remove the reference to app.component.scss since we deleted that file:
// ng2-dinos/src/app/core/app.component.ts

import { Component } from '@angular/core';

@Component({
  selector: 'app-root',
  templateUrl: './app.component.html'
})
export class AppComponent {
  navOpen: boolean;

  constructor() { }
}
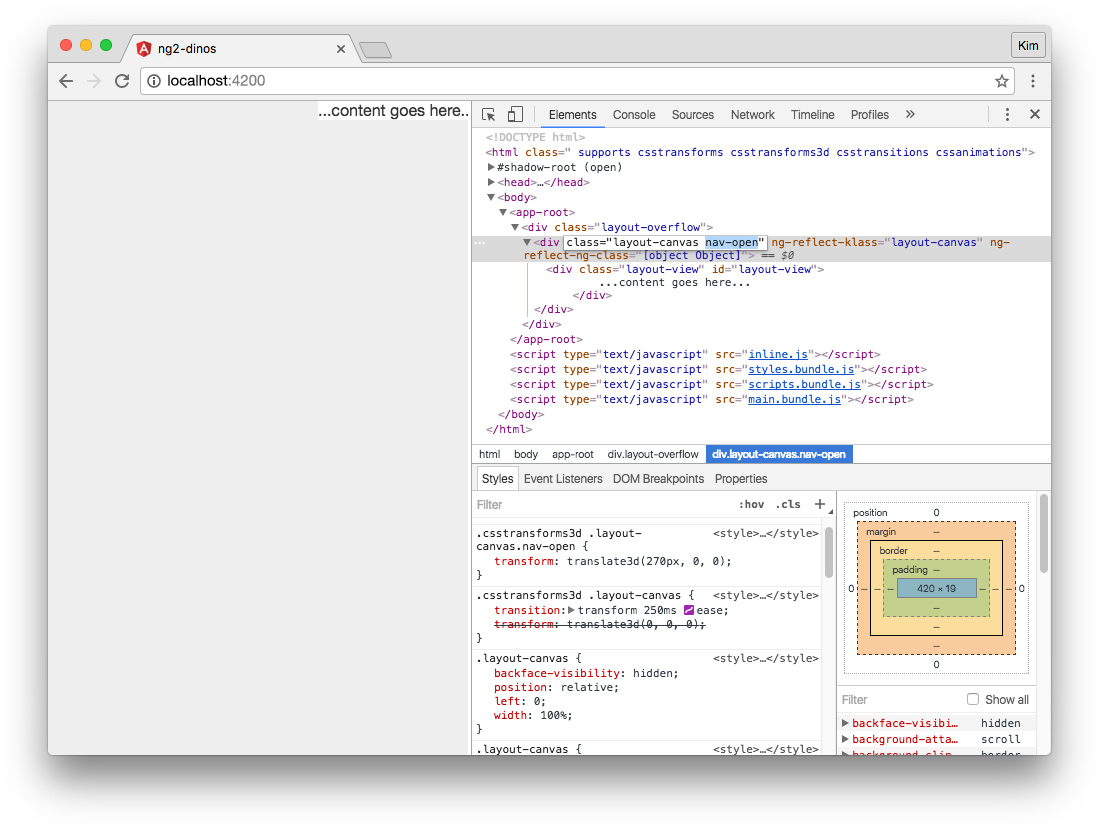
If we restart the Angular CLI server now and inspect the DOM in the browser, we'll see a .nav-closed class on the <div class="layout-canvas"> element. We can use the inspector to change .nav-closed to .nav-open. If we do this, we should see the page content slide to the right:
Now we're ready to create the header.
Angular 2 Header Component
We can use the Angular CLI's g command (shortcut for generate) to generate new components for our app. Stop the server (Ctrl+C) and let's create a header component:
$ ng g component headerNew components are created relative to the ng2-dinos/src/app root. The resulting output should resemble the following:
We can see from the terminal output that new files were created, but let's also look at the app.module.ts file so we're familiar with everything necessary for adding new components to an Angular 2 app.
app.module.ts is our app's primary @NgModule. It now looks like this:
// ng2-dinos/src/app/app.module.ts

import { BrowserModule } from '@angular/platform-browser';
import { NgModule } from '@angular/core';
import { FormsModule } from '@angular/forms';
import { HttpModule } from '@angular/http';

import { AppComponent } from './core/app.component';
import { HeaderComponent } from './header/header.component';

@NgModule({
  declarations: [
    AppComponent,
    HeaderComponent
  ],
  imports: [
    BrowserModule,
    FormsModule,
    HttpModule
  ],
  providers: [],
  bootstrap: [AppComponent]
})
export class AppModule { }
As you can see, the HeaderComponent class is imported and has also been added to the @NgModule's declarations array.
Add Header Element to App Component Template
If we open the header.component.ts file, we can see that the @Component's selector is app-header. We generally want custom elements to be hyphenated as per the W3C spec for custom elements. This is also covered by the Angular 2 Style Guide. The Angular CLI generates new component selectors with a prefix. By default, this prefix is app. This way, we won't get conflicts with native elements when calling this component (since <header> already exists in the HTML5 spec).
Let's add <app-header> to our app.component.html:
<!-- ng2-dinos/src/app/core/app.component.html -->
...
    <!-- HEADER -->
    <app-header></app-header>
...
Header Component Template
Let's add our markup to the header component similar to ng1-dinos/src/app/header/header.tpl.html. Open header.component.html and add HTML for the header, off-canvas toggle, and navigation menu:
<!-- ng2-dinos/src/app/header/header.component.html -->
<header id="header" class="header">
  <div class="header-page bg-primary">
    <a class="toggle-offcanvas bg-primary" (click)="toggleNav()"><span></span></a>
    <h1 class="header-page-siteTitle">
      <a href="/">ng2-dinos</a>
    </h1>
  </div>
  <nav id="nav" class="nav" role="navigation">
    <ul class="nav-list">
      <li>
        <a href>Dinosaurs</a>
      </li>
      <li>
        <a href>About</a>
      </li>
      <li>
        <a href="https://github.com/auth0-blog/sample-nodeserver-dinos">Dino API on GitHub</a>
      </li>
    </ul>
  </nav>
</header>
This is mostly standard markup. The only Angular 2 functionality so far is a (click) binding on the link to toggle the off-canvas menu. We'll add more Angular later once we have multiple views and routing in place.
Header Component Styles
First grab the Angular 1 ng1-dinos/src/assets/css/scss/components/_nav.scss file and copy it into the ng2-dinos header component folder.
Now let's @import it and add SCSS to header.component.scss:
/* ng2-dinos/src/app/header/header.component.scss */

/*--------------------
       HEADER
--------------------*/

@import '../../assets/scss/partials/layout.vars';
@import 'nav';

.header-page {
  color: #fff;
  height: 50px;
  margin-bottom: 10px;
  position: relative;

  &-siteTitle {
    font-size: 30px;
    line-height: 50px;
    margin: 0;
    padding: 0 0 0 50px;
    position: absolute;
      top: 0;
    text-align: center;
    width: 100%;

    a {
      color: #fff;
      text-decoration: none;
    }
  }
}
We need to make one modification in the _nav.scss file. We'll change the .nav-open & selector to :host-context(.nav-open) & instead:
/* ng2-dinos/src/app/header/_nav.scss */

...
  :host-context(.nav-open) & {
    span {
      background: transparent;

      &:before,
      &:after { ...
This has to do with how Angular 2 encapsulates DOM node styles. If you've ever used native web components or Google Polymer, you should be familiar with shadow DOM encapsulation in components. Regardless, you may want to read about View Encapsulation in Angular 2.
In a nutshell, Angular 2's default encapsulation mode is Emulated. This means styles are scoped to their components with unique attributes that Angular 2 generates. Having component-isolated styles is often very useful—except for when we want to reach up the DOM tree and have our component styles affected by ancestors.
We don't need to change View Encapsulation in the header component class though. There is only one reference to an ancestor in _nav.scss. We can use special selectors like :host-context() to look up the cascade instead.
Now the component CSS can access the .nav-open class up the DOM tree from the header component.
Note: Recall that the site layout and navigation functionality styles remained global rather than being componetized in
app.component.scss(instead we deleted that file). We could have moved the sections of the global_layout.scssinto different child components and replaced references to parent styles with:host-context(). We didn't do this because the goal of this tutorial is to demonstrate as close to a 1:1 migration as possible while covering many topics. When we're finished migrating the entire app, I encourage you to refactor where desirable! We'll highlight refactoring suggestions at the end of each part of this tutorial.
Angular 2 Component Interaction
Let's make our header component functional. We need the header to communicate with the root app component to implement the off-canvas navigation.
Header Component TypeScript
Open the header.component.ts file. We'll implement component communication with inputs/outputs and events. Remember that we added a click event binding to our header HTML that looked like this:
<a class="toggle-offcanvas bg-primary" (click)="toggleNav()"><span></span></a>Note:
[],(), and[()]are "binding punctuation" and refer to the direction of data flow.()indicates a binding to an event. You can read more about binding syntax in the Angular 2 docs.
There are a few things we need to do to make this event handler functional.
// ng2-dinos/src/app/header/header.component.ts

import { Component, OnInit, Output, EventEmitter } from '@angular/core';

@Component({
  selector: 'app-header',
  templateUrl: './header.component.html',
  styleUrls: ['./header.component.scss']
})
export class HeaderComponent implements OnInit {
  @Output() navToggled = new EventEmitter();
  navOpen: boolean = false;

  constructor() { }

  ngOnInit() {
  }

  toggleNav() {
    this.navOpen = !this.navOpen;
    this.navToggled.emit(this.navOpen);
  }

}
The header component is a child of the root app component. We need a way to notify the parent when the user clicks the hamburger to open or close the menu. We'll do this by emitting an event that the parent can bind to.
We'll import Output and EventEmitter from @angular/core and then create a new event emitter @Output decorator. We also need a way to track whether the navigation is open or closed, so we'll add a navOpen property that defaults to false.
Note: Notice that we didn't declare a type annotation for
navOpen. This is because we initialized the property with a value. The type is inferred from this value. Adding type annotations that can be inferred automatically will result in linting errors.
Now we need to define the click event handler. We already named this function toggleNav() in our header.component.html. The function will toggle the navOpen boolean and emit the navToggled event with the current state of navOpen.
Header Communication with App Component
Next we need to listen for the navToggled event in the parent. Add the following declarative code to app.component.html:
<!-- ng2-dinos/src/app/core/app.component.html -->
...
    <!-- HEADER -->
    <app-header (navToggled)="navToggleHandler($event)"></app-header>
...
Now we'll create the navToggleHandler($event) in app.component.ts:
// ng2-dinos/src/app/core/app.component.ts

import { Component } from '@angular/core';

@Component({
  selector: 'app-root',
  templateUrl: './app.component.html'
})
export class AppComponent {
  navOpen: boolean;

  navToggleHandler(e: boolean) {
    this.navOpen = e;
  }
}
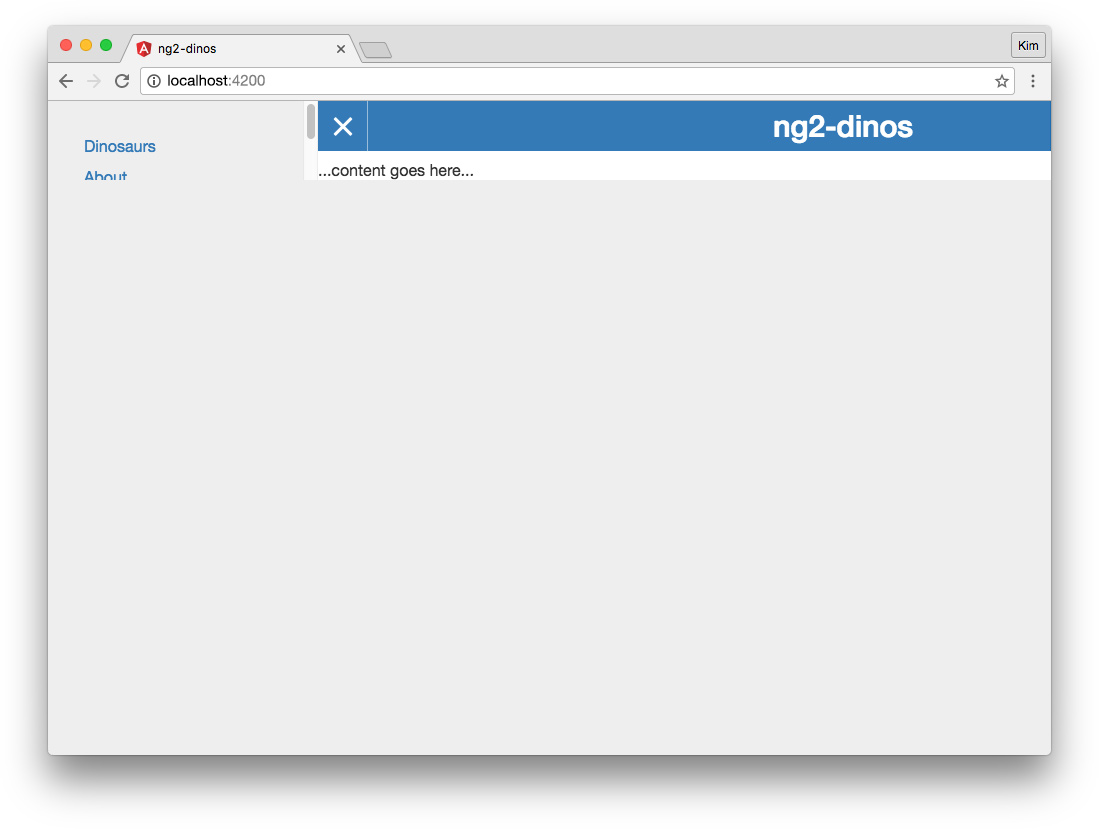
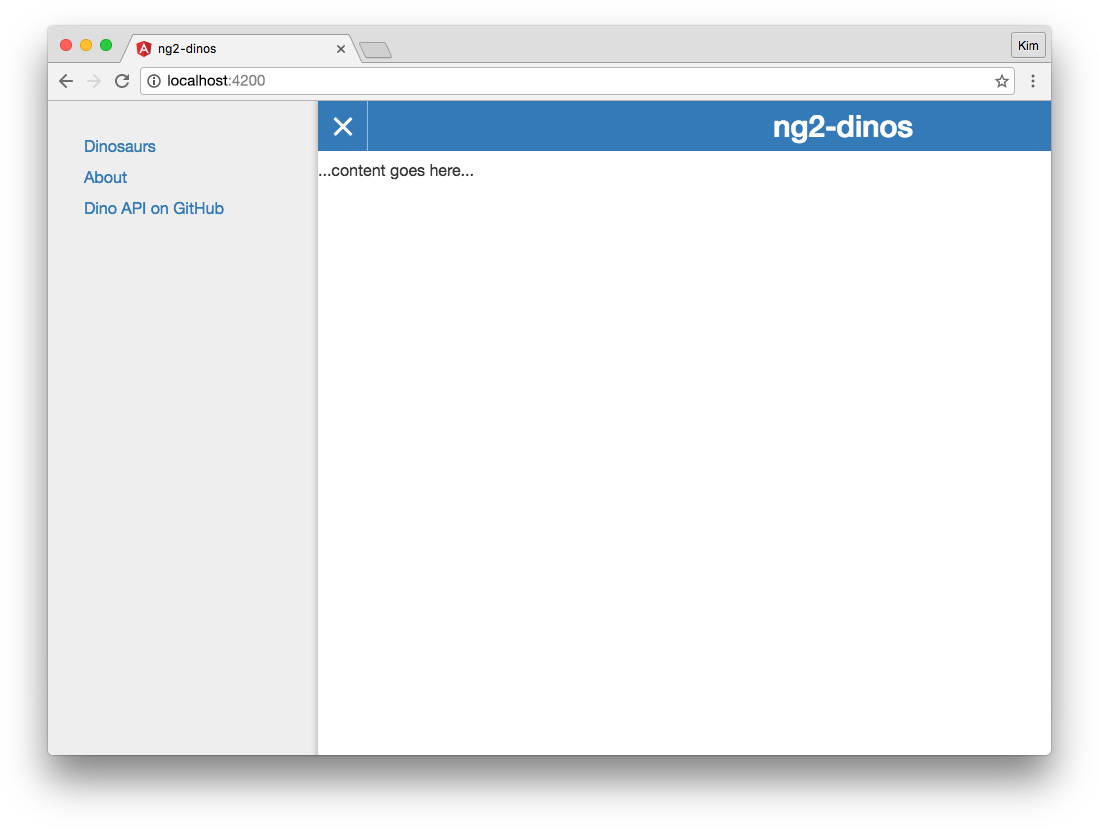
If we build now, we should be able to open and close the off-canvas navigation by clicking the hamburger icon. When open, the icon should animate into an X and the app should look like this:
Everything is working correctly but this doesn't look very good. Let's fix it!
Angular 2 Observables and DOM Properties
In ng1-dinos, all off-canvas nav functionality was handled by ng1-dinos/src/app/core/ui/navControl.dir.js, including menu toggling and layout height. We've migrated the navigation functionality but we're still missing the layout height fix.
We want our minimum page height to be the height of the window no matter how tall the content is. This way, the off-canvas navigation will never look prematurely cut off. To address this, we'll use an RxJS observable and the window.resize event.
Note: In ng1-dinos, we referenced the
navControldirective's DOM$elementand appliedmin-heightstyles with JS. We did this to avoid an additional watcher in Angular 1. However, Angular 2's change detection is vastly improved so we can shift our concerns over watchers to other things instead.
Angular 2 strongly recommends avoiding direct DOM manipulation. There is an ElementRef class that provides access to the native element, but using it is not recommended and is usually avoidable. We'll use property data binding instead.
Add Observable to App Component TypeScript
Our app.component.ts will look like this:
// ng2-dinos/src/app/core/app.component.ts

import { Component, OnInit } from '@angular/core';
import { Observable } from 'rxjs/Observable';
import 'rxjs/add/observable/fromEvent';
import 'rxjs/add/operator/debounceTime';

declare var window: any;

@Component({
  selector: 'app-root',
  templateUrl: './app.component.html'
})
export class AppComponent implements OnInit {
  navOpen: boolean;
  minHeight: string;
  private initWinHeight: number = 0;

  ngOnInit() {
    Observable.fromEvent(window, 'resize')
      .debounceTime(200)
      .subscribe((event) => {
        this.resizeFn(event);
      });

    this.initWinHeight = window.innerHeight;
    this.resizeFn(null);
  }

  navToggleHandler(e: boolean) {
    this.navOpen = e;
  }

  private resizeFn(e) {
    let winHeight: number = e ? e.target.innerHeight : this.initWinHeight;
    this.minHeight = `${winHeight}px`;
  }
}
Let's talk about the code above.
First we'll import dependencies. We're going to use the OnInit lifecycle hook from @angular/core to manage the observable and implement initial layout height. Then we need Observable from the RxJS library which is packaged with Angular 2.
In order to avoid TypeScript Name not found errors, we'll declare the type for window to be any.
We're using an RxJS observable to subscribe to the window.resize event and execute a debounced function that sets a min-height. The window.resize event doesn't automatically fire on page load, so we need to trigger the handler manually in ngOnInit().
Note: This tutorial does not cover Reactive Programming (RP) and RxJS in depth. If RP and RxJS are new to you, please read Understanding Reactive Programming and RxJS, or for a more Angular 2-centric approach: Functional Reactive Programming for Angular 2 Developers - RxJs and Observables.
Add DOM Property to App Component Template
We can then bind minHeight to the [style.min-height] property on the layout canvas element in app.component.html:
<!-- ng2-dinos/src/app/core/app.component.html -->
...
  <div
    class="layout-canvas"
    [ngClass]="{'nav-open': navOpen, 'nav-closed': !navOpen}"
    [style.min-height]="minHeight">
...
Note: Angular 2 binds to DOM properties, not HTML attributes. This may seem counter-intuitive because we're declaratively adding things like
[disabled]or[style.min-height]to our markup, but these refer to properties, not attributes. Please read Binding syntax: An overview to learn more.
Now our app should be the height of the window even if the content is short. If the navigation grows longer than the content, the CSS we imported from ng1-dinos will ensure that it gets a scrollbar. With the menu open, our app should look like this in the browser:
Angular 2 Footer Component
We have a header, so let's add the simple footer from ng1-dinos too. Run the $ ng g command to create a new component:
$ ng g component footerFooter Component TypeScript
The footer.component.ts should be very simple. There's no dynamic functionality; we just need to create the component and display it. Let's simplify the FooterComponent class:
// ng2-dinos/src/app/footer/footer.component.ts

import { Component } from '@angular/core';

@Component({
  selector: 'app-footer',
  templateUrl: './footer.component.html',
  styleUrls: ['./footer.component.scss']
})
export class FooterComponent {}
Footer Component Template
We can copy the footer markup from ng1-dinos/src/app/footer/footer.tpl.html to our ng2-dinos footer.component.html file. We just need to update the link so that it references ng2-dinos instead of ng1-dinos:
<!-- ng2-dinos/src/app/footer/footer.component.html -->
<p>
  <small>MIT 2016 | <a href="https://github.com/auth0-blog/ng2-dinos">ng2-dinos @ GitHub</a></small>
</p>
Footer Component Styles
The ng1-dinos footer SCSS comes from ng1-dinos/src/assets/css/scss/components/_footer.scss. We need to add @imports so our Angular 2 component can access global layout variables and responsive mixins. We're also going to change .footer to the special :host selector since .footer no longer exists and we need to style the component's host element:
/* ng2-dinos/src/app/footer/footer.component.scss */

/*--------------------
        FOOTER
--------------------*/

@import '../../assets/scss/partials/layout.vars';
@import '../../assets/scss/partials/responsive.partial';

:host {
  padding: $padding-screen-small;
  text-align: center;

  @include mq($large) {
    padding: $padding-screen-large;
  }
}
Add Footer to App Component Template
Finally, we'll add the <app-footer> element to the app.component.html:
<!-- ng2-dinos/src/app/core/app.component.html -->
...
    <!-- FOOTER -->
    <app-footer></app-footer>
...
Restart ng serve and we should see the simple footer in our app.
Aside: Refactoring Suggestions
As mentioned before, this is a migration tutorial so one of our goals is to maintain close to 1:1 correlation with ng1-dinos while still implementing Angular 2 best practices. This will be the continued goal in subsequent parts of the tutorial. However, there are refactoring opportunities that we shouldn't ignore.
Note: You may want to wait to refactor until you complete all parts of the tutorial.
Here is my refactoring suggestion from part one of our migration tutorial:
- Consider componetizing more global SCSS, breaking files like
_layout.scssup into respective*.component.scssfiles and utilizing selectors like:hostand:host-context().
Keep an eye out for more refactoring suggestions in the next lessons.
Conclusion
We now have the basic architecture for our ng2-dinos app! We've successfully migrated global styles, custom off-canvas navigation, header, and footer. We've covered Angular 2 setup, components, child-to-parent component communicaton, binding syntax, and even touched on observables. If we run ng lint, our app should be free of linter errors.
In the next parts of the tutorial, we'll enable navigation by creating page components and implementing routing. Then we'll call the API and use HTTP and observables to get and display dinosaur data and detail subpages, create type models, learn about filtering, implement error handling, and show loading states. We'll even address authentication.
Migrating an existing application can be a great way to learn a new framework or technology. We experience familiar and new patterns and implement real-world features. To continue our migration, please join me for Part 2 of Migrating an AngularJS App to Angular!


