


There’s Metadata in Your Photos
The mass adoption of smartphones — essentially portable, sensor-rich, location-aware, always-networked computers — has given us two major consequences whose effects on privacy and security aren’t yet fully understood:
- More people than ever have a camera that’s usually within arm’s reach.
- By default, the photos taken with these cameras can give away sensitive information, and many users are unaware that it’s happening.
In addition to picture data, photos taken with smartphones and modern digital cameras contain metadata, which is additional information about the photo. This metadata is stored in a format called EXIF, which is short for EXchangeable Image File format, which is a continually evolving standard for information added to digital image and sound recordings.
In photos, EXIF can include information such as:
- The dimensions and pixel density of the photo
- The make and model of the device used to take the photo
- Zoom, aperture, flash, and other camera settings when the photo was taken
- The orientation of the device when the photo was taken
- When the photo was taken
- Where the photo was taken
- Which direction the camera was facing
- The altitude at which the photo was taken
This metadata is useful for sorting, cataloging, and searching through photos, which is why the EXIF standard was defined. However, it also introduces privacy and security concerns that many users don’t take into account.
One of the earliest cautionary tales about EXIF is the 2012 privacy incident involving antivirus company founder John McAfee. This was an exciting time in McAfee’s life, as he was evading law enforcement while still granting exclusive, much sought-after interviews to journalists. One journalist who was lucky enough to get an interview decided to show off his good fortune by posting a photo of McAfee without first removing its EXIF data. That data gave away his location and led to his arrest.
You’re probably aware of more recent stories where law enforcement has been arresting suspects using photos posted to a social media site that didn’t take the precaution of “scrubbing” their EXIF data during the upload process.
Being the security-conscious developers that I suspect you are, you’re probably asking yourself questions like these:
- How can I programmatically detect and read the EXIF metadata from a photo?
- How can I alter, add, or erase EXIF metadata programmatically?
If you have Python 3.6 or later installed on your computer, you can find out through the hands-on exercises below. They’ll cover a couple of Python packages that you can incorporate into your applications to extract, add, alter, or erase EXIF data from photos. Along the way, you’ll use not just your programming skills, but you’ll do some detective work as well!
The exif Module
There are a number of Python modules that can access the EXIF data in digital photos. For this article, we’ll focus on exif. Its API is so Pythonic that it feels almost as if it’s part of the language rather than a module.
To install exif, use pip by entering the following on the command line:
pip install exifIf entering this command gave you an error message, try using the command
pip3 install exifinstead.pip3is the version ofpip, the Python package manager, that is specifically for Python 3.If you’re not maintaining any Python 2 code but have to use
pip3to install Python packages, you should consider upgrading your Python installation.
Loading photos and checking them for EXIF data
Let’s put exif to work. Consider these two photos, named palm tree 1.jpg and palm tree 2.jpg:
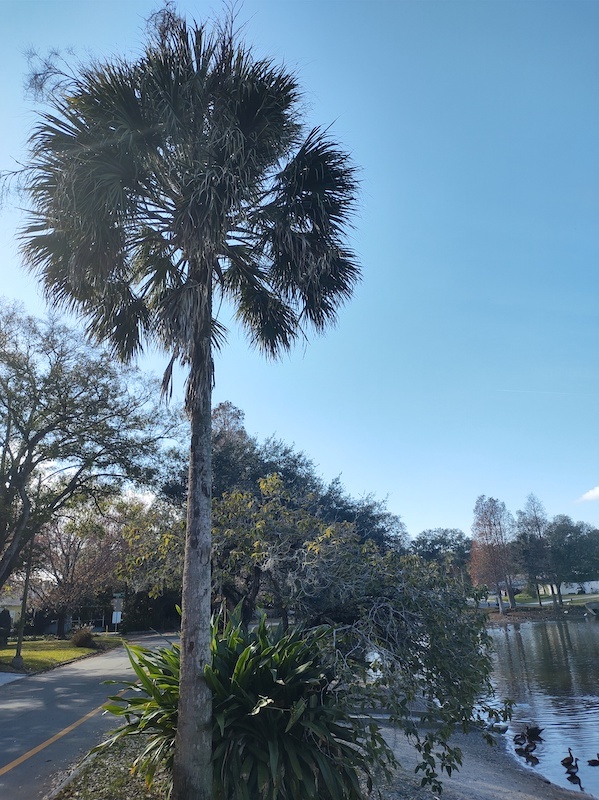
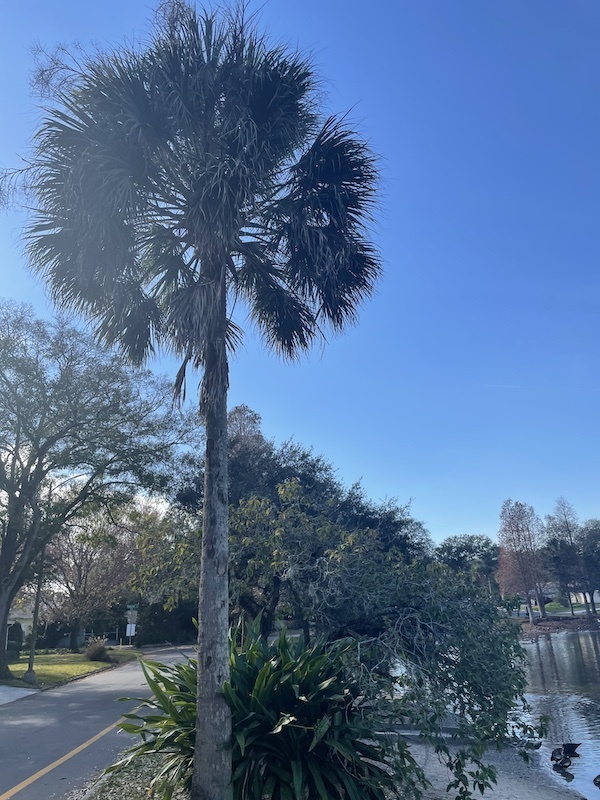
Suppose you’ve been asked these questions:
- Were these photos taken on the same device or two different devices?
- Which photo was taken first?
- Where were these photos taken?
To answer these questions, we’ll load the data from these photos’ files into exif Image objects and then use those objects to examine the EXIF metadata:
from exif import Image

with open("./images/palm tree 1.jpg", "rb") as palm_1_file:
    palm_1_image = Image(palm_1_file)

with open("./images/palm tree 2.jpg", "rb") as palm_2_file:
    palm_2_image = Image(palm_2_file)

images = [palm_1_image, palm_2_image]
The code opens each file as read-only. It reads the file’s data in binary format into a file object, which it then uses to instantiate an exif Image object. Finally, it puts the Image objects into an array so that we can iterate over them, performing the same operations on each photo’s EXIF metadata.
Let’s perform our first operation on each photo: confirming that they actually contain EXIF data. We’ll do this by checking each Image object’s has_exif property. For every image that contains EXIF data, we’ll use Image’s exif_version property to display the version of EXIF it’s using:
for index, image in enumerate(images):
    if image.has_exif:
        status = f"contains EXIF (version {image.exif_version}) information."
    else:
        status = "does not contain any EXIF information."
    print(f"Image {index} {status}")
When run, this code produces the following results:
Image 0 contains EXIF (version 0220) information.
Image 1 contains EXIF (version 0232) information.
We now know that both photos contain EXIF information and use different versions of EXIF. It’s very likely that these photos were taken on different cameras.
What EXIF metadata is available in each photo?
Think of EXIF as a key-value data structure similar to a Python dictionary. EXIF key-value pairs are called tags, and each tag can contain either a string or numeric value. There are dozens of tags in the current EXIF standard (version 2.32), and anyone — from smartphone and camera manufacturers to photographers — is free to add their own.
Here’s a comprehensive list of EXIF tags that you’re likely to find in digital photos. It includes tags that aren’t in the EXIF standard, but are provided by a number of devices or software.
EXIF is one of those informal formats where manufacturers pick and choose which features they’ll implement. This means that photos produced by different cameras and smartphones will have different sets of EXIF tags.
You can generally count on smartphones embedding a number of often-used EXIF tags in the photos they take, including the make and model of the smartphone, the date and time when the photo was taken, the location where the phone was taken, and common camera settings.
Given the differences between devices and the availability of tools for editing EXIF data, one of the first things you should do when working with a photo’s EXIF data is to see which tags are available.
The Image objects provided by the exif module expose EXIF tags as properties of that object. This means that you can use Python’s built-in dir() function on an Image object to see which EXIF tags it has.
The following code displays the list of members of each Image object in our list of palm tree images:
image_members = []

for image in images:
    image_members.append(dir(image))

for index, image_member_list in enumerate(image_members):
    print(f"Image {index} contains {len(image_member_list)} members:")
    print(f"{image_member_list}\n")
You’ll see the following output:
Image 0 contains 53 members:
['_exif_ifd_pointer', '_gps_ifd_pointer', '_segments', 'aperture_value', 'brightness_value', 'color_space', 'components_configuration', 'datetime', 'datetime_digitized', 'datetime_original', 'delete', 'delete_all', 'digital_zoom_ratio', 'exif_version', 'exposure_bias_value', 'exposure_mode', 'exposure_program', 'exposure_time', 'f_number', 'flash', 'flashpix_version', 'focal_length', 'focal_length_in_35mm_film', 'get', 'get_file', 'get_thumbnail', 'gps_altitude', 'gps_altitude_ref', 'gps_datestamp', 'gps_latitude', 'gps_latitude_ref', 'gps_longitude', 'gps_longitude_ref', 'has_exif', 'light_source', 'make', 'max_aperture_value', 'metering_mode', 'model', 'orientation', 'photographic_sensitivity', 'pixel_x_dimension', 'pixel_y_dimension', 'resolution_unit', 'scene_capture_type', 'sensing_method', 'shutter_speed_value', 'subsec_time', 'subsec_time_digitized', 'subsec_time_original', 'white_balance', 'x_resolution', 'y_resolution']

Image 1 contains 68 members:
['<unknown EXIF tag 316>', '<unknown EXIF tag 322>', '<unknown EXIF tag 323>', '<unknown EXIF tag 42080>', '_exif_ifd_pointer', '_gps_ifd_pointer', '_segments', 'aperture_value', 'brightness_value', 'components_configuration', 'datetime', 'datetime_digitized', 'datetime_original', 'delete', 'delete_all', 'exif_version', 'exposure_bias_value', 'exposure_mode', 'exposure_program', 'exposure_time', 'f_number', 'flash', 'flashpix_version', 'focal_length', 'focal_length_in_35mm_film', 'get', 'get_file', 'get_thumbnail', 'gps_altitude', 'gps_altitude_ref', 'gps_dest_bearing', 'gps_dest_bearing_ref', 'gps_horizontal_positioning_error', 'gps_img_direction', 'gps_img_direction_ref', 'gps_latitude', 'gps_latitude_ref', 'gps_longitude', 'gps_longitude_ref', 'gps_speed', 'gps_speed_ref', 'has_exif', 'lens_make', 'lens_model', 'lens_specification', 'make', 'maker_note', 'metering_mode', 'model', 'offset_time', 'offset_time_digitized', 'offset_time_original', 'orientation', 'photographic_sensitivity', 'pixel_x_dimension', 'pixel_y_dimension', 'resolution_unit', 'scene_capture_type', 'scene_type', 'sensing_method', 'shutter_speed_value', 'software', 'subject_area', 'subsec_time_digitized', 'subsec_time_original', 'white_balance', 'x_resolution', 'y_resolution']
As you can see, while both Image objects have a lot of common members, image 1 contains a few more than image 0. This means that image 1 has a few more EXIF tags than image 0. This is a strong indicator that image 0 and image 1 were taken on different devices.
You can use Python sets to determine the members that image 0 and image 1 have in common:
common_members = set(image_members[0]).intersection(set(image_members[1]))
common_members_sorted = sorted(list(common_members))
print("Image 0 and Image 1 have these members in common:")
print(f"{common_members_sorted}")
Running this code produces this output:
Image 0 and Image 1 have these members in common:
['_exif_ifd_pointer', '_gps_ifd_pointer', '_segments', 'aperture_value', 'brightness_value', 'components_configuration', 'datetime', 'datetime_digitized', 'datetime_original', 'delete', 'delete_all', 'exif_version', 'exposure_bias_value', 'exposure_mode', 'exposure_program', 'exposure_time', 'f_number', 'flash', 'flashpix_version', 'focal_length', 'focal_length_in_35mm_film', 'get', 'get_file', 'get_thumbnail', 'gps_altitude', 'gps_altitude_ref', 'gps_latitude', 'gps_latitude_ref', 'gps_longitude', 'gps_longitude_ref', 'has_exif', 'make', 'metering_mode', 'model', 'orientation', 'photographic_sensitivity', 'pixel_x_dimension', 'pixel_y_dimension', 'resolution_unit', 'scene_capture_type', 'sensing_method', 'shutter_speed_value', 'subsec_time_digitized', 'subsec_time_original', 'white_balance', 'x_resolution', 'y_resolution']
If you looked at the names of EXIF tags in the documentation (either the list of standard EXIF tags or the extended list), you may have noticed that EXIF tag names are in
PascalCasewhile the EXIF properties in exifImageobjects are insnake_case. This is because the authors of the exif module are striving to follow the Python Style Guide and designedImageto convert EXIF tag names into Pythonic property names.
Non-EXIF members of exif’s Image class
Most, but not all, of the members of any Image instances will be properties corresponding to EXIF tags in the image. However, there are a handful of members for working with EXIF metadata. They’re listed in the table below:
| Class member | Description |
|---|---|
deleteattribute) | Removes the EXIF tag specified by the string attribute from the image. |
delete_all | Removes all EXIF tags from the image. |
getattribute, default=None) | Returns the value for the EXIF tag specified by the string attribute. If the tag is not available or does contain a value, it returns the value specified by the default keyword argument. |
get_file | Returns the current data for the image, formatted for writing to a binary file. |
get_thumbnail | Returns the binary data for a thumbnail of the image. |
has_exif | A Boolean value that returns True if the image currently contains EXIF metadata. |
setattribute, value) | Set the value for the EXIF tag specified by the string attribute. If the tag is not available or does contain a value, it returns the value specified by the default keyword argument. |
We’ll cover most of these properties and methods in this article.
Getting Basic Photo Information
Let’s answer the first question about these photos. Were they taken on the same device or two different devices? We already have reason to believe that the answer is “no”.
Make and model of the device used to take the photo
Both images have a make and model tag, so let’s use those to determine what kind of devices were used to take these pictures:
for index, image in enumerate(images):
    print(f"Device information - Image {index}")
    print("----------------------------")
    print(f"Make: {image.make}")
    print(f"Model: {image.model}\n")
Here’s the result of the code above:
Device information - Image 0
----------------------------
Make: motorola
Model: motorola one hyper

Device information - Image 1
----------------------------
Make: Apple
Model: iPhone 12 Pro
This confirms that the photos were taken with different devices, and we now know the specifics.
Additional and optional information about the devices
Let’s gather some more information about the devices used to take the photos, namely the details about their lenses and operating system versions.
Not all devices report the type of lens in their EXIF metadata, so we’ll use Image’s get() method, which is similar to the get() method used by Python’s dictionaries. Like Python dictionaries’ get() method, the get() method provided by exif’s Image object gracefully handles the case where the given key does not exist.
The code below uses get() to attempt to access the lens and operating system versions used in taking the photos. If a particular property doesn’t exist, its value will be displayed as “Unknown”:
for index, image in enumerate(images):
    print(f"Lens and OS - Image {index}")
    print("---------------------")
    print(f"Lens make: {image.get('lens_make', 'Unknown')}")
    print(f"Lens model: {image.get('lens_model', 'Unknown')}")
    print(f"Lens specification: {image.get('lens_specification', 'Unknown')}")
    print(f"OS version: {image.get('software', 'Unknown')}\n")
Here’s its output:
Lens and OS - Image 0
---------------------
Lens make: Unknown
Lens model: Unknown
Lens specification: Unknown
OS version: Unknown

Lens and OS - Image 1
---------------------
Lens make: Apple
Lens model: iPhone 12 Pro back triple camera 4.2mm f/1.6
Lens specification: (1.5399999618512084, 6.0, 1.6, 2.4)
OS version: 14.3
Note that the phone used to take image 0 (the Motorola One Hyper), doesn’t provide the lens_make, lens_model, lens_specification, or software properties. If we had tried to access them directly (for example, image.lens_make), the result would have been an error. The get() method allowed us to provide an alternate value for those non-existent properties.
Date and time when the photo was taken
The next question is: which photo was taken first?
We can find out by looking at each photo’s datetime_original property, which specifies the date and time when the photo was taken. The processor in a smartphone is fast enough to record the exact fraction of a second when it takes a photo, and that fraction is stored in the subsec_time_original property.
Some phones also record an offset_time property, which we can use to determine datetime’s offset from UTC.
The following code displays the date and time when each of the photos was taken. If the photo includes time offset data, the code will also display that value:
for index, image in enumerate(images):
    print(f"Date/time taken - Image {index}")
    print("-------------------------")
    print(f"{image.datetime_original}.{image.subsec_time_original} {image.get('offset_time', '')}\n")
Here are the results:
Date/time taken - Image 0
-------------------------
2021:01:22 15:08:46.327211

Date/time taken - Image 1
-------------------------
2021:01:22 15:08:59.383 -05:00
As you can see from the output, image 0 was taken first, and image 1 was taken 13 seconds later.
Determining Where the Photo Was Taken
Digital cameras have been recording the date and time into their photos from the beginning, but it wasn’t until the smartphone that recording the location where the photo was taken became commonplace. In this section, we’ll look at accessing the GPS coordinates in a photo’s metadata, formatting those coordinates, and making those coordinates more comprehensible by locating them on a map and converting them into the names of the country, region, and city where the photo was taken.
Getting the photo’s GPS coordinates
The EXIF format specifies a number of tags beginning with “gps”, which contain useful geolocation information, including the latitude and longitude where the photo was taken:
for index, image in enumerate(images):
    print(f"Coordinates - Image {index}")
    print("---------------------")
    print(f"Latitude: {image.gps_latitude} {image.gps_latitude_ref}")
    print(f"Longitude: {image.gps_longitude} {image.gps_longitude_ref}\n")
Here’s the output for the code above:
Coordinates - Image 0
---------------------
Latitude: (28.0, 0.0, 1.56) N
Longitude: (82.0, 26.0, 59.04) W

Coordinates - Image 1
---------------------
Latitude: (28.0, 0.0, 1.54) N
Longitude: (82.0, 26.0, 58.75) W
Note that the gps_latitude and gps_longitude properties return the latitude and longitude as a tuple of three values, which are:
- Degrees
- Minutes (1/60th of a degree)
- Seconds (1/60th of a minute, or 1/3600th of a degree)
Latitude specifies the angular distance from the equator, which can be either north or south. The gps_latitude_ref property indicates this direction, which is either N or S.
Longitude specifies the angular distance from the meridian, which can be either east or west. The gps_longitude_ref property indicates this direction, which is either E or W.
You may have noticed the slight difference between the coordinates reported in the photos. This is expected; even the same device, located at the same spot, will report slightly different coordinates at different times. The discrepancy in coordinates reported by the phones is on the order of a fraction of a second, which translates to about 25 feet, or 7.6 meters.
Formatting latitude and longitude
Let’s define a couple of functions to format the latitude and longitude information returned by Image into standard formats:
- Degrees, minutes, and seconds. In this format, the latitude of image 0 would be written as 28.0° 0.0' 1.56" N.
- Decimal degrees. In this format, the latitude of image 0 would be written as 28.000433333333334. North latitudes and east longitudes are represented with positive values, while south latitudes and west longitudes are represented with negative values.
Here’s the definitions for those functions, as well as some code that makes use of them:
def format_dms_coordinates(coordinates):
    return f"{coordinates[0]}° {coordinates[1]}\' {coordinates[2]}\""

def dms_coordinates_to_dd_coordinates(coordinates, coordinates_ref):
    decimal_degrees = coordinates[0] + \
                      coordinates[1] / 60 + \
                      coordinates[2] / 3600

    if coordinates_ref == "S" or coordinates_ref == "W":
        decimal_degrees = -decimal_degrees

    return decimal_degrees

for index, image in enumerate(images):
    print(f"Coordinates - Image {index}")
    print("---------------------")
    print(f"Latitude (DMS): {format_dms_coordinates(image.gps_latitude)} {image.gps_latitude_ref}")
    print(f"Longitude (DMS): {format_dms_coordinates(image.gps_longitude)} {image.gps_longitude_ref}\n")
    print(f"Latitude (DD): {dms_coordinates_to_dd_coordinates(image.gps_latitude, image.gps_latitude_ref)}")
    print(f"Longitude (DD): {dms_coordinates_to_dd_coordinates(image.gps_longitude, image.gps_longitude_ref)}\n")
Here’s the output:
Coordinates - Image 0
---------------------
Latitude (DMS): 28.0° 0.0' 1.56" N
Longitude (DMS): 82.0° 26.0' 59.04" W

Latitude (DD): 28.000433333333334
Longitude (DD): -82.44973333333334

Coordinates - Image 1
---------------------
Latitude (DMS): 28.0° 0.0' 1.54" N
Longitude (DMS): 82.0° 26.0' 58.75" W

Latitude (DD): 28.000427777777777
Longitude (DD): -82.44965277777779
Displaying photo locations on a map
You probably don’t know the latitude and longitude of your home, even when rounded to the nearest degree. There are a couple of simple ways to convert the EXIF location data into something easier for humans to understand.
One way is to use Python’s built-in webbrowser module to open a new browser tab for each photo, using the decimal version of each photo’s EXIF coordinates as the parameters for a Google Maps URL. We’ll create a utility function named draw_map_for_location() that does this:
def draw_map_for_location(latitude, latitude_ref, longitude, longitude_ref):
    import webbrowser

    decimal_latitude = dms_coordinates_to_dd_coordinates(latitude, latitude_ref)
    decimal_longitude = dms_coordinates_to_dd_coordinates(longitude, longitude_ref)
    url = f"https://www.google.com/maps?q={decimal_latitude},{decimal_longitude}"
    webbrowser.open_new_tab(url)

for index, image in enumerate(images):
    draw_map_for_location(image.gps_latitude,
                          image.gps_latitude_ref,
                          image.gps_longitude,
                          image.gps_longitude_ref)
When you run it, two new browser tabs will open, and each one will show a Google Map indicating where the corresponding photo was taken.
Displaying the city, region, and country where a photo was taken
Another way to display the location of a photo is to use reverse geocoding, which is the process of converting geographic coordinates into an address or the name of a place. In order to do this, we’ll need to install two Python modules:
- reverse_geocoder, a simple offline reverse geocoder that uses internal tables to convert a set of coordinates into a collection of city and state/province names and country codes. Install this by entering
pip install reverse_geocoderon the command line. - pycountry, a country lookup utility that we’ll use to convert country codes into their corresponding names. Install this by entering
pip install pycountryon the command line.
Once you’ve installed the modules above, use the following code to convert the photo coordinates into something more recognizable:
import reverse_geocoder as rg
import pycountry

for index, image in enumerate(images):
    print(f"Location info - Image {index}")
    print("-----------------------")
    decimal_latitude = dms_coordinates_to_dd_coordinates(image.gps_latitude, image.gps_latitude_ref)
    decimal_longitude = dms_coordinates_to_dd_coordinates(image.gps_longitude, image.gps_longitude_ref)
    coordinates = (decimal_latitude, decimal_longitude)
    location_info = rg.search(coordinates)[0]
    location_info['country'] = pycountry.countries.get(alpha_2=location_info['cc'])
    print(f"{location_info}\n")
The code uses reverse_geocoder’s search() method to convert each photo’s decimal latitude and longitude into a collection of the following information:
- City, town, or village name
- Major administrative region, which is typically a state or province
- Minor administrative region, which is typically a county or district
- Country code
It then uses pycountry’s get() method to convert the country code provided by reverse_geocoder into a tuple containing the corresponding common and official country names.
Here’s its output:
Location info - Image 0
-----------------------
{'lat': '27.94752', 'lon': '-82.45843', 'name': 'Tampa', 'admin1': 'Florida', 'admin2': 'Hillsborough County', 'cc': 'US', 'country': Country(alpha_2='US', alpha_3='USA', name='United States', numeric='840', official_name='United States of America')}

Location info - Image 1
-----------------------
{'lat': '27.94752', 'lon': '-82.45843', 'name': 'Tampa', 'admin1': 'Florida', 'admin2': 'Hillsborough County', 'cc': 'US', 'country': Country(alpha_2='US', alpha_3='USA', name='United States', numeric='840', official_name='United States of America')}
Other Useful Sensor Information
As I mentioned at the start of this article, smartphones are packed with sensors. These include a magnetometer, barometer, and accelerometer. In combination with GPS, these sensors provide extra information that is added to each photo’s EXIF metadata.
What direction was the camera facing?
The magnetometer senses magnetic fields, including the giant one generated by the Earth. Its primary purpose is to be the phone’s compass and determine the direction in which the phone is pointing. That information is written into EXIF as a compass heading every time you take a picture.
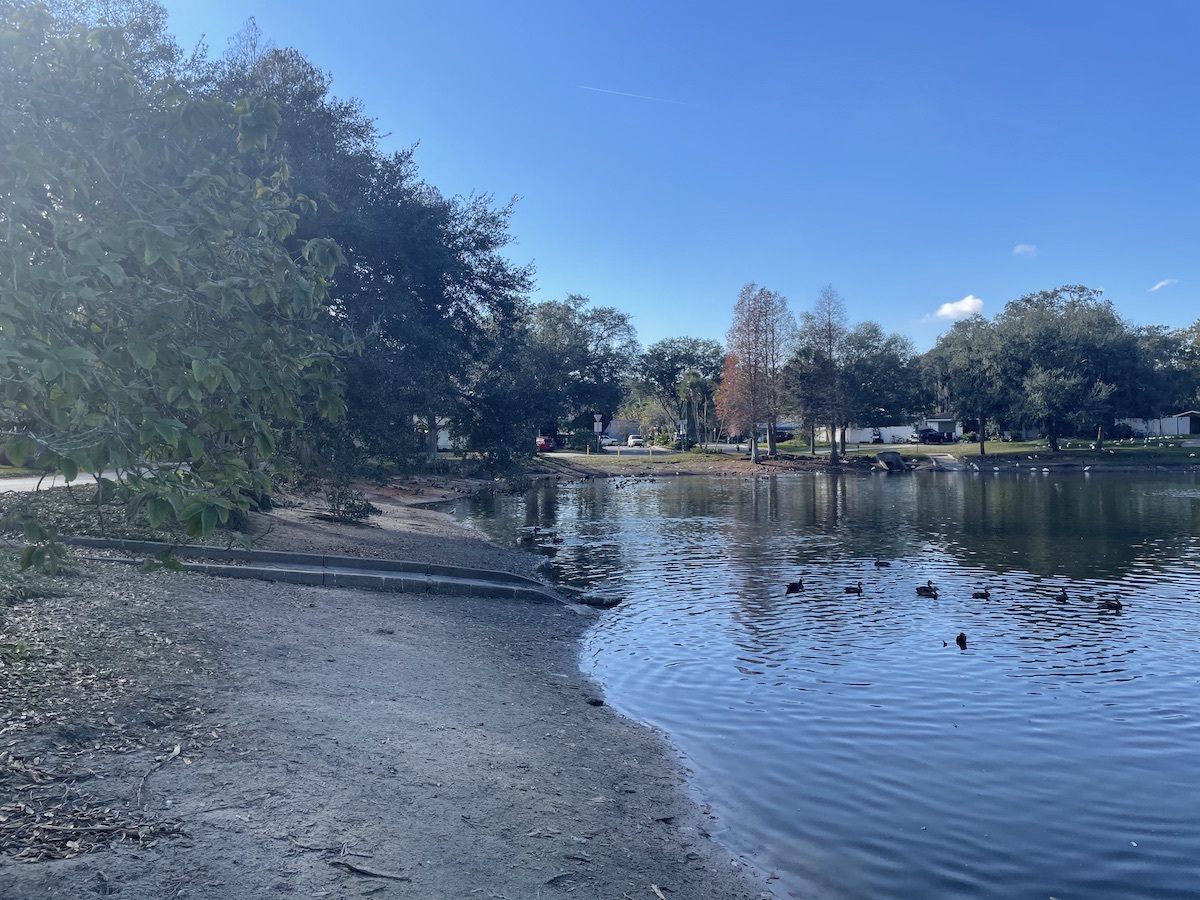
Let’s determine which direction I was facing when I took each of these photos:
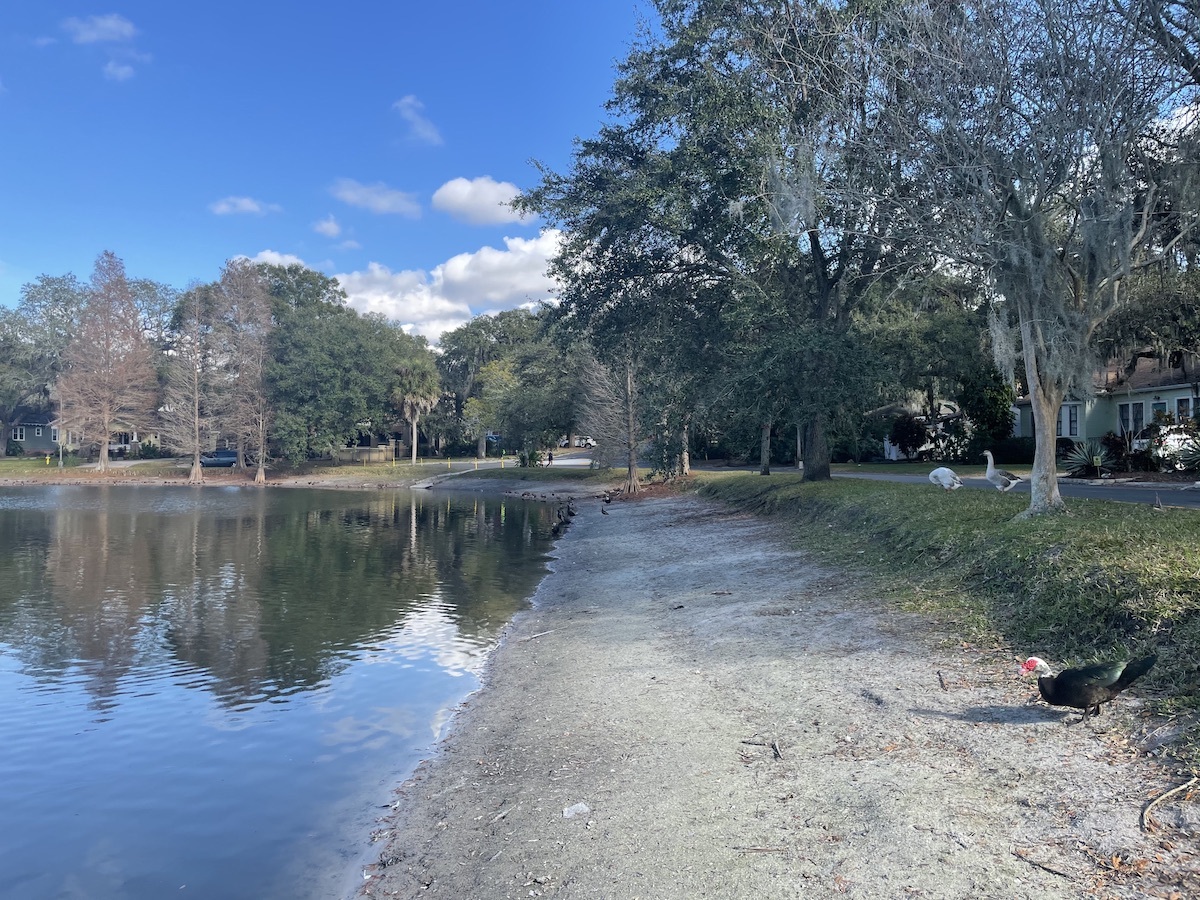
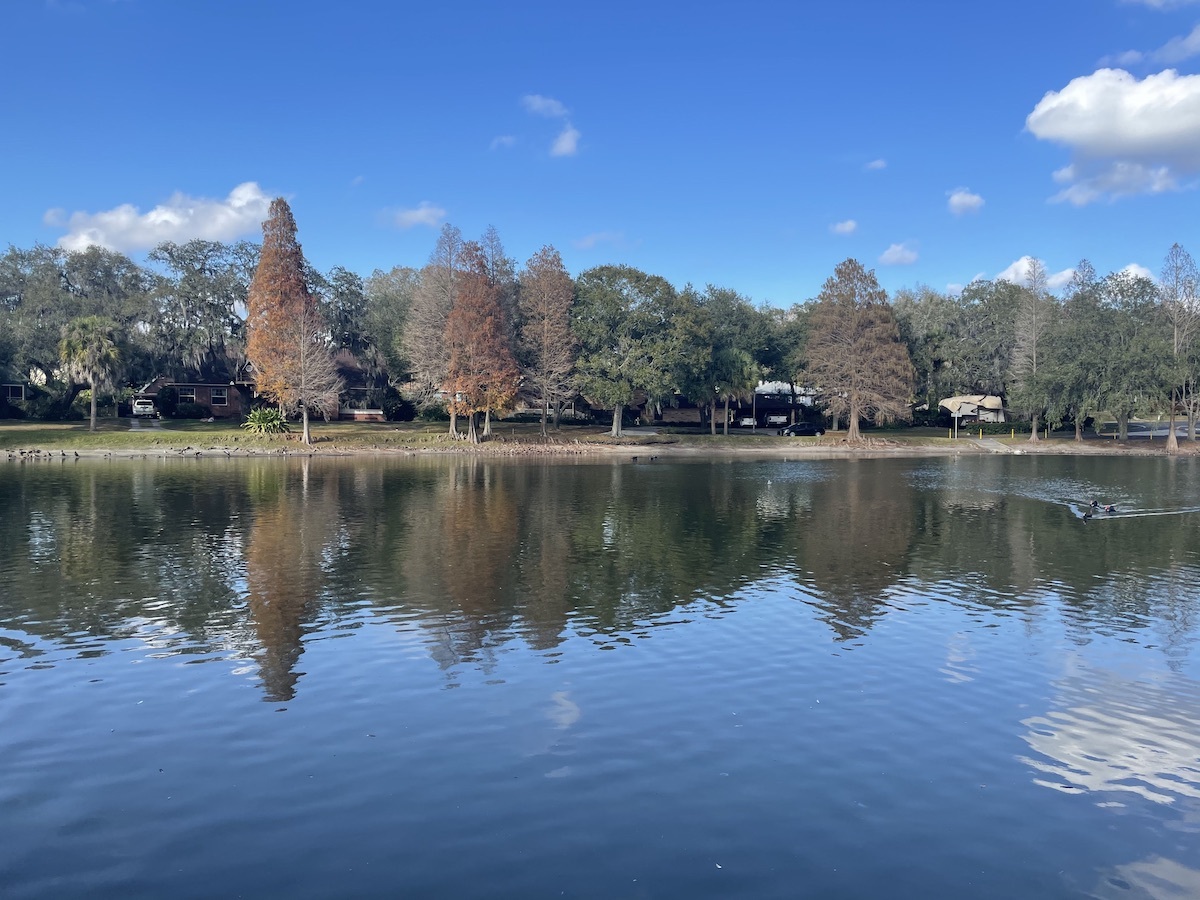
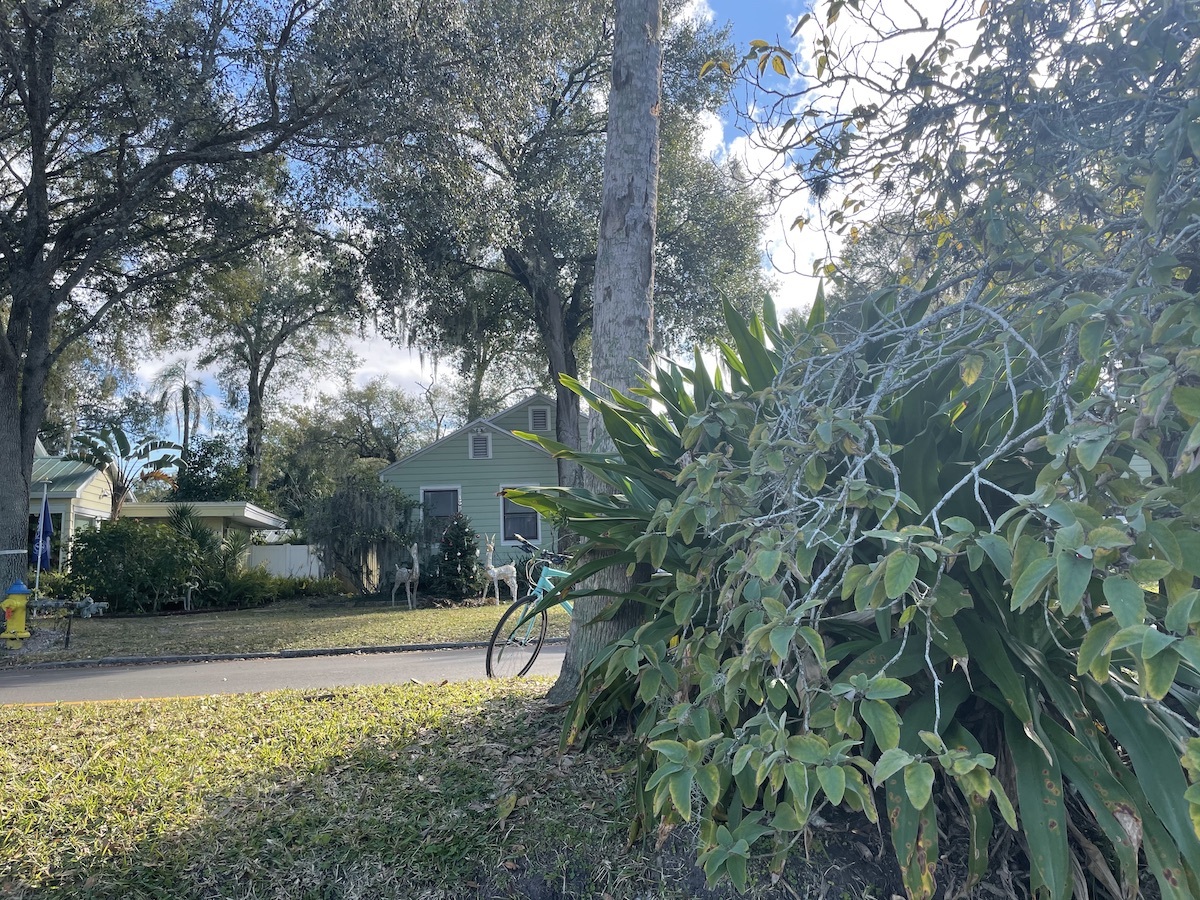
We’ll use the following exif Image properties to determine the direction in which the camera was pointed:
gps_img_direction: The compass heading (that is, direction) that the camera was facing when the picture was taken, expressed in decimal degrees. 0° is north, 90° is east, 180° is south, and 270° is west.gps_img_direction_ref: The reference point forgps_img_direction. This can be eitherT, which means that 0° refers to true or geographic north, orM, which means that 0° refers to magnetic north. Most of the time, true north is used.
The code below displays the camera direction for the four lake photos. It makes use of a couple of utility functions:
degrees_to_direction(): This function converts compass headings into cardinal directions (e.g., N, NE, NNE, and so on).format_direction_ref(): This function turns the value ingps_img_direction_refinto a human-friendly string.
def degrees_to_direction(degrees):
    COMPASS_DIRECTIONS = [
        "N",
        "NNE",
        "NE",
        "ENE",
        "E",
        "ESE",
        "SE",
        "SSE",
        "S",
        "SSW",
        "SW",
        "WSW",
        "W",
        "WNW",
        "NW",
        "NNW"
    ]

    compass_directions_count = len(COMPASS_DIRECTIONS)
    compass_direction_arc = 360 / compass_directions_count
    return COMPASS_DIRECTIONS[int(degrees / compass_direction_arc) % compass_directions_count]

def format_direction_ref(direction_ref):
    direction_ref_text = "(true or magnetic north not specified)"
    if direction_ref == "T":
        direction_ref_text = "True north"
    elif direction_ref == "M":
        direction_ref_text = "Magnetic north"
    return direction_ref_text

# Import images
lake_images = []
for i in range(1, 5):
    filename = f"lake {i}.jpg"
    with open(f"./images/{filename}", "rb") as current_file:
        lake_images.append(Image(current_file))

# Display camera direction for each image
for index, image in enumerate(lake_images):
    print(f"Image direction - Image {index}")
    print("-------------------------")
    print(f"Image direction: {degrees_to_direction(image.gps_img_direction)} ({image.gps_img_direction}°)")
    print(f"Image direction ref: {format_direction_ref(image.gps_img_direction_ref)}\n")
When you run the code, you’ll see this output:
Image direction - Image 0
-------------------------
Image direction: ENE (78.416259765625°)
Image direction ref: True north

Image direction - Image 1
-------------------------
Image direction: N (1.174224853515625°)
Image direction ref: True north

Image direction - Image 2
-------------------------
Image direction: SSE (178.46739196870607°)
Image direction ref: True north

Image direction - Image 3
-------------------------
Image direction: W (273.8248136315229°)
Image direction ref: True north
What was the altitude where the photo was taken?
In addition to providing location coordinates, GPS can also be used to determine altitude. Some smartphones are equipped with barometers (which detect air pressure), which they use to increase the accuracy of the altitude measurement.
Let’s find out the altitudes where these photos were taken:

We’ll make use of these properties of exif’s Image object to determine altitude:
We’ll use the following exif Image properties:
gps_altitude: The altitude reported by the camera, expressed in meters.gps_altitude_ref: The reference point forgps_altitude. This value is either0, which means that the value ingps_altituderefers to meters above sea level, or1, which means that the value ingps_altituderefers to meters below sea level.
The following code displays the altitude reported by the phone at the moment each of the photos was taken. It utilizes one utility function, format_altitude(), which specifies whether the given altitude is above or below sea level:
def format_altitude(altitude, altitude_ref):
    altitude_ref_text = "(above or below sea level not specified)"
    if altitude_ref == 0:
        altitude_ref_text = "above sea level"
    elif altitude_ref == 1:
        altitude_ref_text = "below sea level"
    return f"{altitude} meters {altitude_ref_text}"

# Import images
altitude_images = []
for i in range(1, 3):
    filename = f"altitude {i}.jpg"
    with open(f"./images/{filename}", "rb") as current_file:
        altitude_images.append(Image(current_file))

# Display camera altitude for each image
for index, image in enumerate(altitude_images):
    print(f"Altitude - Image {index}")
    print( "------------------")
    print(f"{format_altitude(image.gps_altitude, image.gps_altitude_ref)}\n")
Here’s the resulting output:
Altitude - Image 0
------------------
14.025835763206075 meters above sea level

Altitude - Image 1
------------------
359.13079847908745 meters above sea level
I could tell you where I took these photos, but you already know how to find out for yourself.
Was the photographer moving?
Smartphones use a combination of GPS locations over time and the accelerometer to determine the phone’s speed and the direction in which it’s moving. Some phones provide this information as part of the EXIF metadata in photos.
My Motorola One Hyper doesn’t write any speed-related metadata to the photos it takes, but my iPhone does. This data can be accessed via these two exif Image object methods:
gps_speed: The speed reported by the camera, expressed as a number.gps_speed_ref: The speed units used for the value ingps_speed. This value can beKfor kilometers per hour,Mfor miles per hour, orNfor nautical miles per hour, or “knots”.
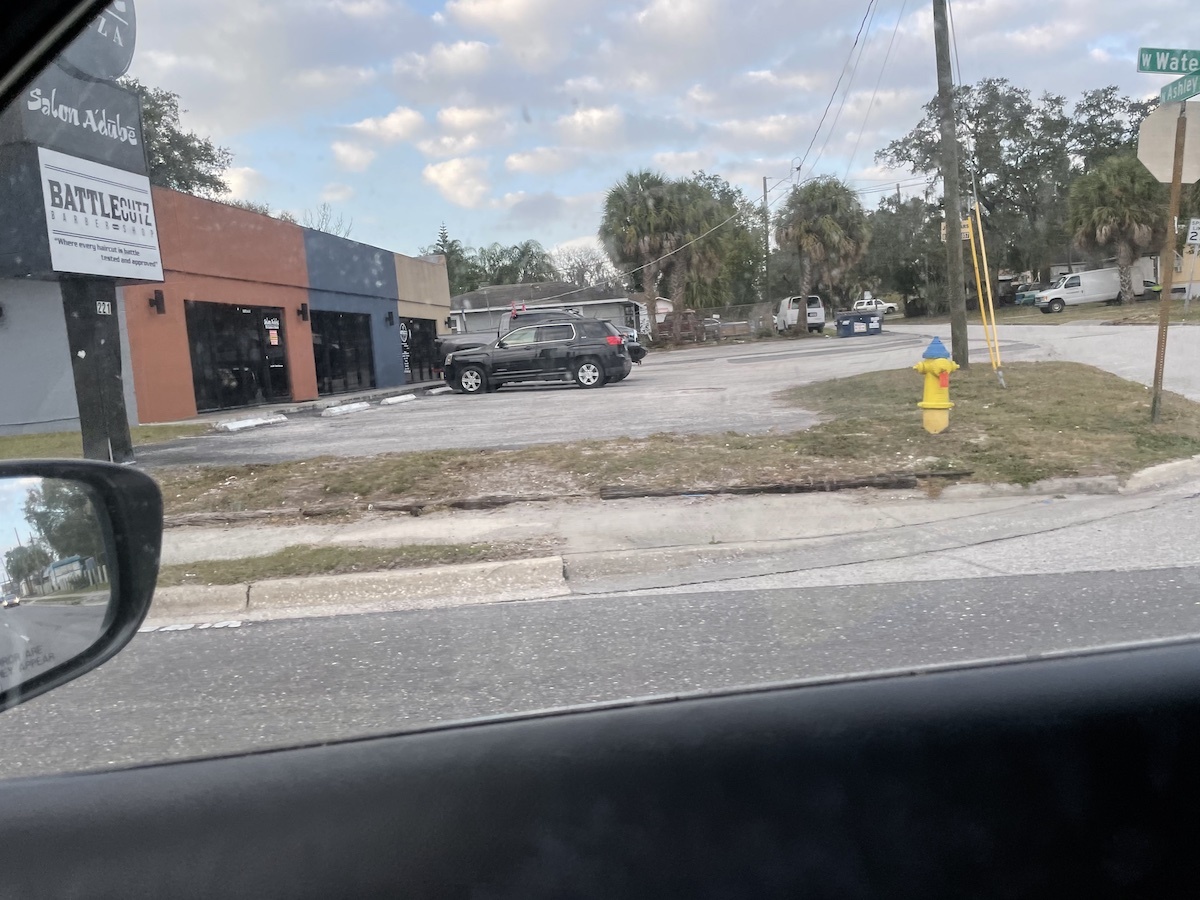
Consider the following photos:
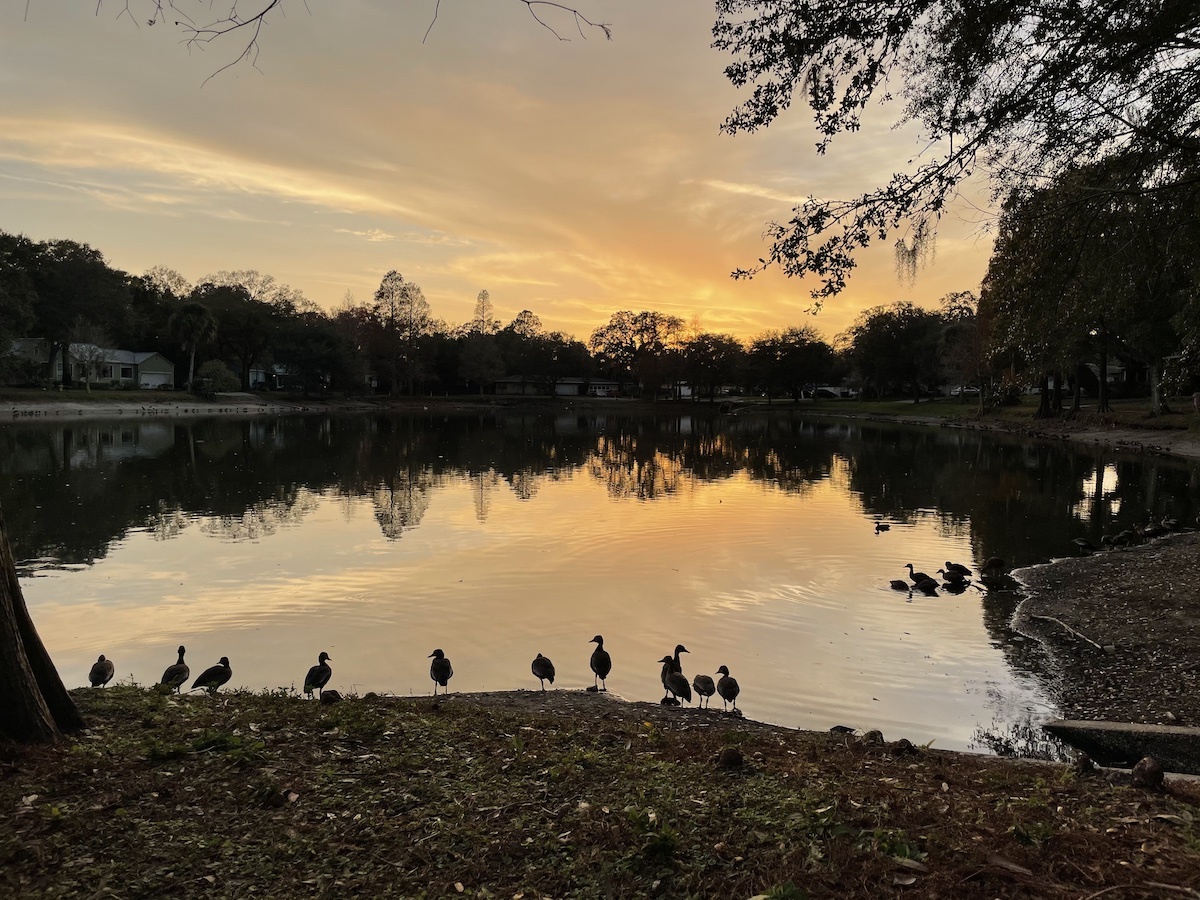

Here’s code that prints out the recorded speed at the time each photo was taken. It includes a utlility function, format_speed_ref(), which specifies the units of the reported speed:
def format_speed_ref(speed_ref):
    speed_ref_text = "(speed units not specified)"
    if speed_ref == "K":
        speed_ref_text = "km/h"
    elif speed_ref == "M":
        speed_ref_text = "mph"
    elif speed_ref == "N":
        speed_ref_text = "knots"
    return speed_ref_text

# Import images
speed_images = []
for i in range(1, 4):
    filename = f"speed {i}.jpg"
    with open(f"./images/speed {i}.jpg", "rb") as current_file:
        speed_images.append(Image(current_file))

for index, image in enumerate(speed_images):
    print(f"Speed - Image {index}")
    print("---------------")
    print(f"Speed: {image.gps_speed} {format_speed_ref(image.gps_speed_ref)}\n")
Here are the speeds it reports:
Speed - Image 0
---------------
Speed: 0.0 km/h

Speed - Image 1
---------------
Speed: 20.19736291335287 km/h

Speed - Image 2
---------------
Speed: 5.520932607215793 km/h
Updating EXIF Data and Saving It
So far, we’ve limited ourselves to simply reading the EXIF metadata from photos. The next step is to make changes to that data and then save the results as a new photo file.
Updating a photo’s coordinates
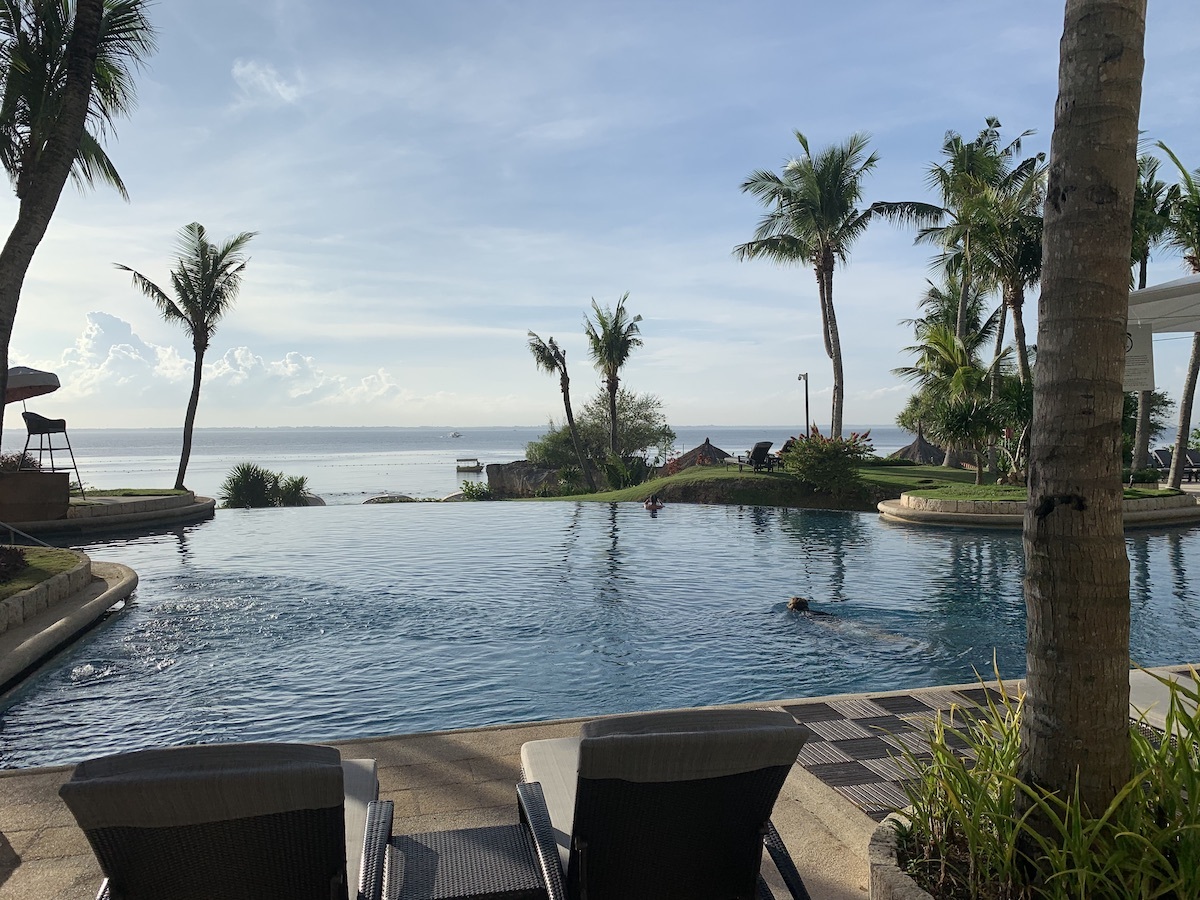
Let’s start with this photo:

By now, you should know how to read its coordinates from EXIF and use those coordinates to open a Google Map to show the location they represent.
Here’s the code that will do just that. It makes use of the draw_map_for_location() utility function that we defined earlier:
with open(f"./images/hotel original.jpg", "rb") as hotel_file:
    hotel_image = Image(hotel_file)

# Read the GPS data
print("Original coordinates")
print("--------------------")
print(f"Latitude: {hotel_image.gps_latitude} {hotel_image.gps_latitude_ref}")
print(f"Longitude: {hotel_image.gps_longitude} {hotel_image.gps_longitude_ref}\n")

# Open a Google Map showing the location represented by these coordinates
draw_map_for_location(hotel_image.gps_latitude,
                      hotel_image.gps_latitude_ref,
                      hotel_image.gps_longitude,
                      hotel_image.gps_longitude_ref)
It outputs the following...
Original coordinates
--------------------
Latitude: (28.0, 21.0, 58.44) N
Longitude: (81.0, 33.0, 34.29) W
...and it opens a new browser tab showing a Google Map that displays the Swan and Dolphin hotels, which are a short walk away from Walt Disney World in Florida.
Let’s make things a little more interesting by changing the coordinates embedded in the photo’s EXIF data so that it reports that it was taken at Area 51. In case you haven’t heard of this place, it’s a military installation in Nevada, where conspiracy theorists believe that the U.S. government stores the bodies of aliens and a spaceship that were captured in the 1950s. Its coordinates are 37.0° 14' 3.6" N, 115° 48' 23.99" W.
You've seen that reading an EXIF tag’s value using exif’s Image object is simply a matter of reading the value in its corresponding property. Likewise, updating its value is simply a matter of assigning a new value to that property. In this case, we’ll assign values that specify Area 51’s coordinates to the image’s gps_latitude, gps_latitude_ref, gps_longitude, and gps_longitude_ref properties:
# Boring. Let's change those coordinates to Area 51!
hotel_image.gps_latitude = (37.0, 14, 3.6)
hotel_image.gps_latitude_ref = 'N'
hotel_image.gps_longitude = (115, 48, 23.99)
hotel_image.gps_longitude_ref = 'W'

# Read the revised GPS data
print("Revised coordinates")
print("-------------------")
print(f"Latitude: {hotel_image.gps_latitude} {hotel_image.gps_latitude_ref}")
print(f"Longitude: {hotel_image.gps_longitude} {hotel_image.gps_longitude_ref}\n")

# Open a Google Map showing the location represented by the revised coordinates
draw_map_for_location(hotel_image.gps_latitude,
                      hotel_image.gps_latitude_ref,
                      hotel_image.gps_longitude,
                      hotel_image.gps_longitude_ref)
Running the code will produce this output...
Revised coordinates
-------------------
Latitude: (37.0, 14.0, 3.6) N
Longitude: (115.0, 48.0, 23.99) W
...and it will open a new browser showing a Google Map that displays Area 51.
Filling out unused EXIF tags
There are a lot of tags defined in the current EXIF specification, and most cameras fill out only a small subset of them. The exif module makes it possible to fill any EXIF tags that don’t have a value assigned to them.
Note: The exif module writes only to tags in the EXIF specification, and not additional tags included by vendors. The “official” tags in the EXIF specification are underlined.
You can assign a value to a tag outside the EXIF specification, even a tag that you made up. The
Imageobject will store that value, but only for as long as the object remains in memory. You won’t be able to save non-EXIF tags or their values because the method that converts the data in theImageobject for writing to a file only takes standard EXIF tags into account.
Here are a couple of EXIF tags that you might want to fill out, as they’re handy for managing a library of photos. Both of them take string values:
ImageDescription: A description of the photo. In exif’sImageobjects, this is exposed as theimage_descriptionproperty.Copyright: A copyright notice for the photo. In exif’sImageobjects, this is exposed as thecopyrightproperty.
Here’s some code that fills out these tags:
hotel_image.image_description = "The Dolphin Hotel in Orlando, viewed at sunset from the Swan Hotel"
hotel_image.copyright = "Copyright 2021 (Your name here)"

print(f"Description: {hotel_image.image_description}")
print(f"Copyright: {hotel_image.copyright}")
Running the code produces this output:
Description: The Dolphin Hotel in Orlando, viewed at sunset from the Swan Hotel
Copyright: Copyright 2021 (Your name here)
Saving the photo with updated data
Now that we’ve updated the EXIF data in the picture, let’s save it as a brand new file with the name hotel updated.jpg.
with open('./images/hotel updated.jpg', 'wb') as updated_hotel_file:
    updated_hotel_file.write(hotel_image.get_file())
This code creates a file object, updated_hotel_file, to write binary data to a file named hotel updated.jpg. It then uses Image’s get_file() method to get the hotel image data in serializable form and writes that data to the file.
You should now have a new file: hotel updated.jpg. Let’s load it and confirm that the data we modified and added were saved:
with open(f"./images/hotel updated.jpg", "rb") as hotel_file:
    hotel_image = Image(hotel_file)

print("Coordinates")
print("-----------")
print(f"Latitude: {hotel_image.gps_latitude} {hotel_image.gps_latitude_ref}")
print(f"Longitude: {hotel_image.gps_longitude} {hotel_image.gps_longitude_ref}\n")

print("Other info")
print("----------")
print(f"Description: {hotel_image.image_description}")
print(f"Copyright: {hotel_image.copyright}")

# Open a Google Map showing the location represented by these coordinates
draw_map_for_location(hotel_image.gps_latitude,
                      hotel_image.gps_latitude_ref,
                      hotel_image.gps_longitude,
                      hotel_image.gps_longitude_ref)
The code will give you this output...
Coordinates
-----------
Latitude: (37.0, 14.0, 3.6) N
Longitude: (115.0, 48.0, 23.99) W

Other info
----------
Description: The Dolphin Hotel in Orlando, viewed at sunset from the Swan Hotel
Copyright: Copyright 2021 (Your name here)
...and it will open another browser tab displaying a Google Map of Area 51.
Deleting EXIF Data and Saving the “Scrubbed” Photo
Suppose that instead of altering the hotel photo’s location data, we decided to delete its tags instead. There are two ways to do this.
The first way is to use the delete() method provided by exif’s Image object. Let’s use it to delete the latitude data:
hotel_image.delete('gps_latitude')
hotel_image.delete('gps_latitude_ref')

print("Latitude data")
print("-------------")
print(f"gps_latitude: {hotel_image.get('gps_latitude', 'Not found')}")
print(f"gps_latitude_ref: {hotel_image.get('gps_latitude_ref', 'Not found')}")
Here’s the output for the code above:
Latitude data
-------------
gps_latitude: Not found
gps_latitude_ref: Not found
The second way is to use Python’s del statement, which deletes objects from memory. In this case, we’ll use it to delete the attributes of hotel_image that store the longitude data:
del hotel_image.gps_longitude
del hotel_image.gps_longitude_ref

print("Longitude data")
print("--------------")
print(f"gps_longitude: {hotel_image.get('gps_longitude', 'Not found')}")
print(f"gps_longitude_ref: {hotel_image.get('gps_longitude_ref', 'Not found')}")
Here’s the output for the code above:
Longitude data
--------------
gps_longitude: Not found
gps_longitude_ref: Not found
Now that we’ve removed the location data from the photo, let’s save it under a new filename, hotel without location data.jpg:
with open('./images/hotel without location data.jpg', 'wb') as updated_hotel_file:
    updated_hotel_file.write(hotel_image.get_file())
Finally, if you want to simply delete all the EXIF data from the photo, you can use the exif Image object’s delete_all() method:
hotel_image.delete_all()

dir(hotel_image)['<unknown EXIF tag 322>',
'<unknown EXIF tag 323>',
'_segments',
'delete',
'delete_all',
'get',
'get_file',
'get_thumbnail',
'has_exif']Again, once you’ve used delete_all() to remove all the EXIF tags, you need to save those changes. The code below saves the our image with all tags deleted as hotel without tags.jpg:
with open('./images/hotel without tags.jpg', 'wb') as updated_hotel_file:
    updated_hotel_file.write(hotel_image.get_file())
Practical and Technical Considerations
Reasons to remove EXIF metadata
EXIF metadata adds a whole new level of information to digital photographs, and a number of things that users, developers, and organizations must consider.
One of the obvious considerations is that of privacy. A single photo’s GPS metadata can give away your location at a specific date and time. What’s far more valuable is the aggregate GPS from someone’s camera roll, as it contains patterns that can be analyzed to determine where they live, work, and what places you frequent on their daily routine. This is why the more reputable social networking services strip this information when you share your photos online. Remember that this only means that your photos on your social network gallery don’t contain GPS data. There’s no guarantee that the service didn’t record the location information for advertiser data mining purposes before removing it.
Other EXIF metadata, such as the combination of make, model, settings, and even preferred camera orientation, can be used to associate a set of photos with a specific person.
Some photographers are more concerned about secrecy than privacy when it comes to their photos’ metadata. They don’t want to give away the camera settings they used to take pictures.
Reasons to retain or add EXIF metadata
One of the original reasons why the EXIF metadata format was developed was to make it easier to automate the process of cataloging, sorting, and searching through a collection of digital photographs. EXIF makes it possible to search for photos taken during a certain time period, with a certain device, or at a certain location. Other tags, such as the Copyright tag, make it possible to search for photos taken by a specific photographer, as well as assert one’s copyright.
Although the ImageDescription tag was intended to store a description of the image, you can also use it to store other helpful text information related to the photo, such as tags to classify the image or instructions for processing and editing the photo.
EXIF metadata is particularly useful in mobile applications that record simultaneous combinations of visual, date/time, and location information. For example, a technician might be required to take “before” and “after” photos of repair work that they did, providing a record of where, when, and how the work was done.
Other things to consider
As we saw in the different tags recorded by the iPhone and Android devices used to take the photographs in this article, different cameras record different sets of EXIF tags. Photo editing software often writes information to different tags or adds their own custom tags. This additional metadata can often be a hint that a photo has been edited.
There’s a concept in wildlife photography called Ethical EXIF, which provides a description of the ethical standards followed when taking a photo. It includes information such as the health and stress level of the animal in the photo, how long the animal was in captivity, and if the animal was transported from its habitat for the picture.
Finally, there are the messages that camera-using mobile apps display when first used. They usually say something along the lines of “This app makes use of the camera. Is that all right with you?”, but most of them don’t make it clear that the camera adds location and other metadata to each photo it takes. If you write mobile apps that use the camera, you might want to inform the user of this.
Securing Python APIs with Auth0
Securing Python APIs with Auth0 is very easy and brings a lot of great features to the table. With Auth0, we only have to write a few lines of code to get:
- A solid identity management solution, including single sign-on
- User management
- Support for social identity providers (like Facebook, GitHub, Twitter, etc.)
- Enterprise identity providers (Active Directory, LDAP, SAML, etc.)
- Our own database of users
For example, to secure Python APIs written with Flask, we can simply create a requires_auth decorator:
# Format error response and append status code

def get_token_auth_header():
    """Obtains the access token from the Authorization Header
    """
    auth = request.headers.get("Authorization", None)
    if not auth:
        raise AuthError({"code": "authorization_header_missing",
                        "description":
                            "Authorization header is expected"}, 401)

    parts = auth.split()

    if parts[0].lower() != "bearer":
        raise AuthError({"code": "invalid_header",
                        "description":
                            "Authorization header must start with"
                            " Bearer"}, 401)
    elif len(parts) == 1:
        raise AuthError({"code": "invalid_header",
                        "description": "Token not found"}, 401)
    elif len(parts) > 2:
        raise AuthError({"code": "invalid_header",
                        "description":
                            "Authorization header must be"
                            " Bearer token"}, 401)

    token = parts[1]
    return token

def requires_auth(f):
    """Determines if the access token is valid
    """
    @wraps(f)
    def decorated(*args, **kwargs):
        token = get_token_auth_header()
        jsonurl = urlopen("https://"+AUTH0_DOMAIN+"/.well-known/jwks.json")
        jwks = json.loads(jsonurl.read())
        unverified_header = jwt.get_unverified_header(token)
        rsa_key = {}
        for key in jwks["keys"]:
            if key["kid"] == unverified_header["kid"]:
                rsa_key = {
                    "kty": key["kty"],
                    "kid": key["kid"],
                    "use": key["use"],
                    "n": key["n"],
                    "e": key["e"]
                }
        if rsa_key:
            try:
                payload = jwt.decode(
                    token,
                    rsa_key,
                    algorithms=ALGORITHMS,
                    audience=API_AUDIENCE,
                    issuer="https://"+AUTH0_DOMAIN+"/"
                )
            except jwt.ExpiredSignatureError:
                raise AuthError({"code": "token_expired",
                                "description": "token is expired"}, 401)
            except jwt.JWTClaimsError:
                raise AuthError({"code": "invalid_claims",
                                "description":
                                    "incorrect claims,"
                                    "please check the audience and issuer"}, 401)
            except Exception:
                raise AuthError({"code": "invalid_header",
                                "description":
                                    "Unable to parse authentication"
                                    " token."}, 400)

            _app_ctx_stack.top.current_user = payload
            return f(*args, **kwargs)
        raise AuthError({"code": "invalid_header",
                        "description": "Unable to find appropriate key"}, 400)
    return decorated
Then use it in our endpoints:
# Controllers API

# This doesn't need authentication
@app.route("/ping")
@cross_origin(headers=['Content-Type', 'Authorization'])
def ping():
    return "All good. You don't need to be authenticated to call this"

# This does need authentication
@app.route("/secured/ping")
@cross_origin(headers=['Content-Type', 'Authorization'])
@requires_auth
def secured_ping():
    return "All good. You only get this message if you're authenticated"
To learn more about securing Python APIs with Auth0, take a look at this tutorial. Alongside with tutorials for backend technologies (like Python, Java, and PHP), the Auth0 Docs webpage also provides tutorials for Mobile/Native apps and Single-Page applications.


