


Multi-factor authentication (MFA) is an essential security measure that helps to protect your organization's data and assets. By requiring users to provide an additional authentication factor, such as a security token or fingerprint, in addition to their username and password, MFA can significantly reduce the risk of unauthorized access.
However, implementing MFA can sometimes create friction in the user experience, potentially leading to frustration and reduced productivity. Additionally, not all users or scenarios may require the same level of security, making a one-size-fits-all MFA approach impractical.
Auth0 Actions is a powerful feature that allows you to customize and extend the functionality of Auth0. With Actions, you can create custom workflows that trigger in response to specific events, such as user login or registration. This enables you to tailor your MFA implementation to meet your organization's specific needs.
For example, you can use Actions to:
- Enforce MFA based on user roles or permissions: You can require certain users, such as administrators or those with access to sensitive data, to use MFA while allowing others to bypass it.
- Implement risk-based authentication: You can use Actions to assess the risk level of a login attempt based on factors such as the user's location, device, and IP address. If the risk is high, you can then require the user to provide an additional factor of authentication.
Prepare your Tenant
Before diving into customizing your Multi-Factor Authentication (MFA) flows, let's make sure we have the essentials in place. This quick guide will walk you through the initial setup steps:
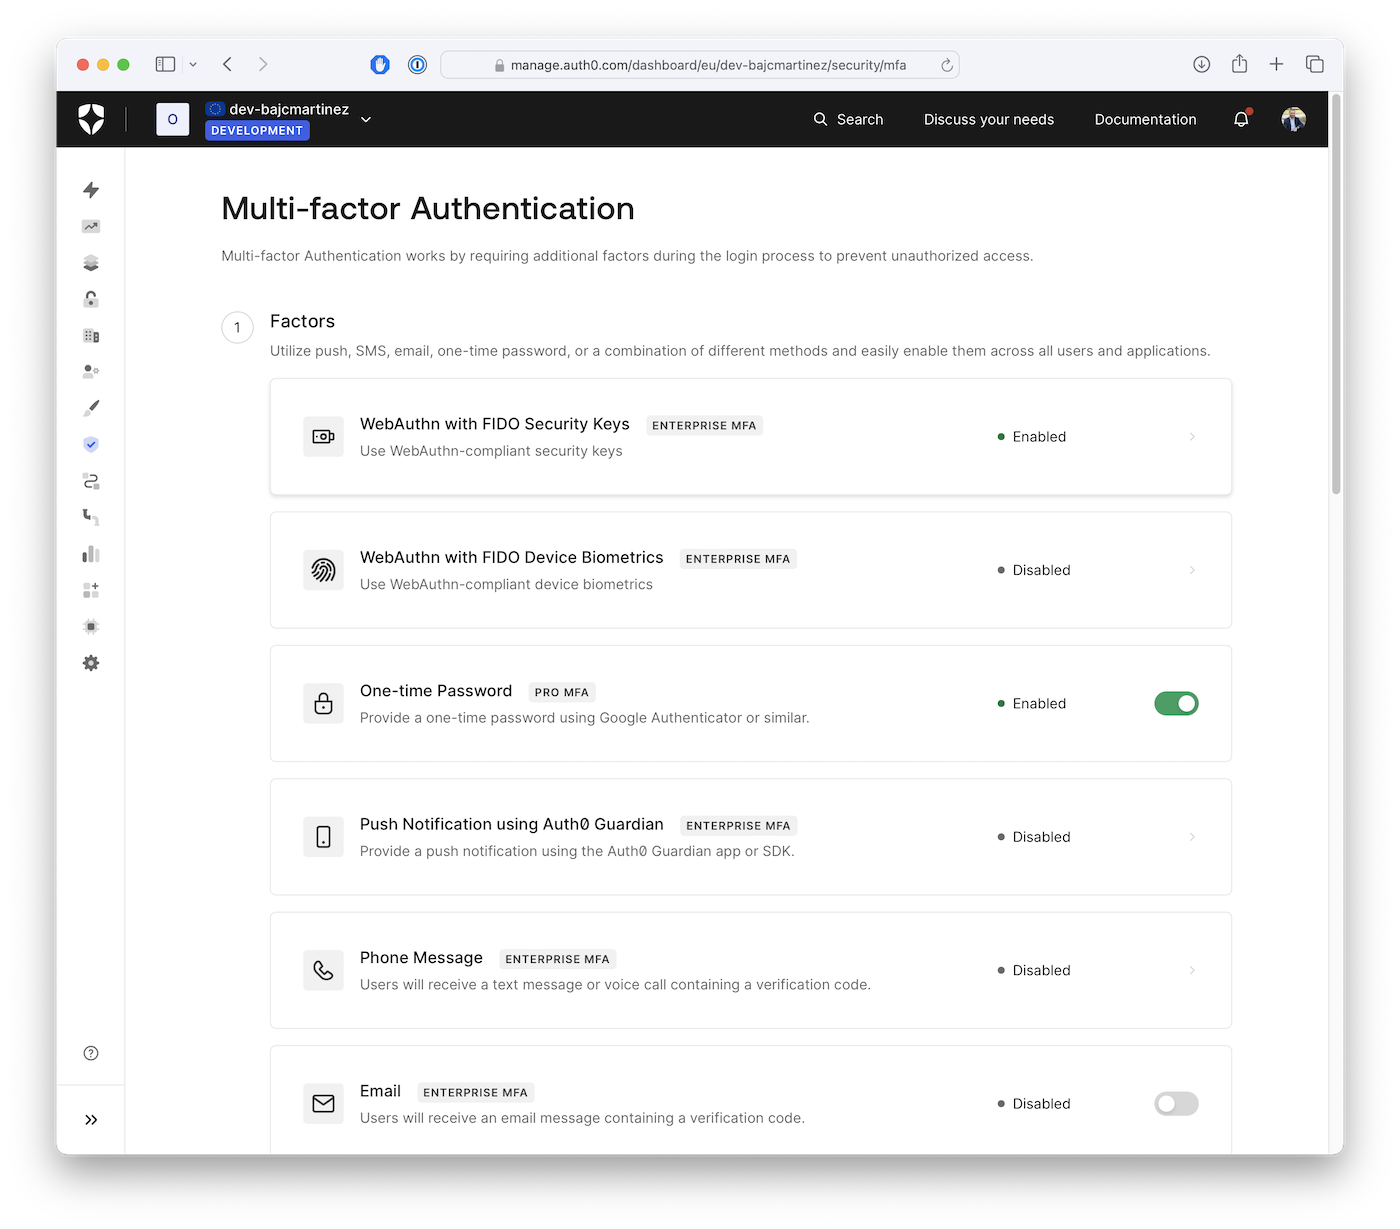
Activate MFA: Head over to your Auth0 Dashboard (Get a free account if you don't already have one) and navigate to Security > Multi-factor Auth. Here, you'll be able to activate MFA for your tenant.
Choose Your Factors: MFA comes in various forms. Decide which factors suit your security needs and enable them on the same Multi-factor Auth page. You might choose options like push notifications, SMS codes, or even biometrics.
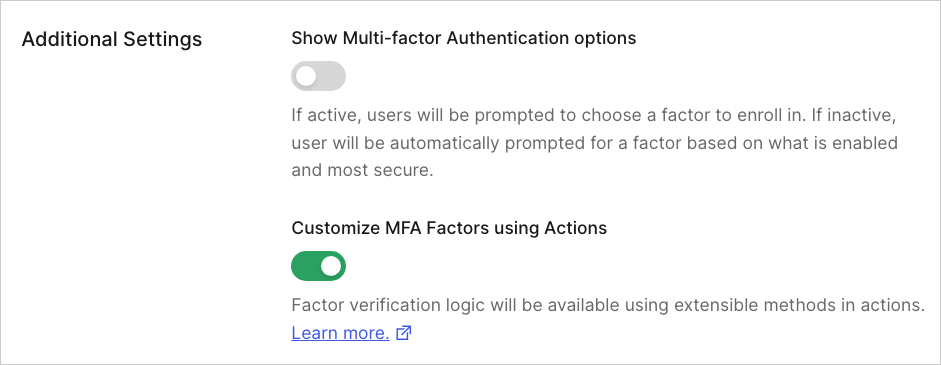
Enable Customization: To personalize your MFA flows, toggle on the "Customize MFA Factors using Actions" setting. This is like unlocking a secret level – it opens the door to fully customized experiences for your users.
Actions with
enrollWithorenrollWithAnycommands override any existing policies or rules that enable or disable MFA in a tenant.
Understand the APIs
Once you've enabled Multi-Factor Authentication (MFA) in your Auth0 tenant, you can go beyond the basic settings and create truly customized enrollment flows using Auth0 Actions. Actions are snippets of code that run at specific points in the user's authentication journey, giving you granular control over your authentication workflow and, in particular, how MFA is presented.
To customize your MFA experiences, Auth0 Actions provides a set of APIs designed for enrollment and requiring authentication challenges. Here's a breakdown of the four key APIs you can use:
enrollWith(factor, options)
Initiates MFA enrollment for a specific factor (e.g., otp, push-notification, webauthn-roaming, etc. Visit the docs to learn about all supported values).
Example:
api.authentication.enrollWith({type: 'otp'})enrollWithAny(factors)
Similar to enrollWith but prompts the user to select an MFA factor to enroll in from the supplied list.
Example:
api.authentication.enrollWithAny([{type: 'otp'}, {type: 'webauthn-roaming'}])challengeWith(factor, options)
Challenge the user with one or more specified multifactor authentication factors. This method presents the default challenge first, then allows the user to select a different option if additional factors have been supplied. If the user has not enrolled in any of the factors supplied (including both the default and any additional factors), the command fails.
Example:
api.authentication.challengeWith({type: 'otp'})challengeWithAny(factors)
Trigger a MFA challenge and allow the user to select their preferred factor from the supplied list.
Example:
api.authentication.challengeWithAny([{type: 'otp'}, {type: 'webauthn-roaming'}])Create a New Auth0 Action
To begin, let's create a new Auth0 Action. Actions are serverless functions that run in a secure Auth0 environment.
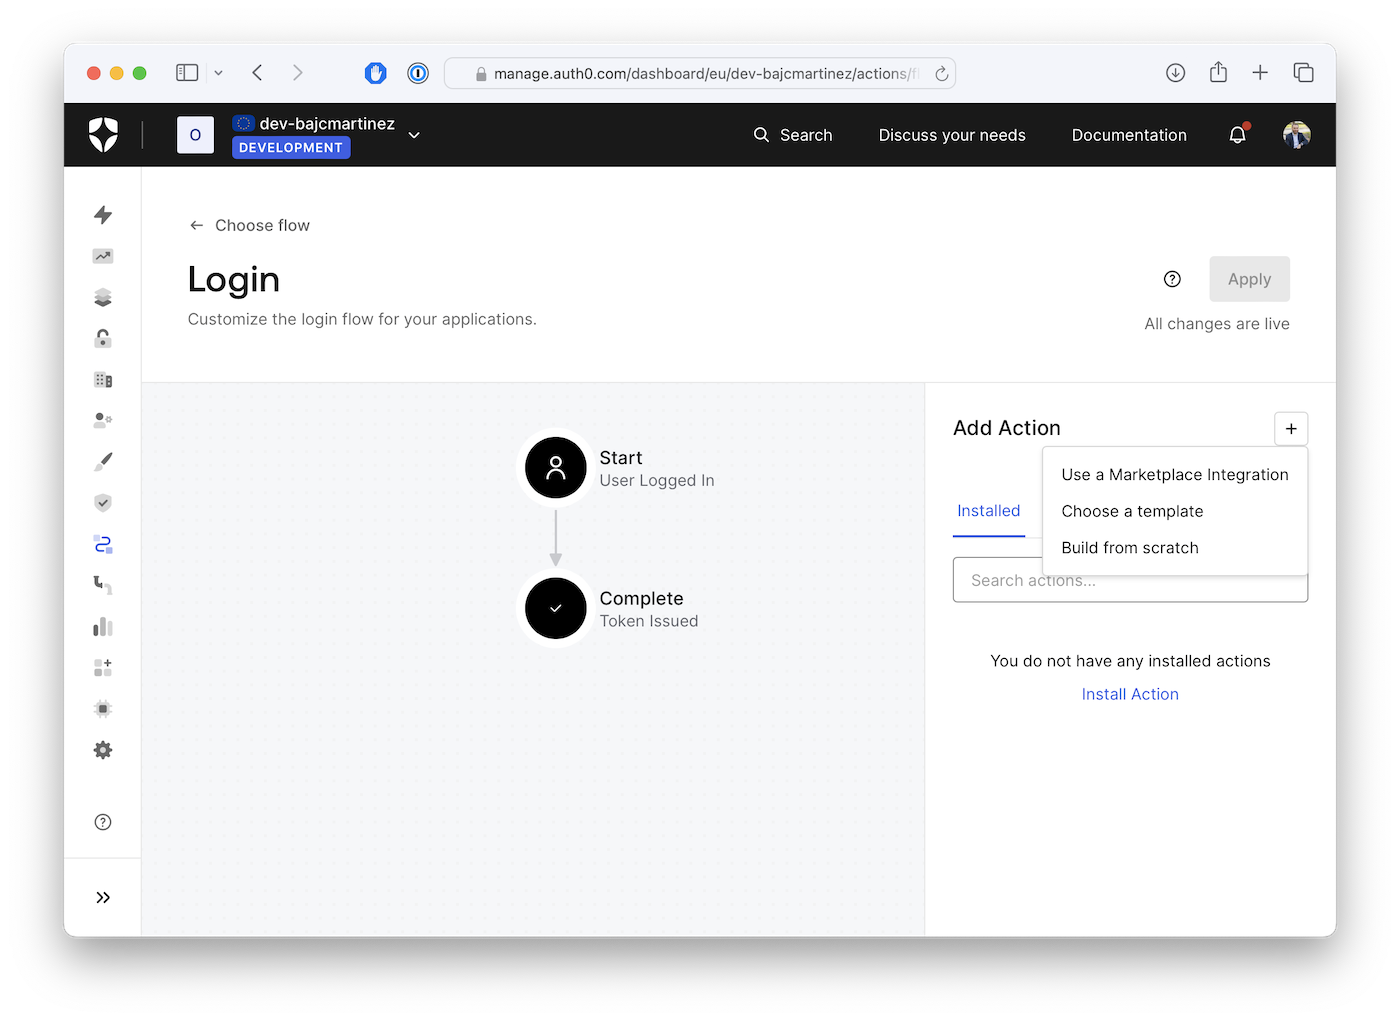
To create an Action, log into your Auth0 Dashboard, select Actions from the left sidebar menu, then select Flows. This page shows the different flows you can customize. For our use case, we’ll choose the “Login” flow.
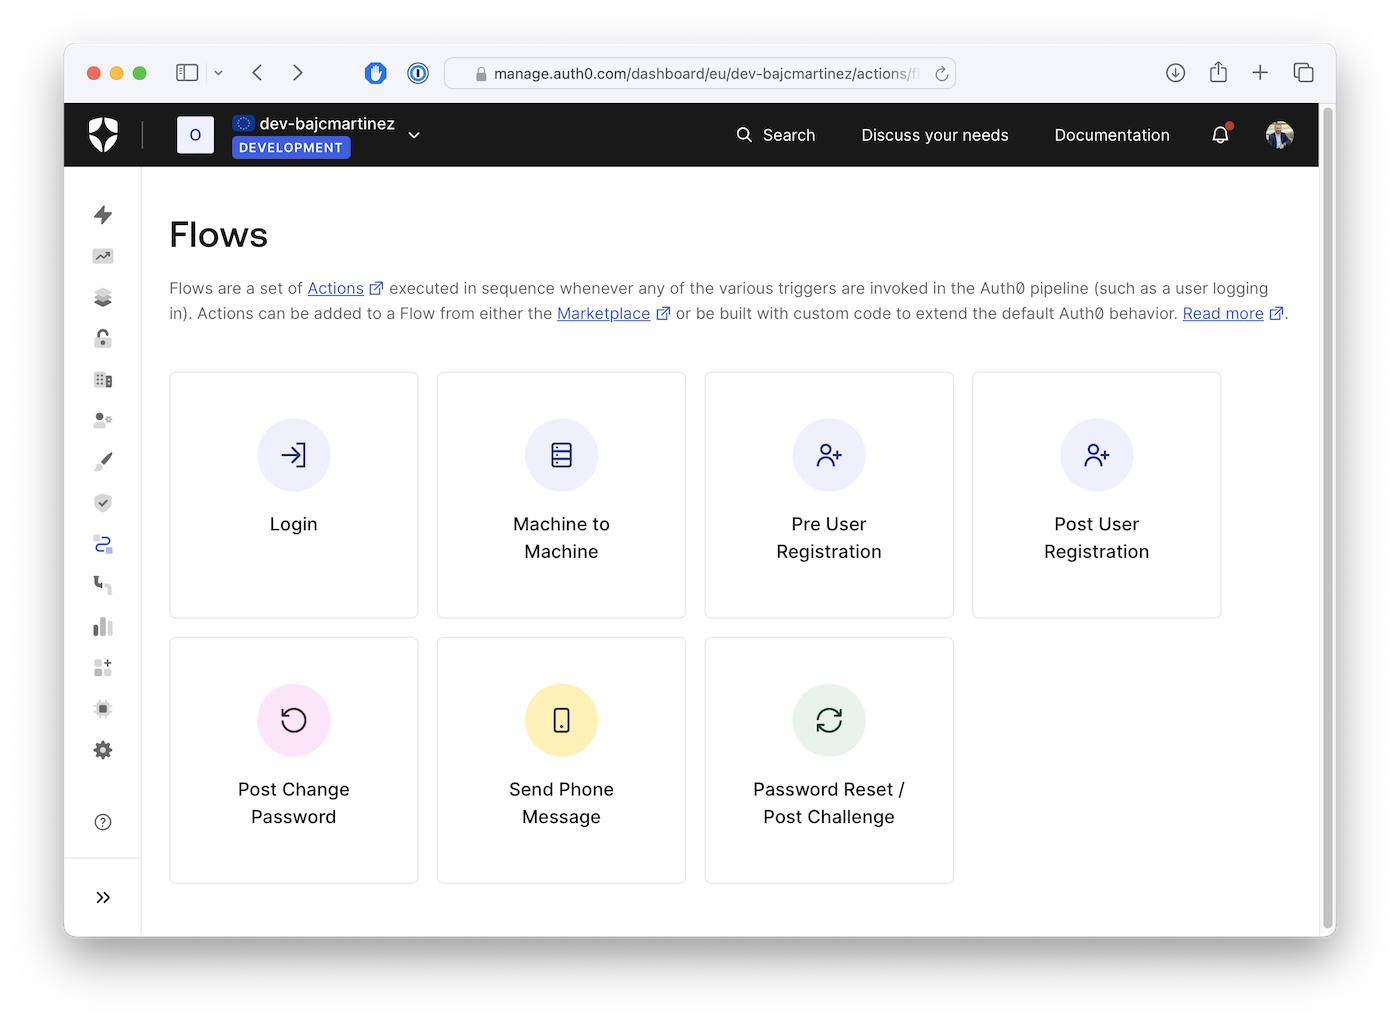
This will take you to the “Login” flow page, where you can install, create, and add Actions to the flow.
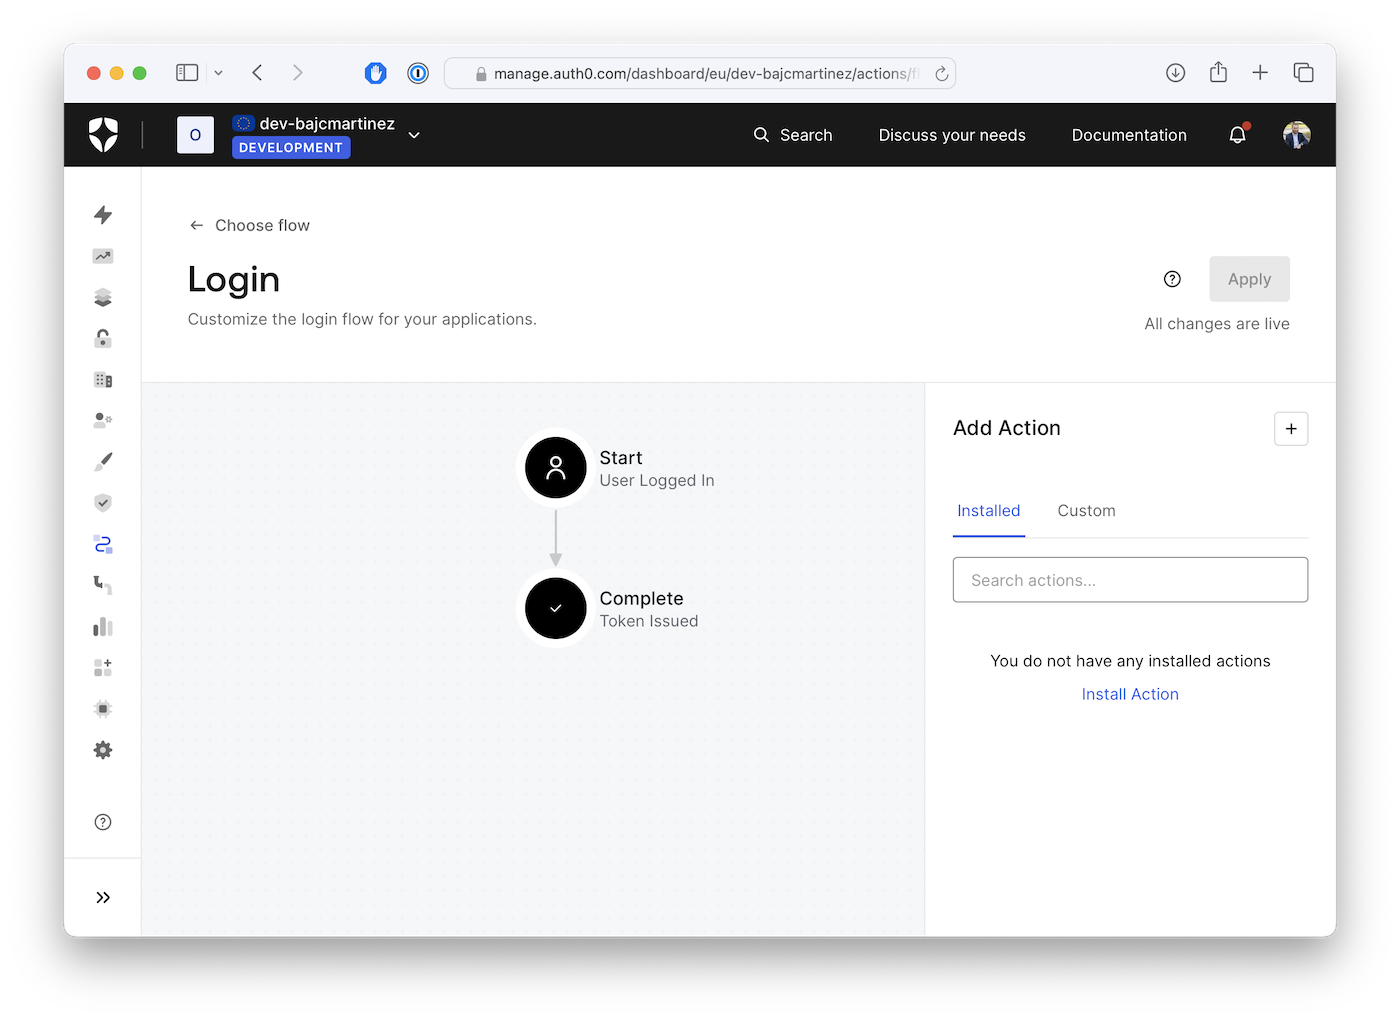
The screen has two main sections: the diagram in the center of the page shows the login flow and the Actions panel.
On the diagram, we can see the default login flow, which contains two states.
- Start: The user completed the login form and is ready to log in.
- Complete: The system issues the user’s credentials (an ID token and, if required, an access token).
You can drag and drop Actions in between these states to add custom logic to the login flow or deny the login request before the tokens are issued.
On the right panel, we have the Actions panel with two tabs.
- Installed: Pre-installed Actions from the Auth0 Actions Marketplace
- Custom: Actions created for this tenant
To create an Action, click the plus icon on the Actions panel and select "Build from scratch".
After that, a modal window will appear to enter the information for our Action: you’ll have to provide a name, and you can leave the trigger and runtime as the default values. For my Action, I’ll name it “Require webauthn MFA for admins”.
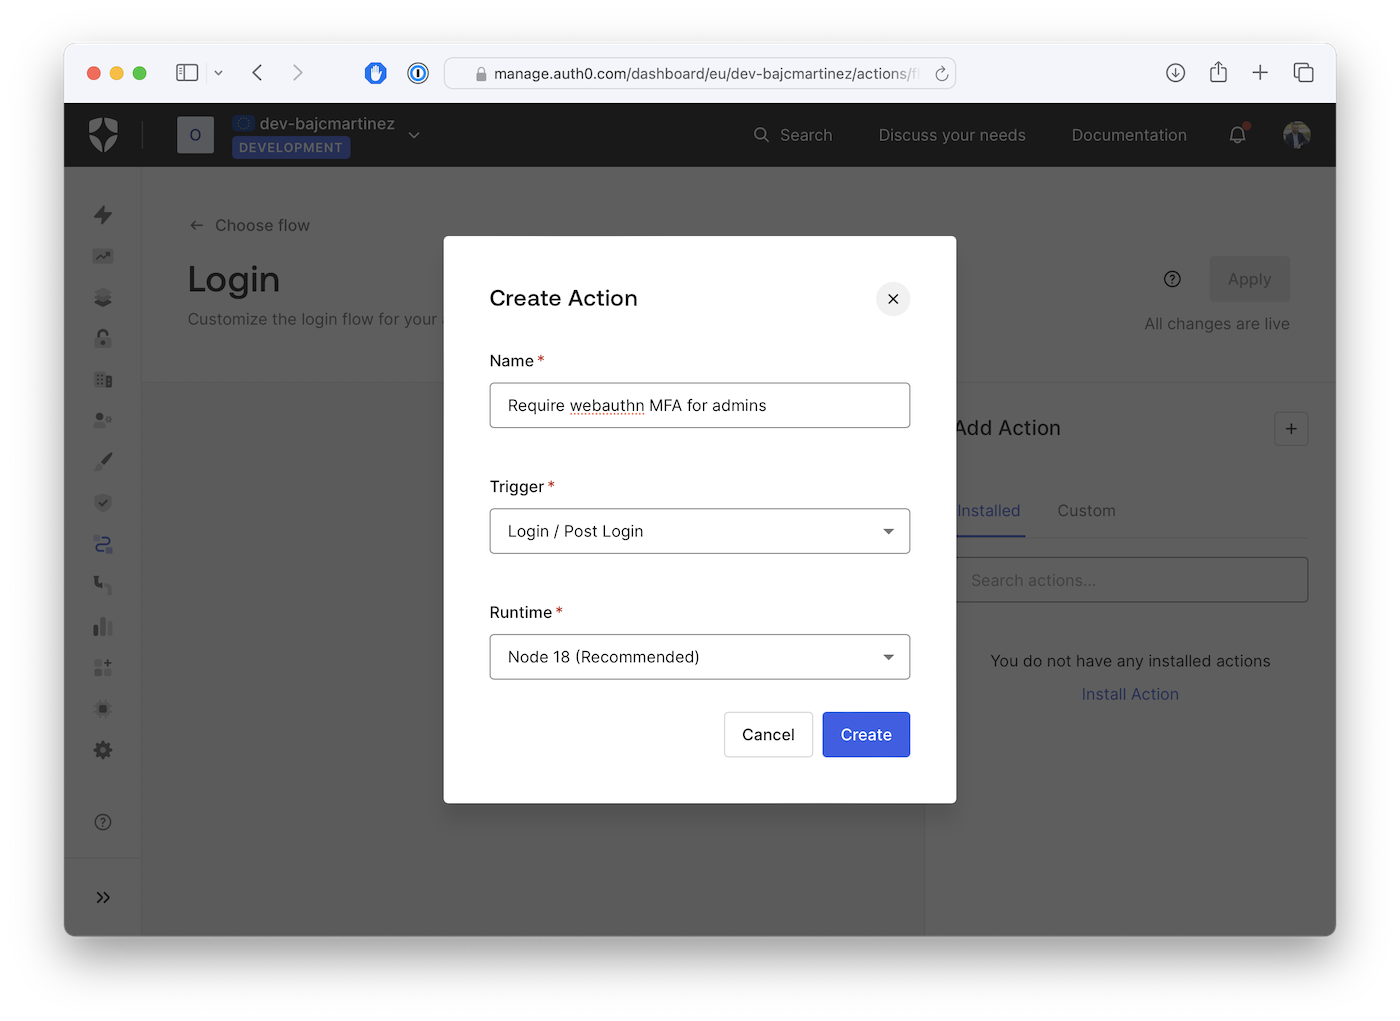
After clicking on "Create", you’ll be taken to the Action’s code editor, where you can write the code for your Action, install packages, test it, and more:
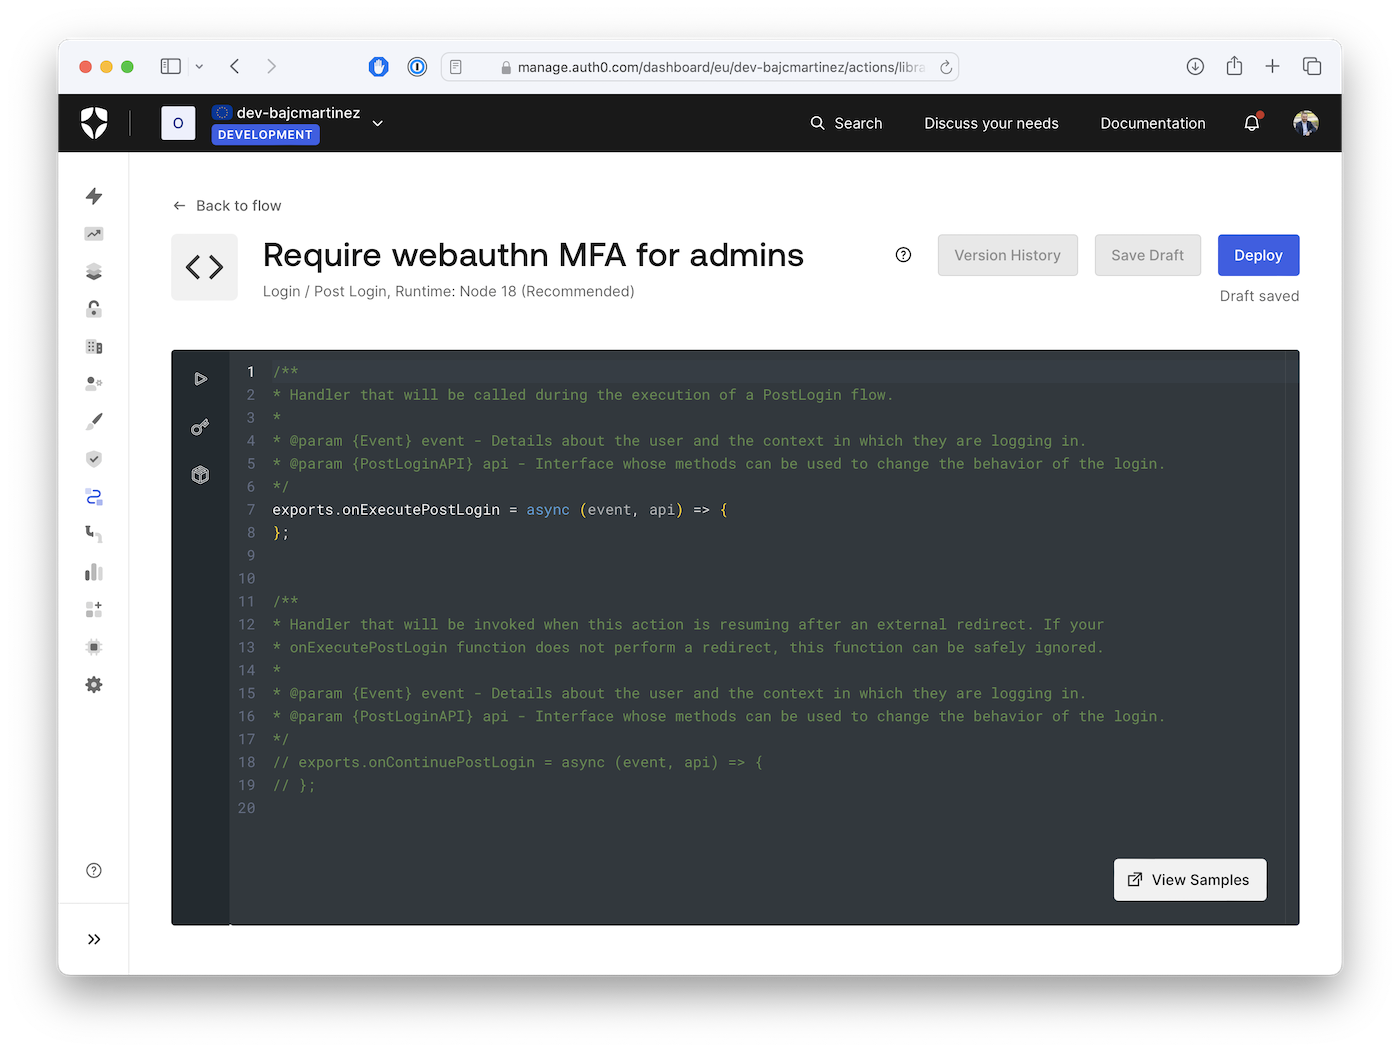
An Action can make use of two JavaScript functions to alter the Login flow:
onExecutePostLogin: defines what should happen immediately after the user provides login credentials that Auth0 verified. This method receives two parameters,eventandapi.event: contains details about the login request, such as the user and the context.api: contains methods to manipulate the login’s behavior.
onContinuePostLogin: defines what should happen when control returns to the Login Action after a redirect to another web page. It’s used only when the user returns after being redirected, which is why it’s commented out by default.
For this tutorial, we’ll focus on the onExecutePostLogin method.
Writing the Actions Code
Next, we'll write the Action's code that will require users under the Admin's group to use webauthn as an additional authentication step. If the user isn't already enrolled with webauthn, the first time they login they will be prompted to do so.
The action will make use of the APIs challengeWith and enrollWith, in addition to using the user's property enrolledFactors to determine if the user has an MFA factor enrolled already.
Here's the actual code:
exports.onExecutePostLogin = async (event, api) => {
    // Check if the user is an admin, enforce webauthn
    if (event.authorization?.roles?.includes('Admin')) {
        // Check if the user is already enrolled with webauthn
        if (event.user.enrolledFactors && event.user.enrolledFactors.some(m => m.type === 'webauthn-roaming')) {
            api.authentication.challengeWith({type: 'webauthn-roaming'})
        } else {
            api.authentication.enrollWith({type: 'webauthn-roaming'})
        }
    }
};
Attach an Auth0 Action to the Login Flow
After coding and testing your Actions, it’s time to deploy and use them as part of the login flow. Once you are ok with your testing results, you can hit the Deploy button on the top right corner of the screen. This will take the existing code and settings and generate a function snapshot you can use in your login flow.
If you ever need to change the code on the function, all changes will automatically be saved as a new draft, and if you want the changes to become effective, you’ll have to deploy your latest version once again.
Once your code is deployed, it doesn’t mean it is actively used as part of your login flow. To check for that, please refer back to the login flow screen, where the login diagram is shown. If you don’t see your Action as part of the diagram, it means that, even if your Action is deployed, it has not yet been activated. To activate the Action as part of the flow, click on the “Custom” tab on the Actions panel, locate your Action by name, and simply drag and drop the box over the login diagram between the "Start" and "Complete" steps. After that, you can apply changes using the “Apply” button on the top right corner of the screen.
Test Your New Authentication Flow
Now, you can try your new Action by logging into your Auth0-powered application using both admin and non-admin accounts. When you log using any method (e.g. username/password, or social login) with a non-admin user, you'll get direct access to your application or continue with the authentication flow as you have it specified for your tenant.
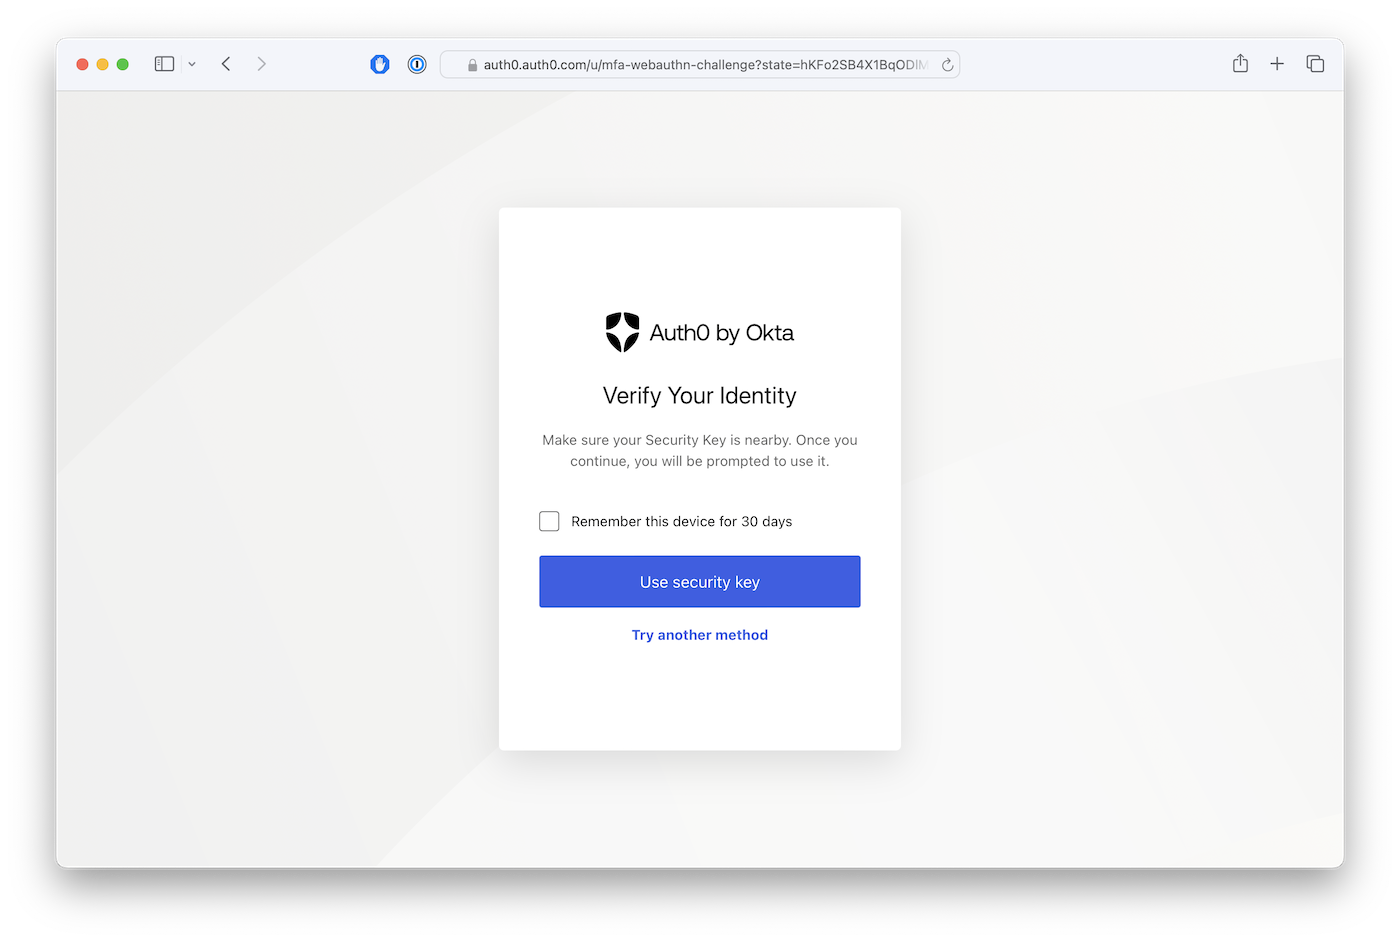
When you log in using an admin user (a member of the group "Admin", as we defined it on the Action), you'll be prompted to either register or validate your account with webauthn. The screen may look something like this:
Conclusion
Auth0 Actions provides a versatile and powerful toolkit to revolutionize your organization's MFA implementation. By harnessing the flexibility of Actions, you can create personalized, risk-based, and context-aware MFA workflows that enhance security without compromising user experience.
The ability to tailor MFA requirements based on user roles, risk assessments, and specific applications empowers you to implement a layered security approach. This means that you can enforce stricter MFA for high-risk scenarios, such as administrative access or sensitive data handling while offering a streamlined experience for regular users.
As you explore the possibilities of Auth0 Actions, remember that Customization is key. By experimenting with different workflows and conditions, you can fine-tune your MFA implementation to perfectly align with your organization's unique security requirements and user expectations.
Thanks for reading!


