TL;DR: In this tutorial, I'll introduce you to Webpack and show you how to configure it for performance optimization in your web application. Check out the repo to get the code.
Webpack is an aggressive and powerful module bundler for JavaScript applications. It packages all the modules in your application into one or more bundles (often, just one) and serves it to the browser. However, Webpack is more than just a module bundler. With the help of loaders and plugins, it can transform, minify and optimize all types of files before serving them as one bundle to the browser. It takes in various assets, such as JavaScript, CSS, Fonts, Images, and HTML, and then transforms these assets into a format that’s convenient to consume through a browser. The true power of Webpack is the sum of its parts.
"The true power of Webpack is the sum of its parts."
Tweet This
Webpack is a JavaScript library, built and maintained by Tobias Koppers and the team. It is very well known and backed by the developer community. Virtually every JavaScript framework and project uses Webpack.

Currently, many web platforms use Webpack during development. Such platforms include Auth0, Netflix, Instagram, Airbnb, KhanAcademy, Trivago and more. The documentation is very detailed, and there is a vibrant community of users. Webpack currently exists in two GitHub Organizations, Webpack and Webpack-contrib. The Webpack org consists of projects such as webpack, webpack-cli, tapable, while the Webpack-contrib org consists of mostly plugins and loaders.
Webpack - The Core Concepts
Webpack is popularly addressed as a beast in the JavaScript community. A lot of developers know how to use Webpack but are constantly confused as to how it actually works under the hood. Is it magic? Is Sean Larkin a sorcerer? What about Tobias? Is he a first-generation spell-caster? Well, I'll address this quite simply. I ask that you just grab your cup of coffee and follow along.
Webpack builds a dependency graph when it processes your application. It starts from a list of modules defined in its config file (webpack.config.js) and recursively builds a dependency graph that includes every module your application needs, then packages all of those modules into a small number of bundles to be loaded by the browser.
"Webpack builds a dependency graph when it processes your application."
Tweet This
There are four core concepts you need to grasp to understand how Webpack functions:
- Entry
- Output
- Loaders
- Plugins
Entry
Every Webpack setup has one or more entry points. The entry point tells Webpack where to start building its dependency graph from. Webpack starts processing the module at the entry point and roams around the application source code to look for other modules that depend on the entry module. Every direct or indirect dependency is captured, processed and outputted into a bundle(s).
webpack.config.js
const config = {
  entry: './app/prosper.js'
};

module.exports = config;
webpack.config.js - separate entries
const config = {
  entry: {
    app: './src/app.js',
    vendors: './src/vendors.js'
  }
};

module.exports = config;
Note: Just simply reiterating. Multiple entry points can be specified in a Webpack config file.
Output
Only one output point can be specified in a Webpack setup. The output config property tells Webpack where to place the bundle(s) it creates and how to name them. It is as simple as specifying the output property in the config file like so:
const config = {
    entry: './app/prosper.js',
    output: {
        path: '/unicodeveloper/project/public/dist',
        filename: 'app.bundle.js'
    }
};

module.exports = config;output.filename - The name of the bundle webpack produces.
output.path - The directory to write app.bundle.js to.
Loaders
Loaders are like transformers. With loaders, Webpack can process any type of file, not just JavaScript files. Loaders transform these files into modules that can be included in the app's dependency graph and bundle. Check out the example below:
const config = {
  entry: './app/prosper.js',
  output: {
    path: '/unicodeveloper/project/public/dist',
    filename: 'app.bundle.js'
  },
  module: {
    rules: [
      { test: /\.(html)$/, use: 'html-loader' }
    ]
  }
};

module.exports = config;
In the code above, the html-loader processes HTML files and exports them as strings. There are several loaders such as css-loader, less-loader, coffee-loader and many more.
Plugins
Earlier in the post, I mentioned that loaders are like transformers. Plugins are super-man-like in their operations. They can do a lot more tasks than loaders. In fact, just anything ranging from deleting files, to backing up files on services like Cloudinary, to copying files, etc. Check out the example below:
const CompressionWebpackPlugin = require('compression-webpack-plugin');
const webpack = require('webpack');
const path = require('path');

const config = {
  entry: './app/prosper.js',
  output: {
    path: '/unicodeveloper/project/public/dist',
    filename: 'app.bundle.js'
  },
  module: {
    rules: [
      { test: /\.(html)$/, use: 'html-loader' }
    ]
  },
  plugins: [
    new CompressionWebpackPlugin({test: /\.js/})
  ]
};

module.exports = config;
In the code above, the compression-webpack-plugin compresses all the JavaScript files before serving them to the browser. There are several plugins such as AggressiveSplittingPlugin, CommonsChunkPlugin, 18nWebpackPlugin and many more.
Webpack Requirements
In order to use Webpack, you need to have the tool mentioned below installed on your machine.
- Node.js: Navigate to the Node.js website and install the latest version on your machine. Verify that
npmworks by runningnpmin your terminal.
Setting Up Webpack in an Application
Create a new project directory. Head over to the terminal and run npm init to create a package.json inside the directory.
Next, go ahead and add webpack to the project.
npm install webpack -D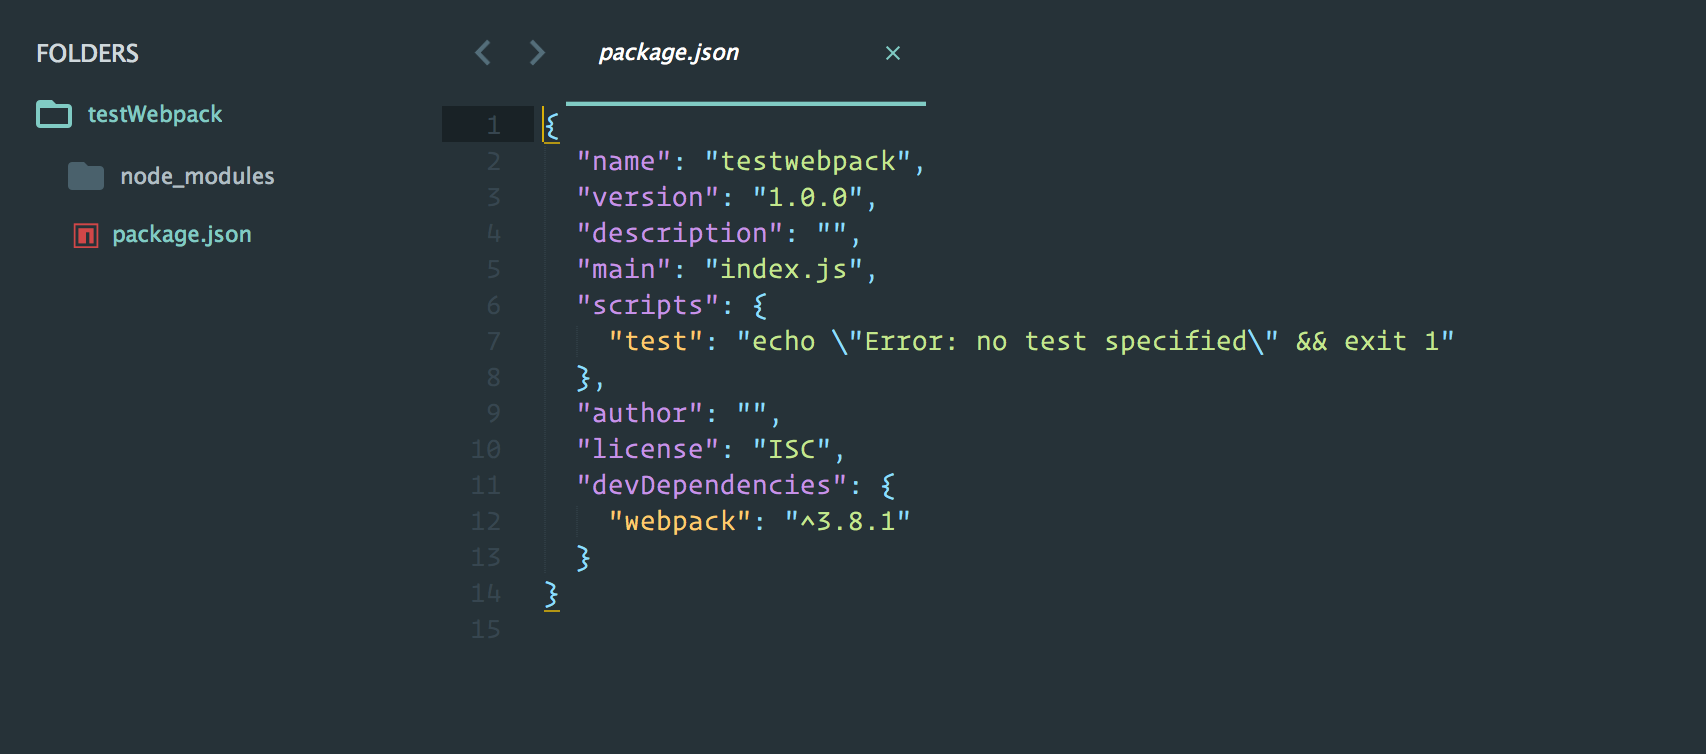
Create a js folder inside the directory with two files, service.js and factory.js.
js/factory.js
import './service.js';js/service.js
console.log("This is a functioning service.");Create a webpack.config.js file in the root directory and add the following code to it like so:
const path = require('path');

module.exports = {
  entry: './js/factory.js',
  output: {
    path: path.resolve(__dirname, 'dist'),
    filename: 'bundle.js'
  }
};
In the code above, we have an entry point, factory.js. This config file tells Webpack to start processing the dependency graph from this file, which is dependent on service.js. And outputs the result of its operation to bundle.js which is written to a new dist directory.
Create an index.html file in the root directory.
    <!DOCTYPE html>
    <html lang="en">
    <head>
      <meta charset="UTF-8">
      <title>Test Webpack</title>
    </head>
    <script type="text/javascript" src="dist/bundle.js"></script>
    <body>
      <h2> Testing Webpack.... </h2>
    </body>
    </html>
One last step. Head over to package.json. Add webpack to the scripts section like so:
package.json
{
  "name": "testwebpack",
  "version": "1.0.0",
  "description": "",
  "main": "index.js",
  "scripts": {
    "test": "echo \"Error: no test specified\" && exit 1",
    "build": "webpack"
  },
  "author": "",
  "license": "ISC",
  "devDependencies": {
    "webpack": "^3.8.1"
  }
}
With this action, we can just run npm run build from the terminal. The command will invoke webpack. Go ahead and try it out.
npm run build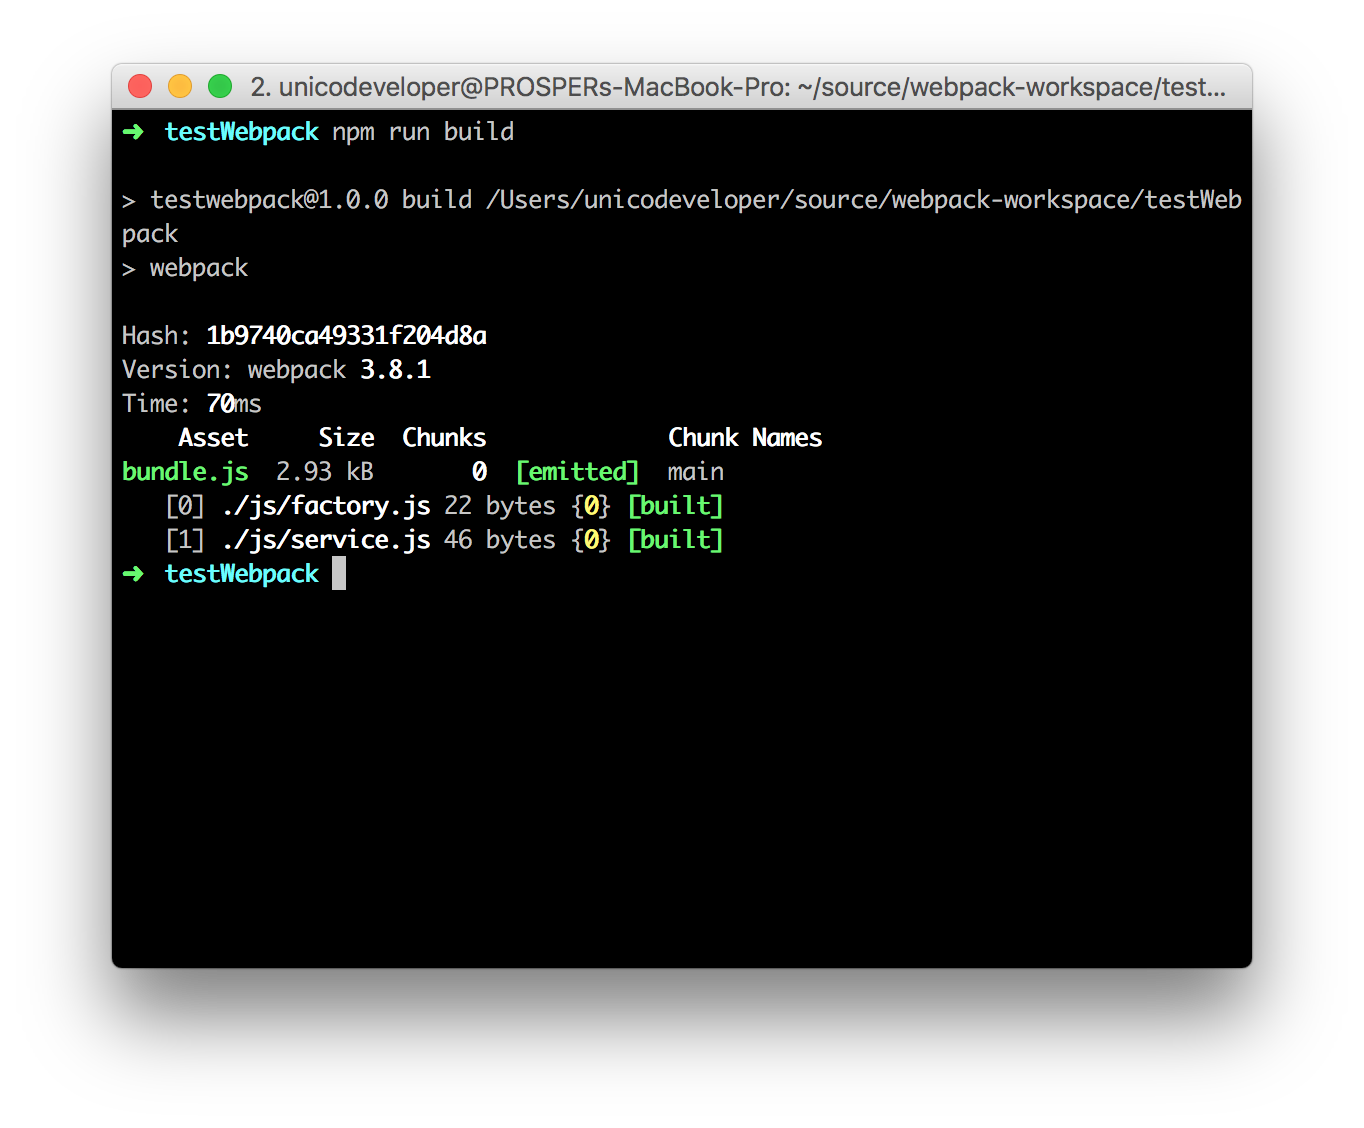
Now, open your index.html in the browser. You should see the result of service.js in the console.
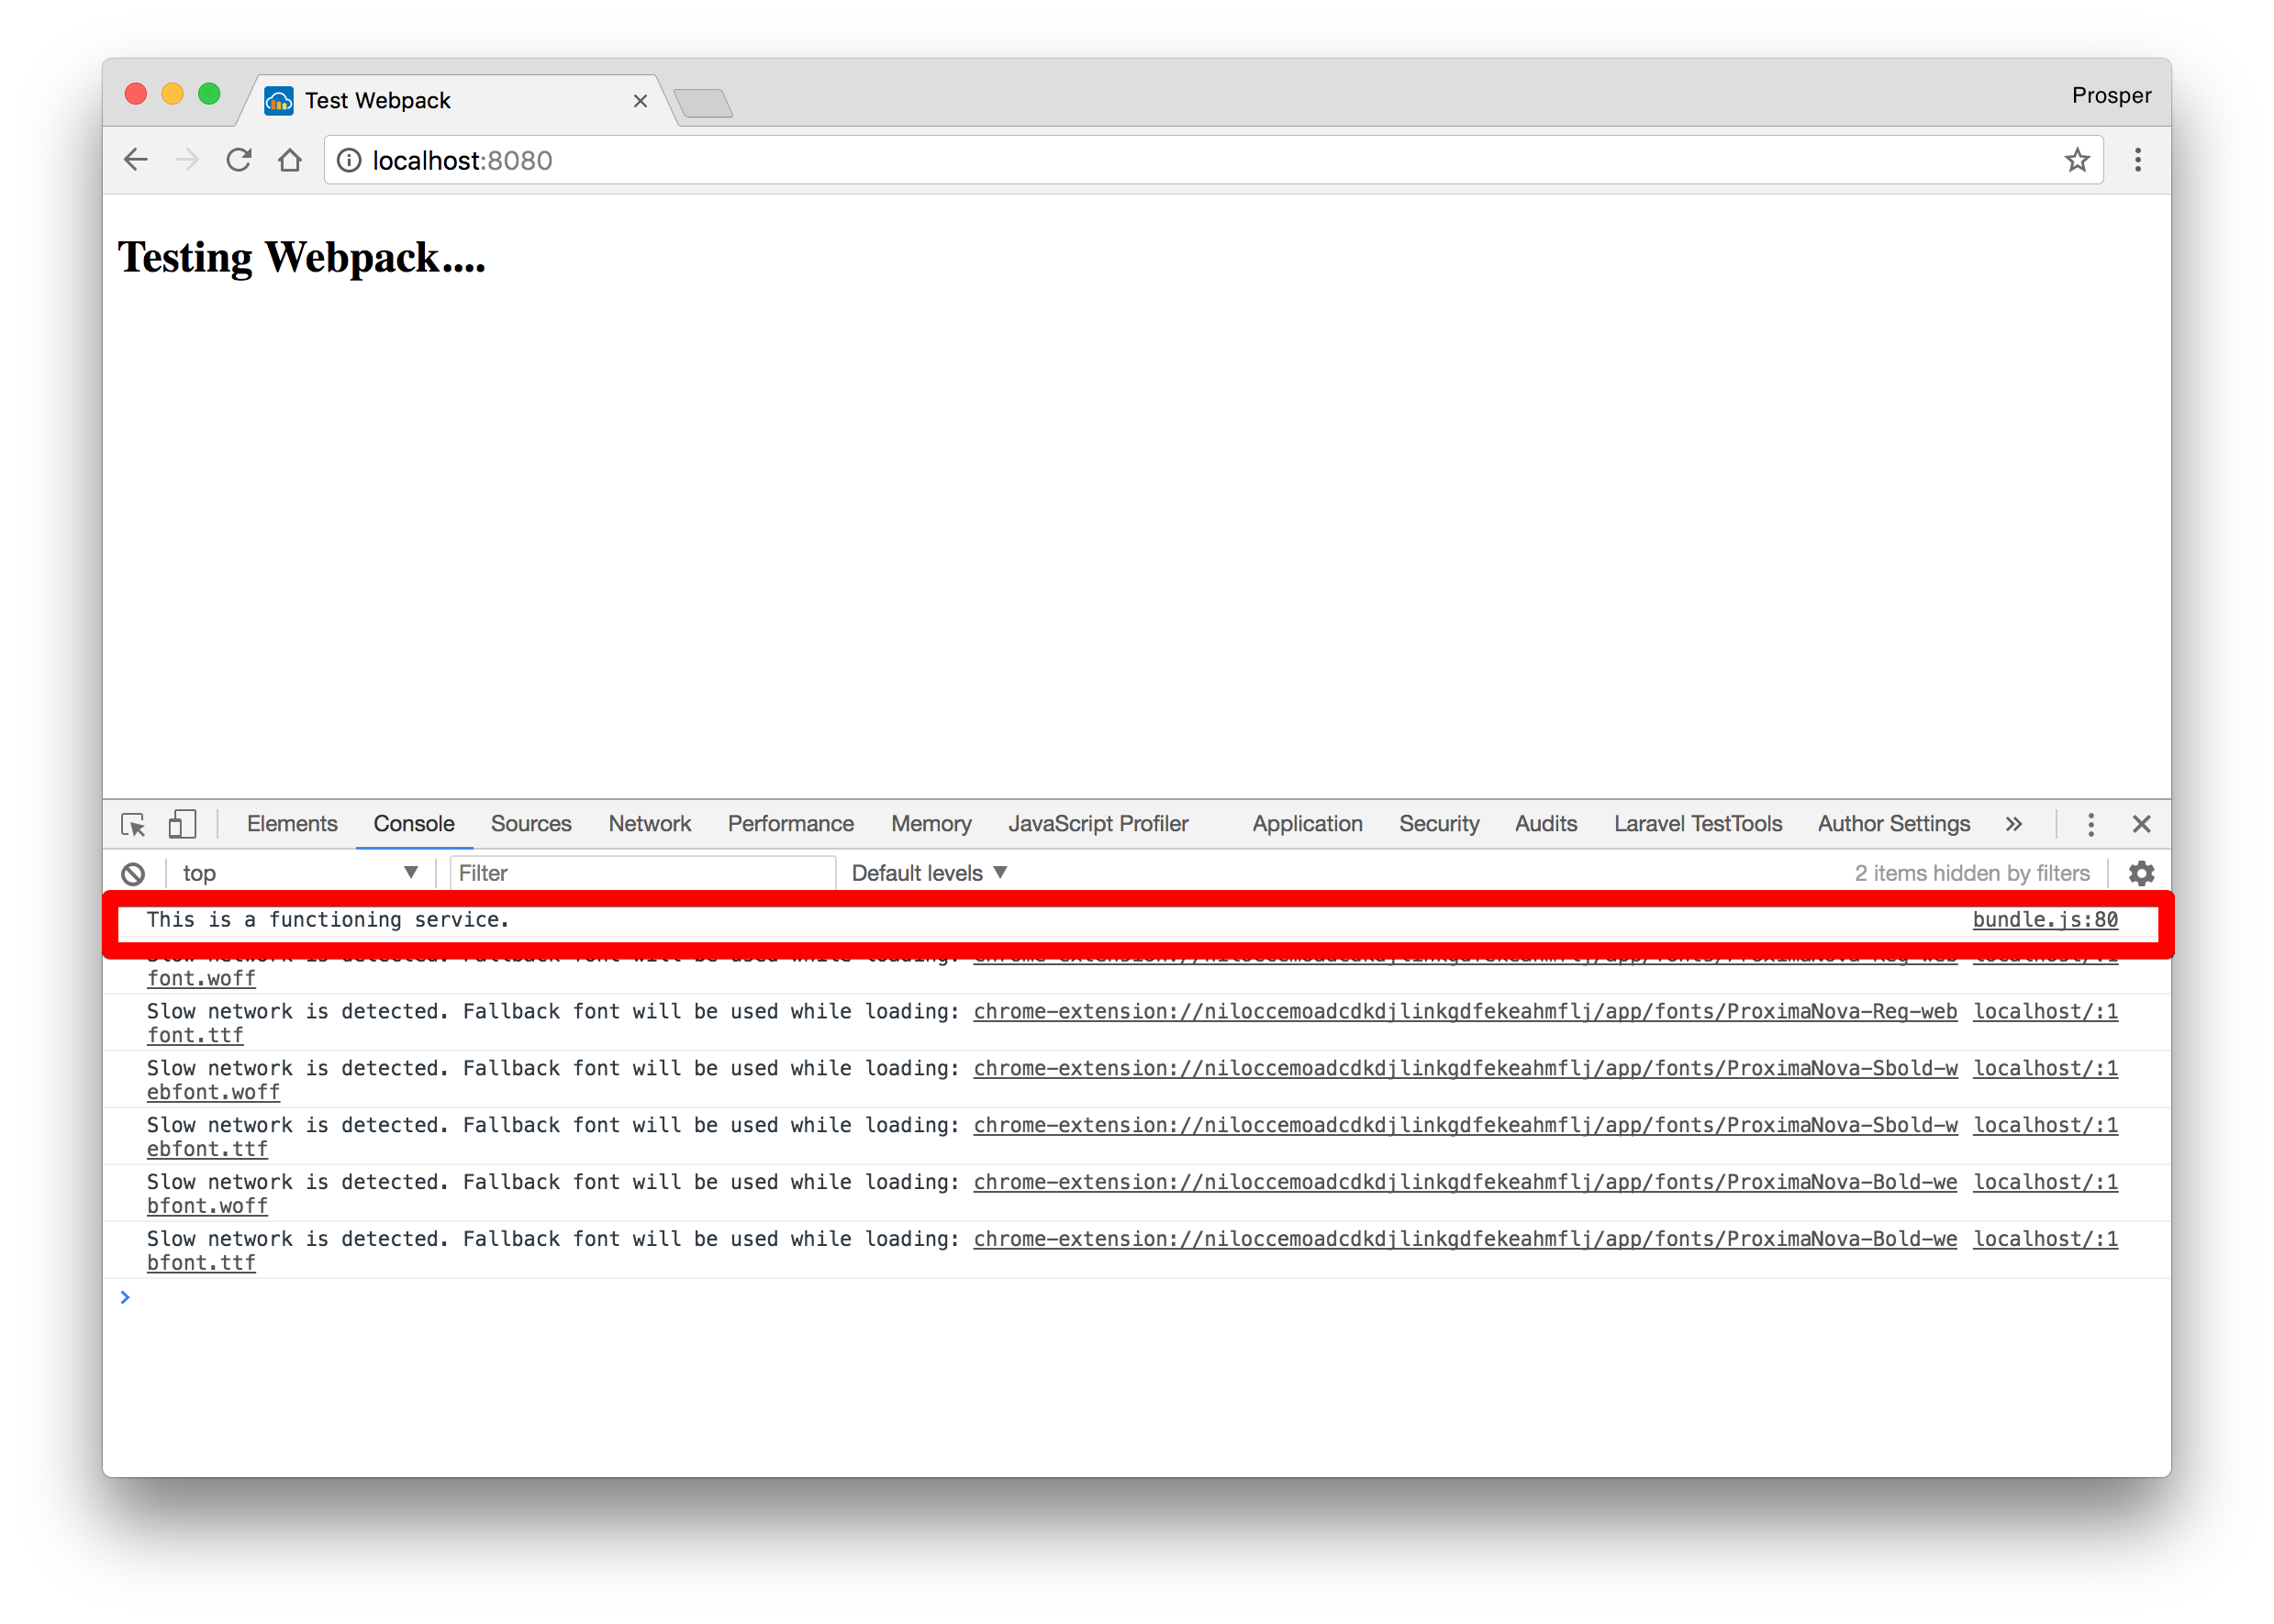
By now, you should understand the basics of using Webpack in a project. Webpack can do a lot more. Let's examine a use case that gives us a better overview of using loaders and plugins with Webpack in a JavaScript project.
Webpack Use Case: Project Asokoro
Remember the Project Lingo we architected with GulpJS? The people of Asokoro were very happy with the results. Now, they want the same results with Project Asokoro.
Project Asokoro is a project that we have embarked upon for the people of Asokoro. It does exactly what Project Lingo does. Project Lingo allows a mere human click a button, input a destination and Lingo automatically teleports the human to their preferred destination in approximately 5 minutes.
In Project Asokoro, we'll have a bunch of JavaScript, Sass and Image files. We need to compress and optimize these files so that Asokoro can be super-fast. I mean, you don't want Asokoro taking over an hour to teleport a human because of our inefficient developer work-flow. We also don't want investors running way.
This is what we need to do:
- Concatenate all our JavaScript files into just one file. This will make sure our app makes one HTTP request while serving JavaScript rather than multiple HTTP requests.
- Compile our Sass files into CSS. The browser understands CSS, not Sass.
- Compress all our image files.
We have these requirements listed above. How do we approach tackling these tasks with Webpack?
Project Asokoro - Install Webpack Loaders and Plugins
Let's continue from where we stopped earlier. Create a new scss folder in the root directory and add a service.scss file to it.
service.scss
$color: rgb(255, 123, 123);
$font-weight: 300;

h2 {
  color: $color;
  font-weight: $font-weight;
}

span {
    font-weight: $font-weight;
    color: rgb(255, 69, 69) ;
}
Head over to js/factory.js and import the sass file like so:
import './service.js';
import '../scss/service.scss';
Go ahead and install the following loaders and plugins via your terminal:
npm install sass-loader node-sass extract-text-webpack-plugin css-loader style-loader --save-devA quick breakdown of what each of these plugins and loaders aims to accomplish.
- sass-loader
- Loads a SASS/SCSS file and compiles it to CSS. It requires
node-sassto work.
- Loads a SASS/SCSS file and compiles it to CSS. It requires
- node-sass
- This libarary allows you to natively compile
.scssfiles tocssat incredible speed and automatically via a connect middleware.
- This libarary allows you to natively compile
- extract-text-webpack-plugin
- Extract text from a bundle, or bundles, into a separate file.
- css-loader
- The
css-loaderinterprets@importandurl()likeimport/require()and resolves them.
- The
- style-loader
- Add CSS to the DOM.
Project Asokoro - Rewrite Webpack Config File
Open up the webpack.config.js file and modify it to this code below:
const path = require('path');
const ExtractTextPlugin = require("extract-text-webpack-plugin");

module.exports = {
  entry: './js/factory.js',
  output: {
    path: path.resolve(__dirname, 'dist'),
    filename: 'bundle.js'
  },
  module: {
    rules: [
      {
        test: /\.scss$/,
        use: ExtractTextPlugin.extract({
          use: [{
            loader: 'css-loader'
          }, {
            loader: 'sass-loader'
          }],
          fallback: 'style-loader'
        })
      }
    ]
  },
  plugins: [
    new ExtractTextPlugin('bundle.css')
  ]
};
In the code above, we have the extract-text-webpack-plugin. It extracts all the CSS code into /dist/bundle.css. Webpack roams the source code for .scss files then use css-loader and sass-loader to load and embed the stylesheets into the JavaScript bundle.
Quickly add a link to the bundle.css in index.html like so:
<link rel="stylesheet" type="text/css" href="dist/bundle.css" />Now, run the build again, npm run build and check out the app in the browser.
The styling was applied to the page and our JavaScript code still logs to the console.
Project Asokoro - Compressing Images
Head over to your terminal and install these two loaders:
npm install file-loader image-webpack-loaderA quick breakdown of what these loaders aim to accomplish.
- file-loader
- Instructs webpack to emit the required object as file and to return its public URL.
- image-webpack-loader
- Minify PNG, JPEG, GIF and SVG images with
imagemin.
- Minify PNG, JPEG, GIF and SVG images with
Update index.html to have this div with class lili:
<div>
  <h2> Project Asokoro.... <span>The Joy of Webpack</span></h2>
  <div class="lili"></div>
</div>
Update service.scss file to have this piece of code.
service.scss
.lili {
  border: 1px solid black;
  background-image: url('../image/lambo.jpg');
  width: 1000px;
  height: 1000px;
}
Note: Create an
imagedirectory and add thelambo.jpgfile to it.
The lambo.jpg can be found here.
Update webpack.config.js to have the file-loader and image-webpack-loader.
...
{
    test:  /\.(gif|png|jpe?g|svg)$/i,
    use: [
      'file-loader',
      {
        loader: 'image-webpack-loader',
        options: {
          bypassOnDebug: true,
        },
      },
    ],
}
...
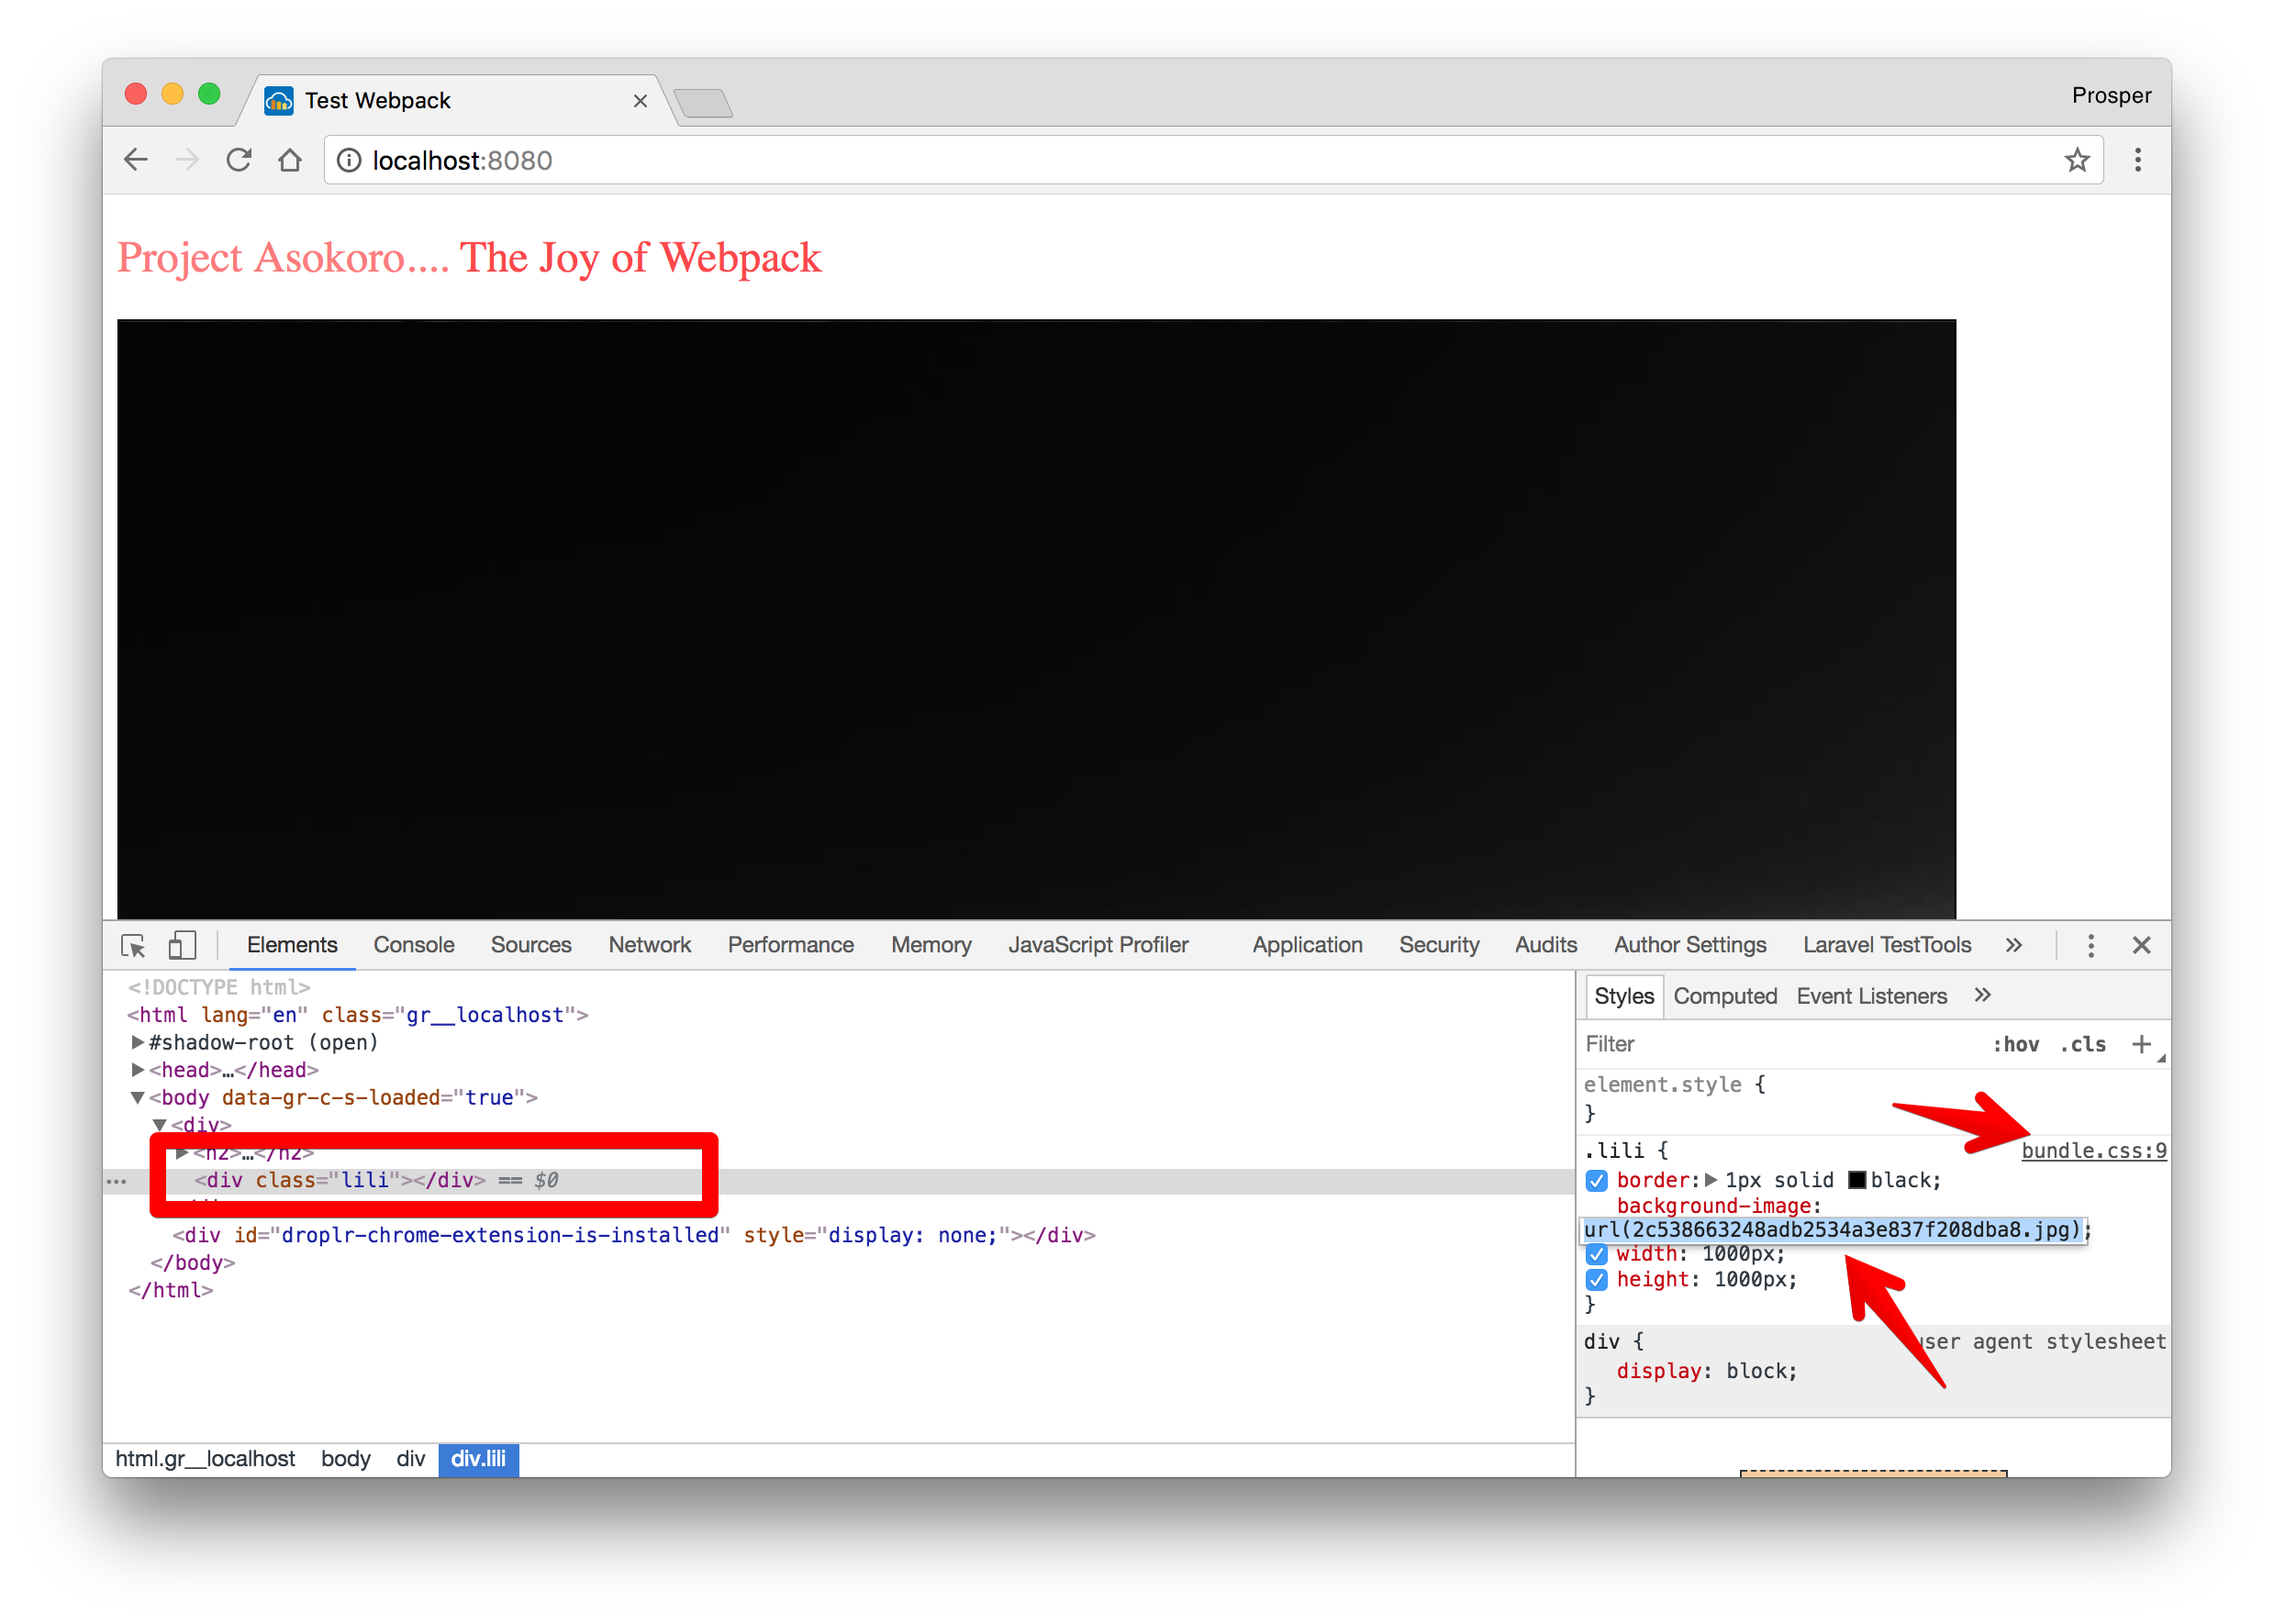
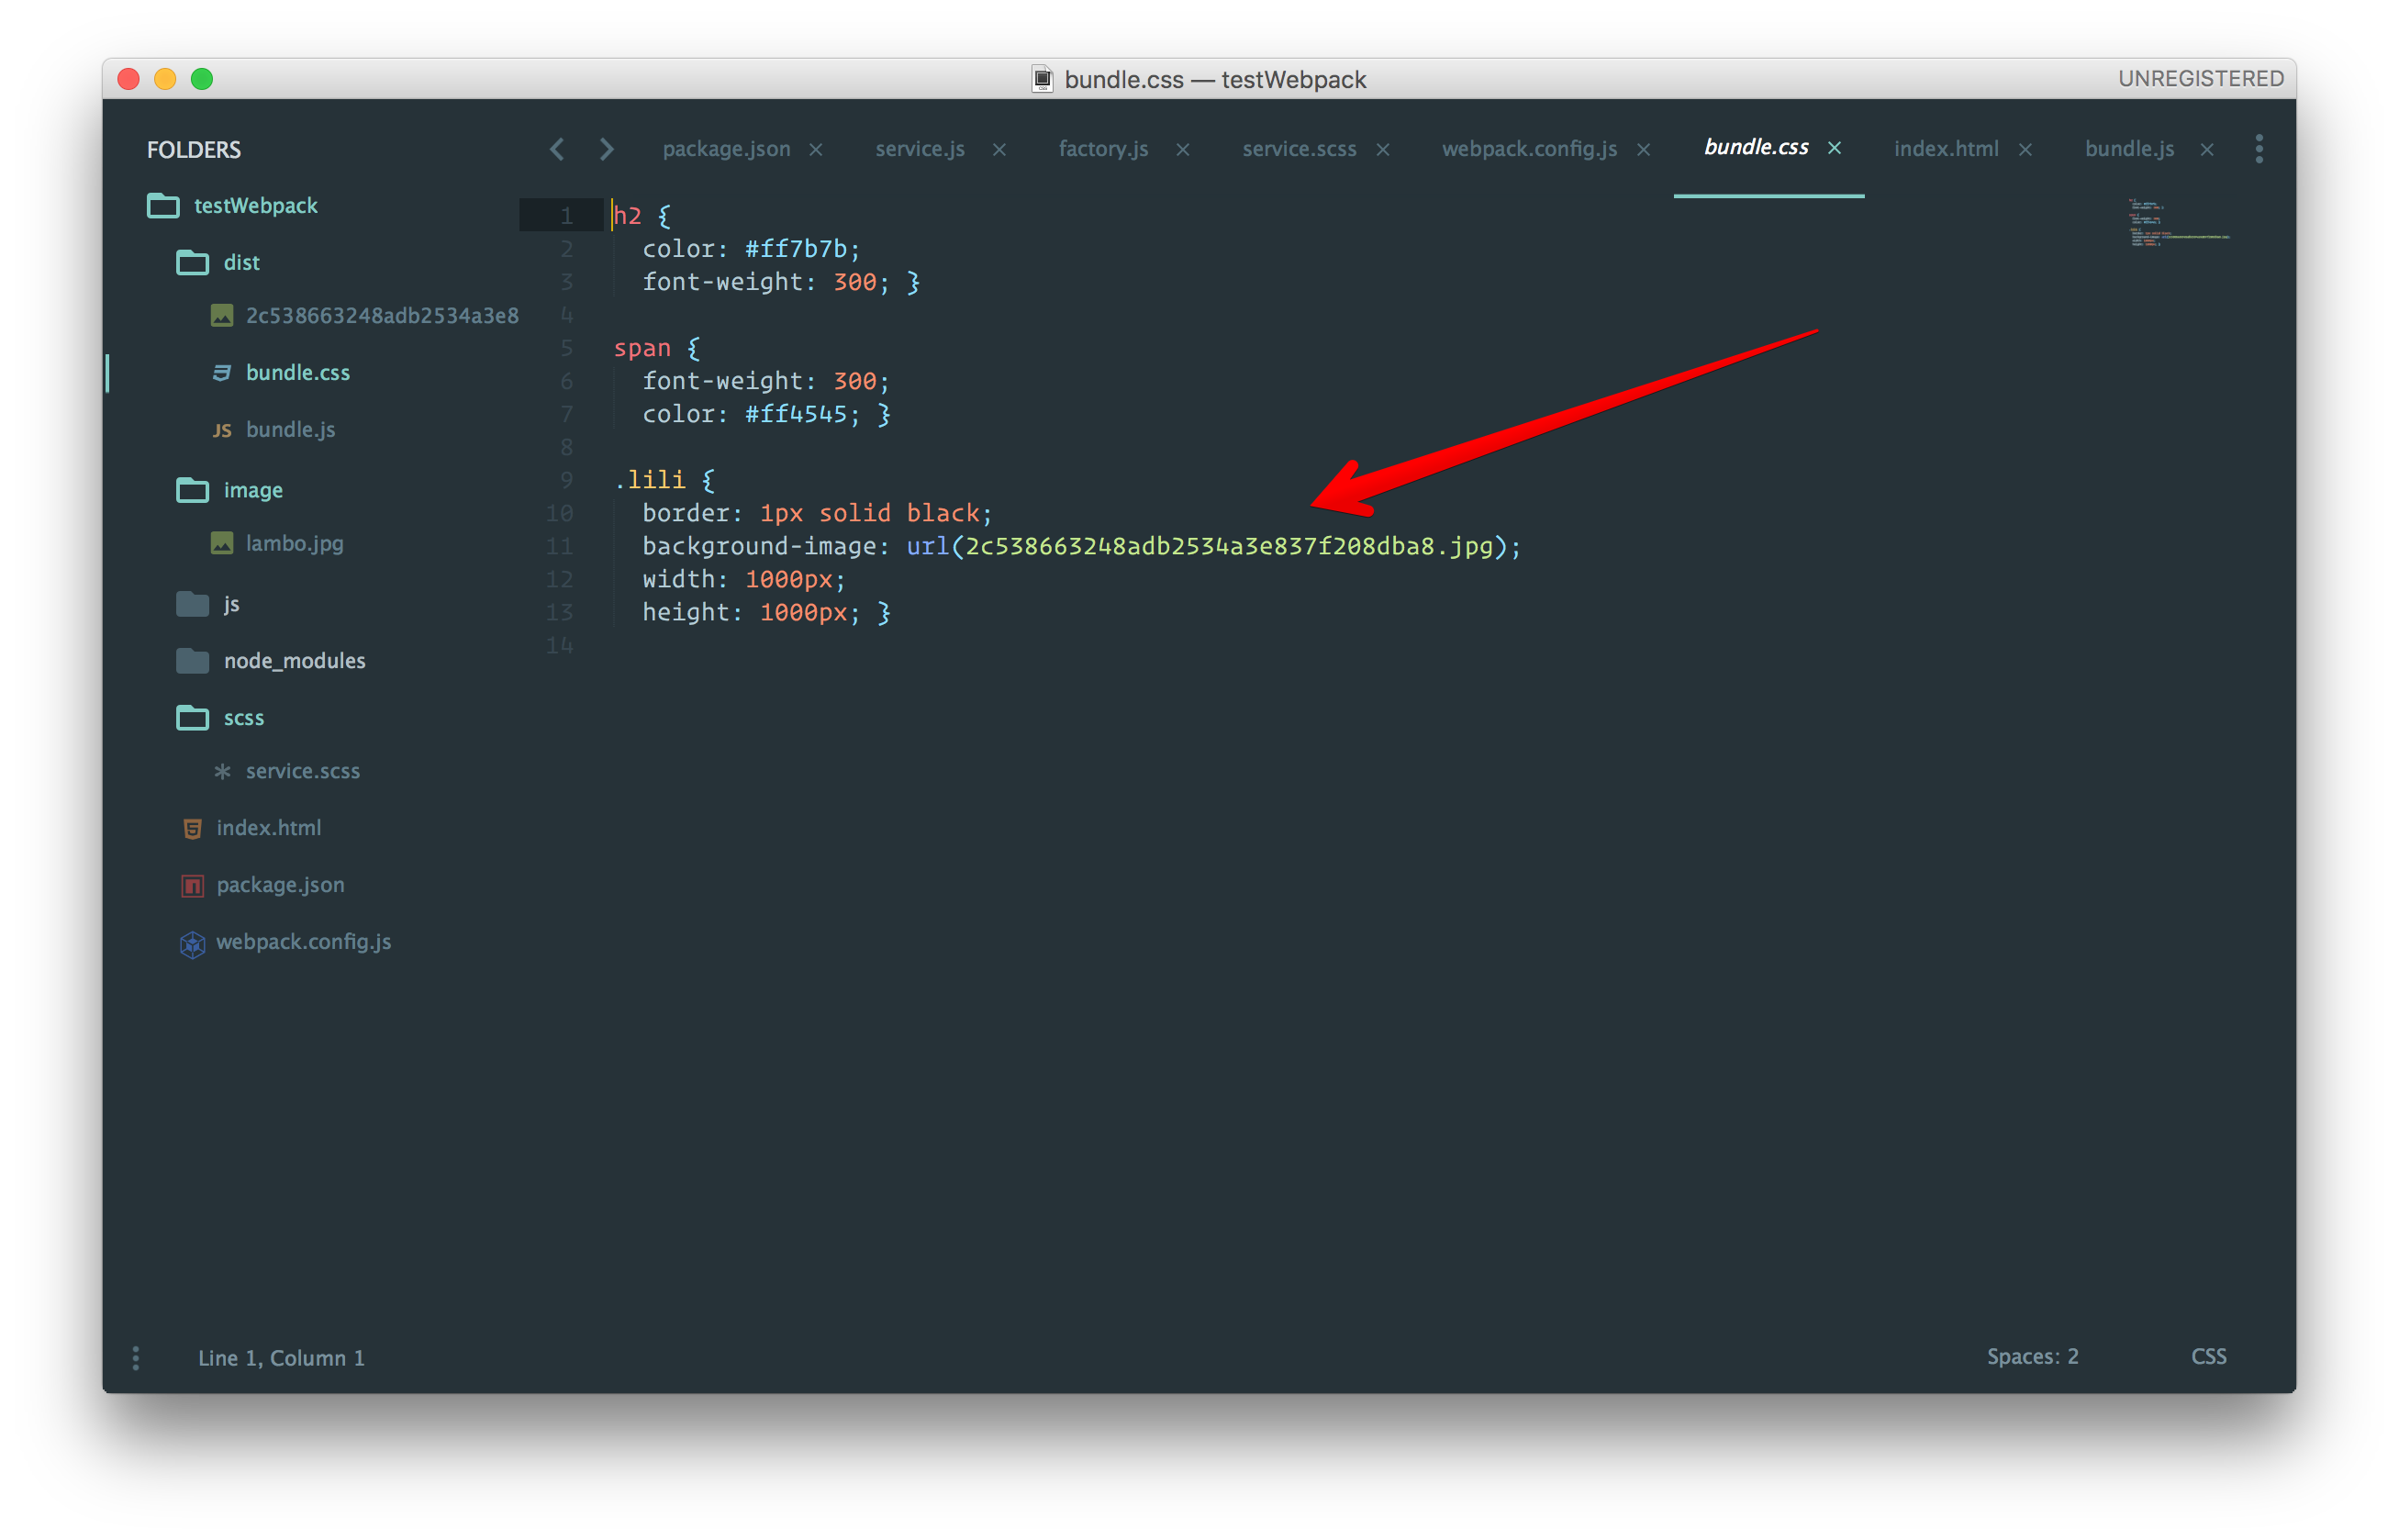
In the code above, the file-loader loads any image file with these extensions and emits the file with a name that is the result of the MD5 hash of the file's contents in the dist directory. The image-webpack-loader compresses the file.
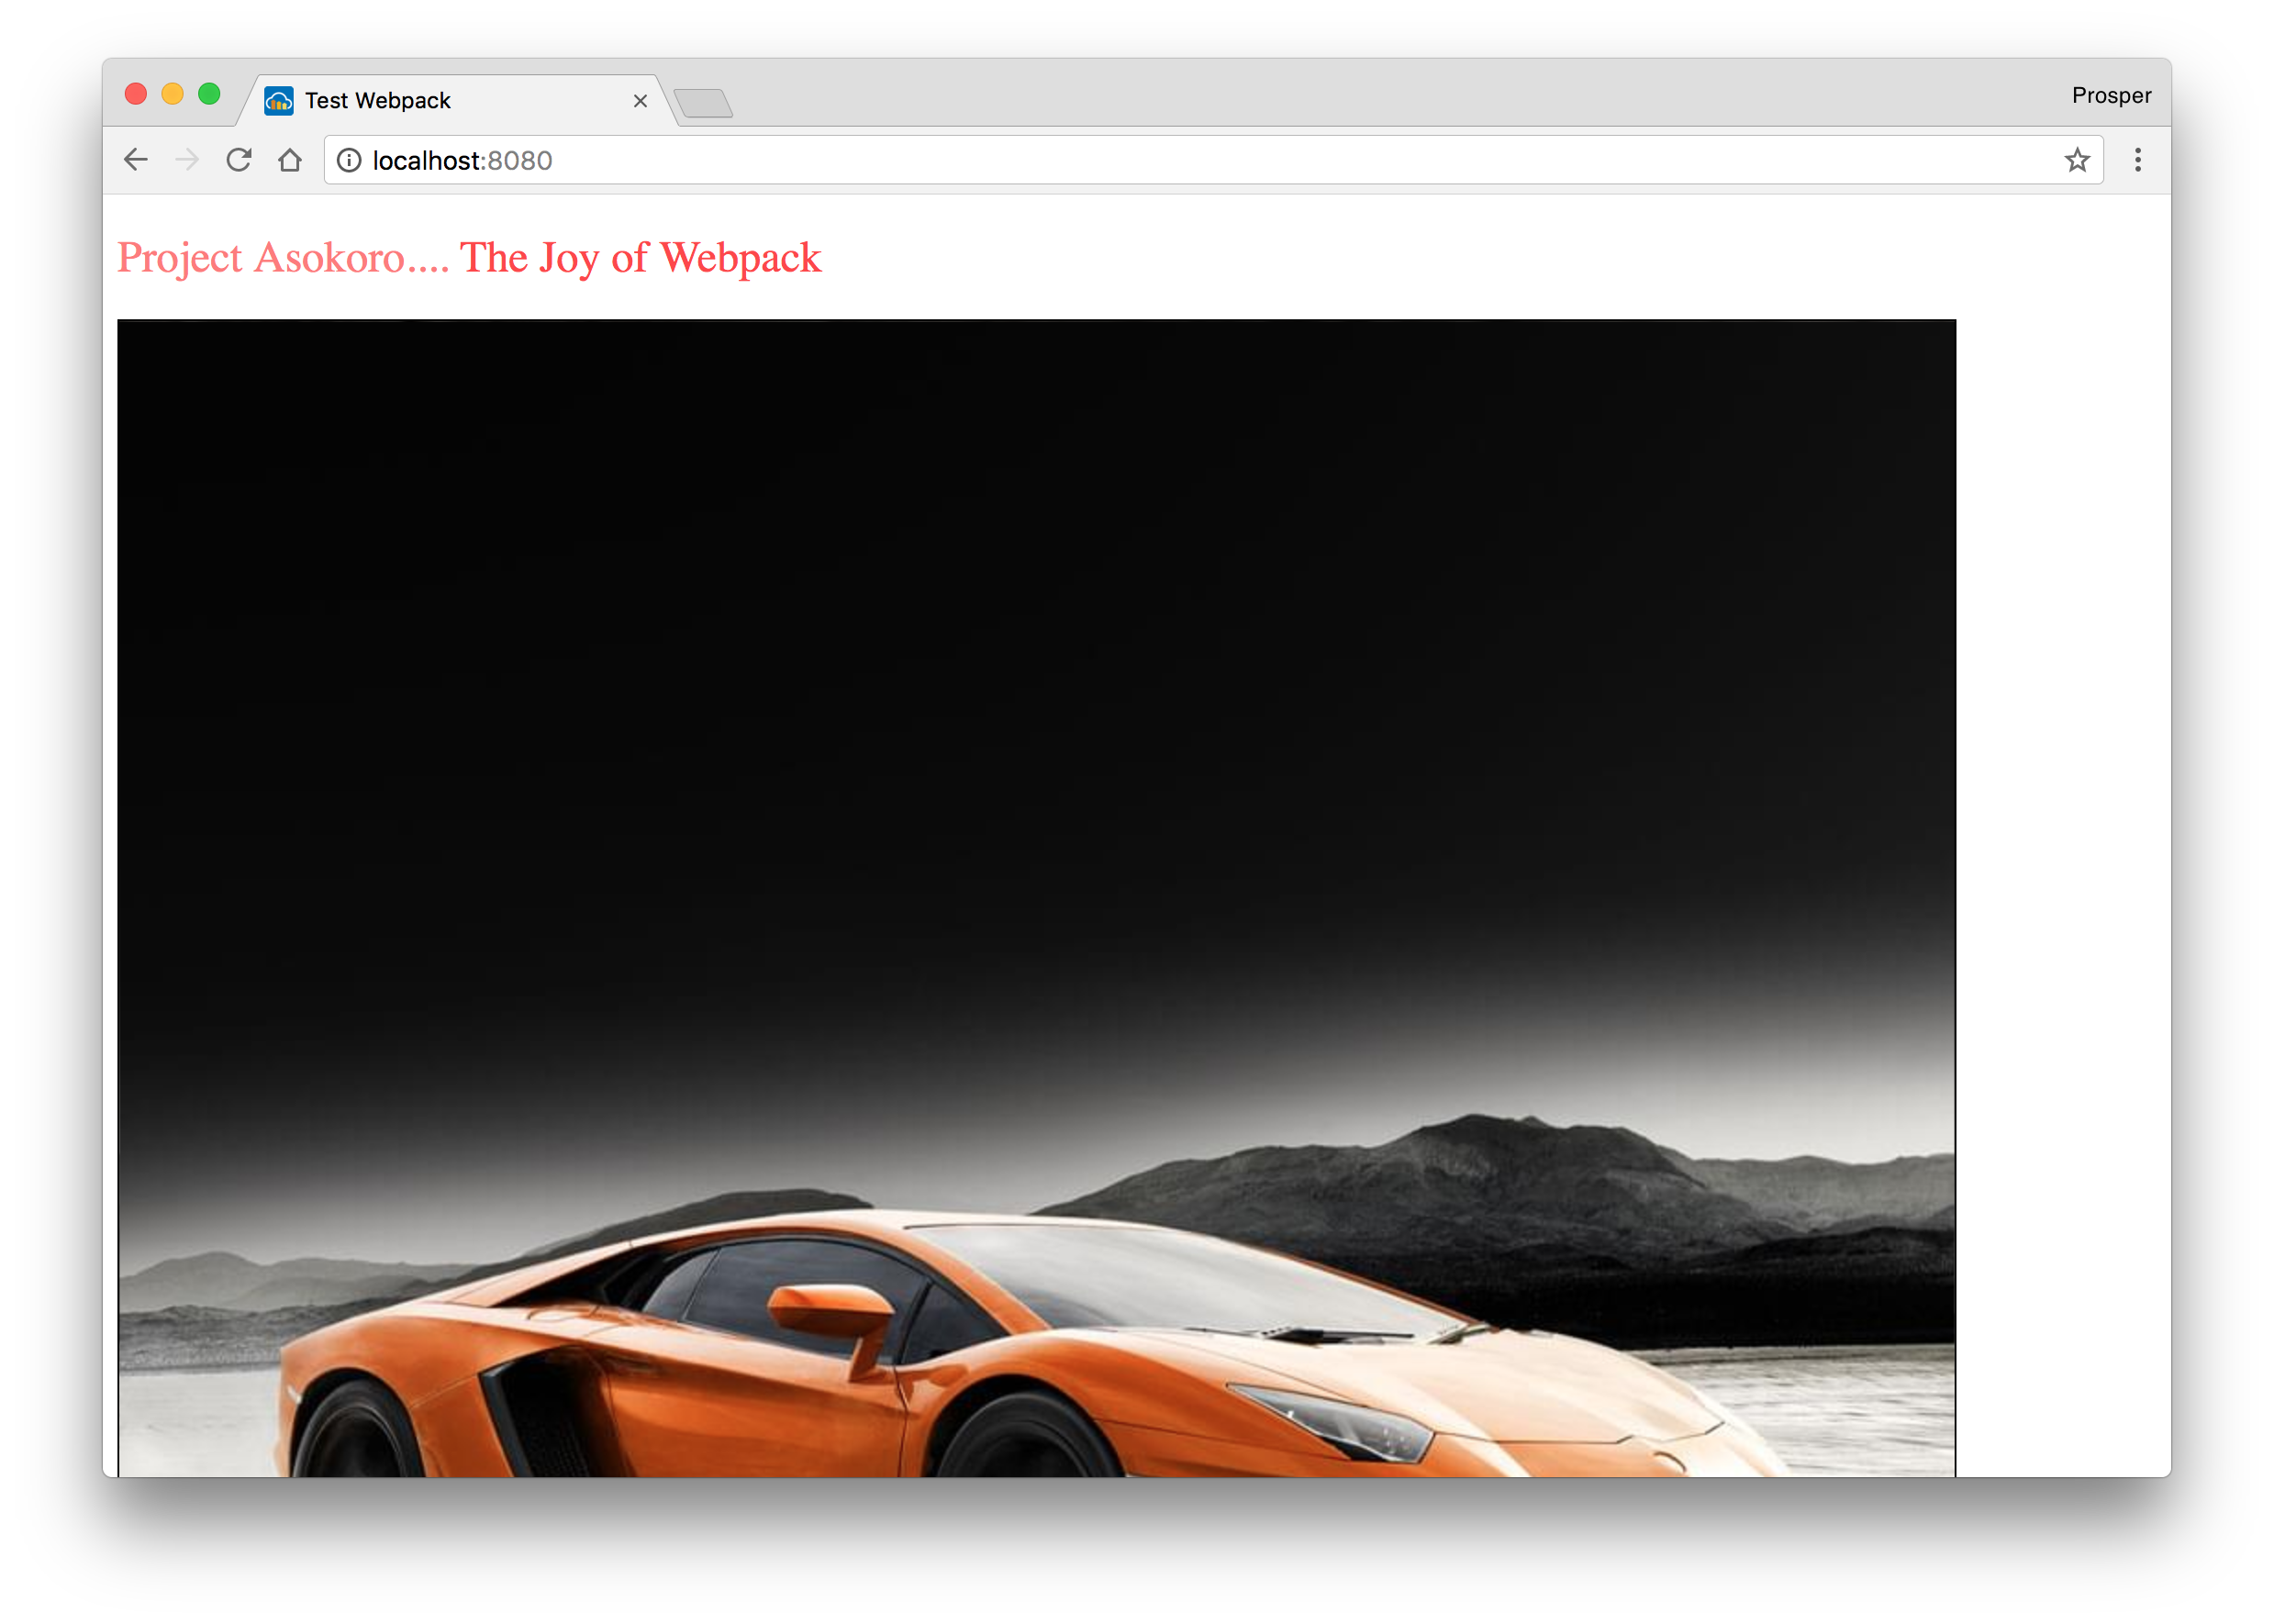
Now, run your build, npm run build and check your app in the browser.
Check out your code editor, you should see a new compressed version of the image in the dist directory.
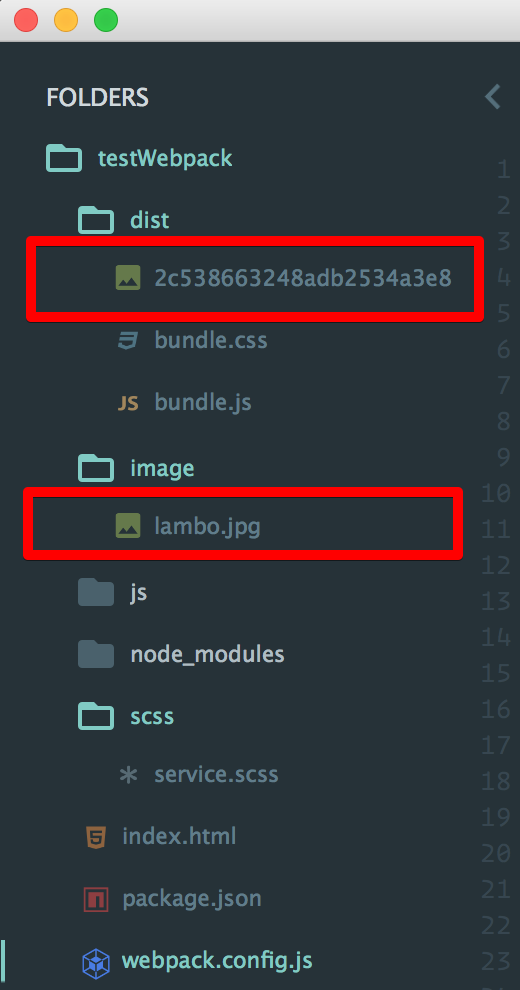
Furthermore, check out the version of the image that is served to the browser.
There are several loaders and plugins available for Webpack. Head over there, search for any plugin that might suit your use case and take advantage of it.
Webpack Performance Budgets
Addy Osmani submitted an RFC on October 31, 2016 about Webpack Performance Budgets. His argument was that many of the apps bundled with Webpack ship a large, single bundle that ends up pegging the main thread and taking longer than it should for web applications to be interactive.
Webpack 2.2 shipped with the Performance Budget feature. And made the feature an opt-out. By default, Webpack prescribes some default performance budgets (for entry points and assets). You can adjust them to suit your use case. All you need to do is add a performance entry in your webpack.config.js and customize the maxAssetSize, maxEntryPointSize and hints attribute.
Let's try it in Project Asokoro. Add a performance entry to the webpack.config.js like so:
webpack.config.js
...
performance: {
    maxAssetSize: 100,
    maxEntrypointSize: 100,
    hints: 'warning'
}
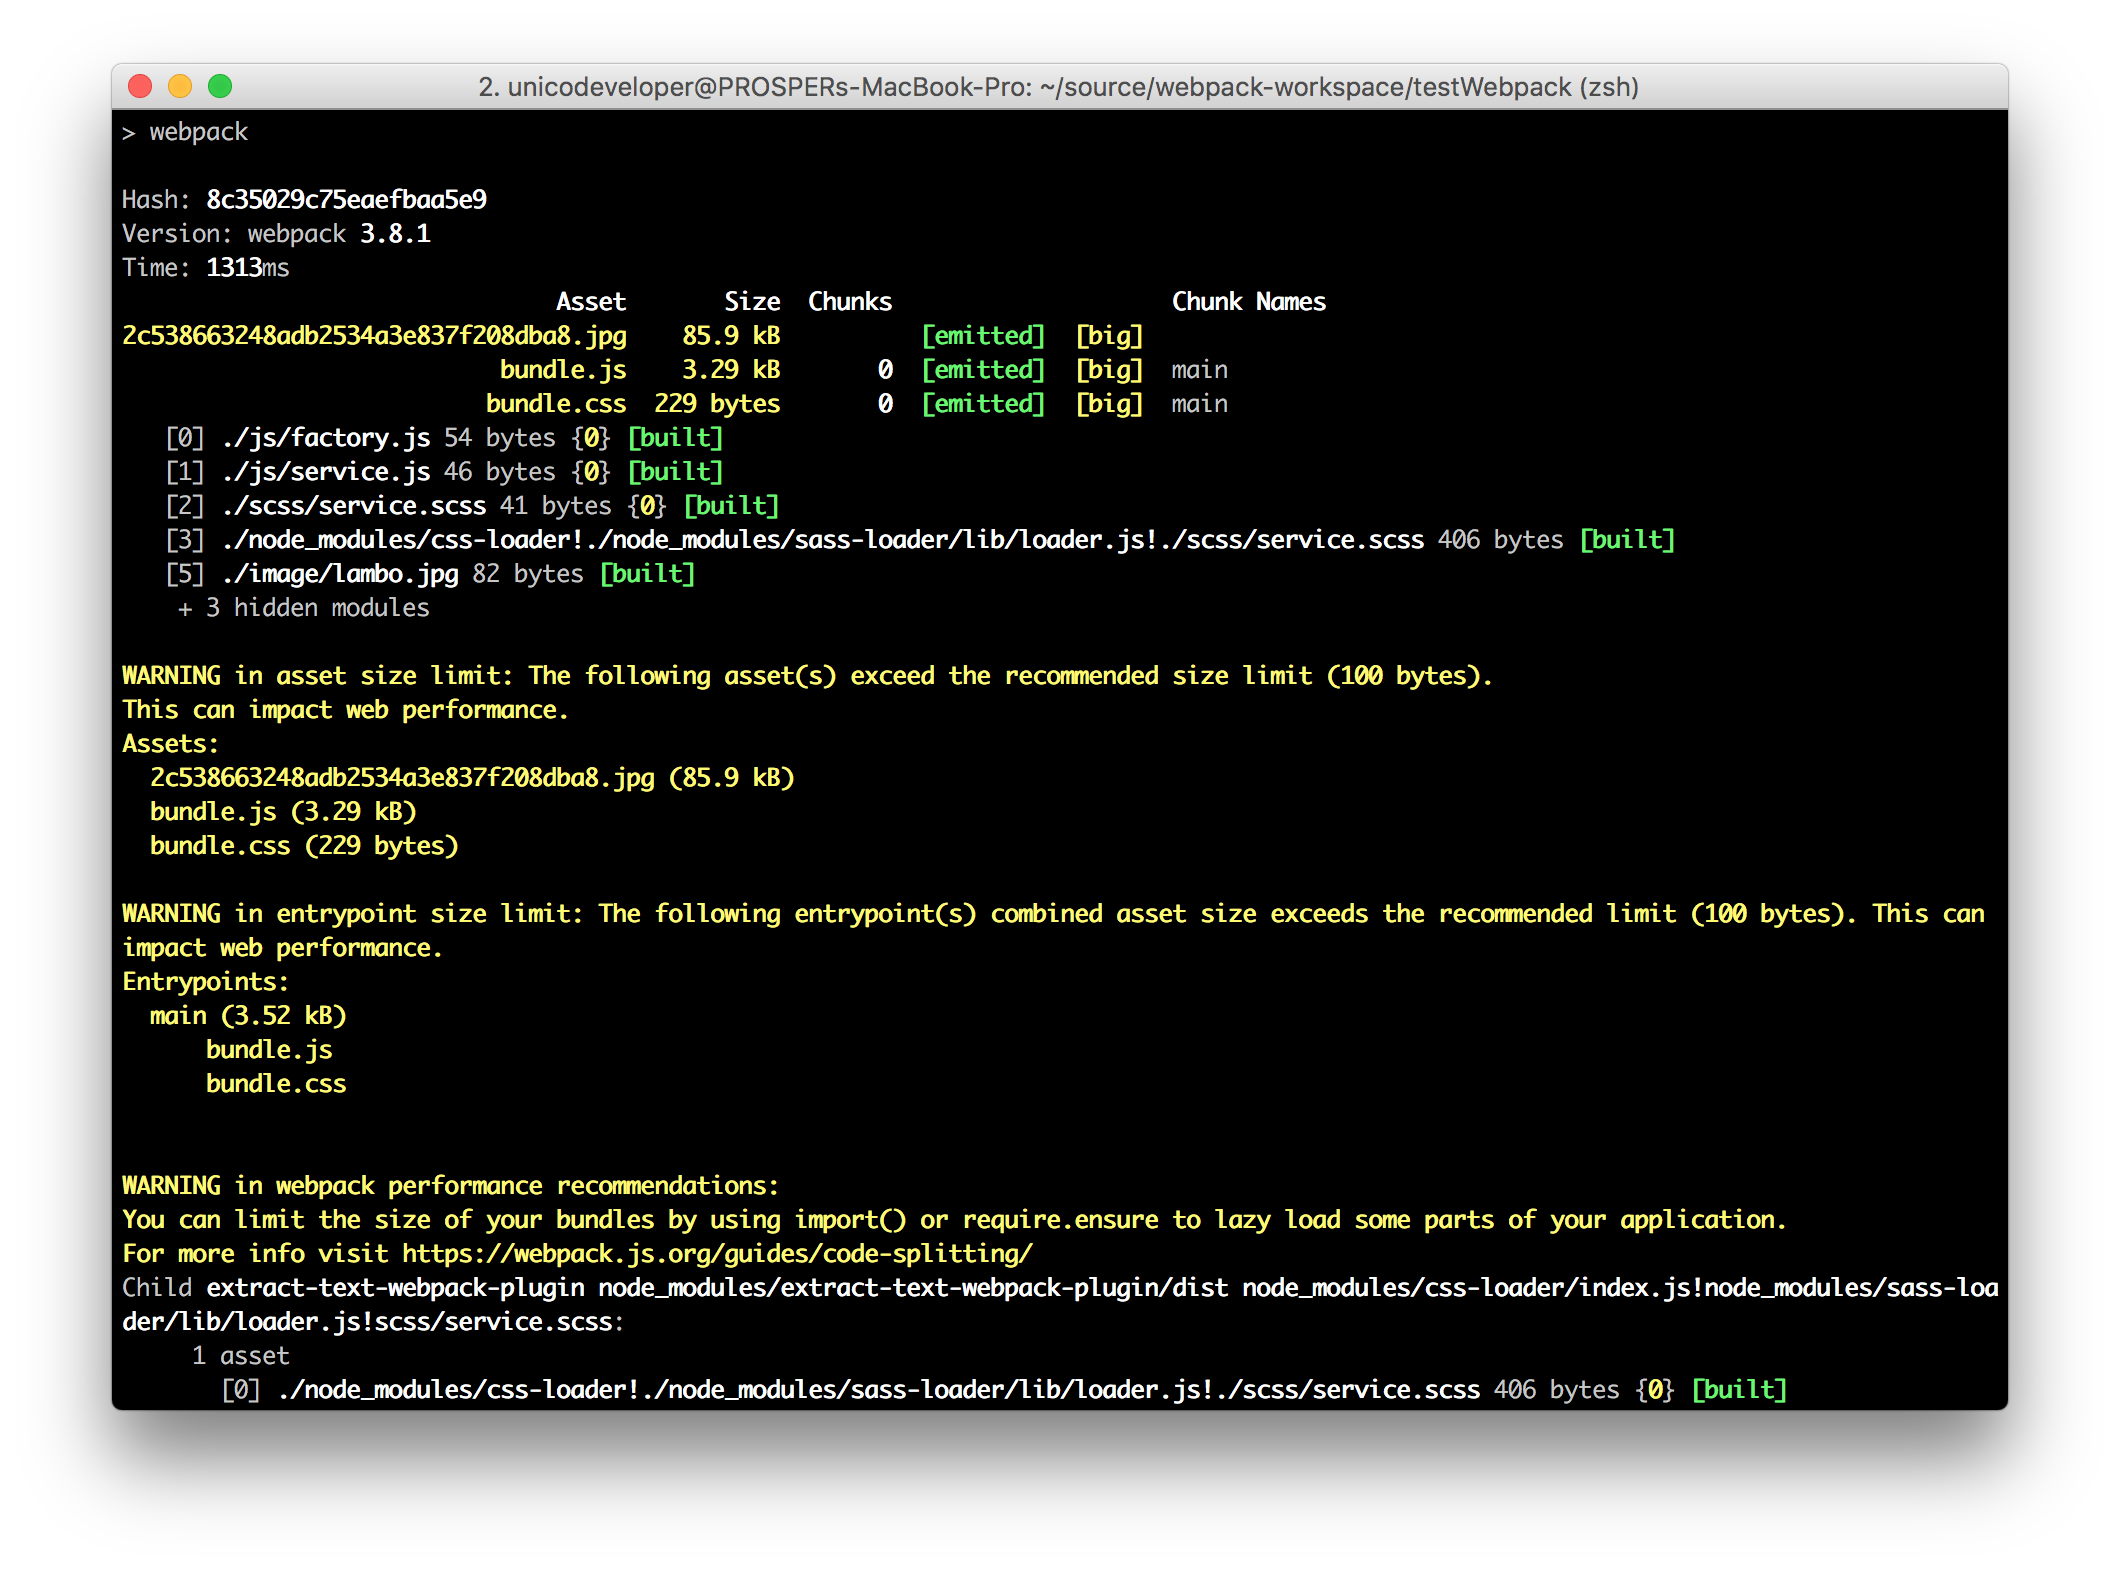
After running Webpack, this is the result shown below:
Learn more about Webpack Performance Budgets here.
Aside: Webpack and JavaScript at Auth0
At Auth0 we use JavaScript heavily in development and automate tasks using build tools such as Webpack. Using our authentication and authorization server from your JavaScript web apps is a piece of cake.
Auth0 offers a free tier to get started with modern authentication.
It's as easy as installing the auth0-js and jwt-decode node modules like so:
npm install jwt-decode auth0-js --saveimport auth0 from 'auth0-js';
const auth0 = new auth0.WebAuth({
clientID: "YOUR-AUTH0-CLIENT-ID",
domain: "YOUR-AUTH0-DOMAIN",
scope: "openid email profile YOUR-ADDITIONAL-SCOPES",
audience: "YOUR-API-AUDIENCES", // See https://auth0.com/docs/api-auth
responseType: "token id_token",
redirectUri: "http://localhost:9000" //YOUR-REDIRECT-URL
});
function logout() {
localStorage.removeItem('id_token');
localStorage.removeItem('access_token');
window.location.href = "/";
}
function showProfileInfo(profile) {
var btnLogin = document.getElementById('btn-login');
var btnLogout = document.getElementById('btn-logout');
var avatar = document.getElementById('avatar');
document.getElementById('nickname').textContent = profile.nickname;
btnLogin.style.display = "none";
avatar.src = profile.picture;
avatar.style.display = "block";
btnLogout.style.display = "block";
}
function retrieveProfile() {
var idToken = localStorage.getItem('id_token');
if (idToken) {
try {
const profile = jwt_decode(idToken);
showProfileInfo(profile);
} catch (err) {
alert('There was an error getting the profile: ' + err.message);
}
}
}
auth0.parseHash(window.location.hash, (err, result) => {
if(err || !result) {
// Handle error
return;
}
// You can use the ID token to get user information in the frontend.
localStorage.setItem('id_token', result.idToken);
// You can use this token to interact with server-side APIs.
localStorage.setItem('access_token', result.accessToken);
retrieveProfile();
});
function afterLoad() {
// buttons
var btnLogin = document.getElementById('btn-login');
var btnLogout = document.getElementById('btn-logout');
btnLogin.addEventListener('click', function () {
auth0.authorize();
});
btnLogout.addEventListener('click', function () {
logout();
});
retrieveProfile();
}
window.addEventListener('load', afterLoad);Go ahead and check out our quickstarts for how to implement authentication using different languages and frameworks in your apps.
Conclusion
You have now learned the core concepts of Webpack and how to configure it in an application. You can leverage this gentle introduction for an understanding of intermediate and advanced concepts. Sean Larkin has some awesome Webpack courses on Webpack Academy
As at the time of this writing, Webpack is the most popular build tool amongst web developers. It is a beast that can be tamed to do your bidding in your JavaScript projects.
What's your experience with using Webpack? Let me know in the comments section.😊


